Westin Automotive Products, Inc.
320 W. Covina Blvd
San Dimas, Ca. 91773
Thank you for choosing Westin products
for additional installation assistance please call
Customer Service (800) 793-7846
DATE: 1/4/17
19
P.N.: 75-XXXX-
RevX
ECO #: W16-
XXXX
Gear Box Clocking Instructions:
Step 1:
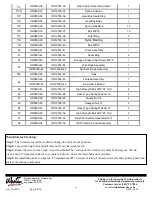
Loosen the tie r ods and r emove them fr om the gear box.
Step 2:
Take off the 10 r emaining bolts.
Step 3:
Rotate the gear box to the desir ed location, then connect the gear box with the gear box base again, and then
reattach all hardware. After that connect the gear box with the tie.
Note:
The rotation of the gear box must be 36 degree, or a
degree which is the multiple of 36 degree clockwise or counter clockwise due to the fixed holes that receive the connection
with the retaining bolts.
Step 4:
Re-install the long bolts.
To maintain the IP67 waterproof rating it is best to have this done professionally and to replace the sealing components.
Control Box Fuse
WARNING:
Only r eplace fuse with the same amp r ating.
Westin winches are equipped with a fuse inside the control box. This fuse provides protection in the case of an internal failure
or overload.
If winch fails to function, you may need to inspect the fuse.
Step 1:
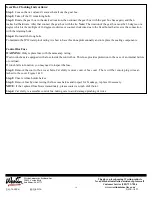
Remove the contr ol box cover bolts. Car efully r emove contr ol box cover . Ther e will be r emote plug wir es at-
tached to the cover. Figure 1 & 2.
Step 2:
Unscr ew fuse holder halves.
Step 3:
Remove fuse by unscr ewing the fuse case halves and inspect for br eakage, r eplace if necessar y.
NOTE:
If the r eplaced fuse blows immediately, please contact a winch distr ibutor .
Step 4:
Car efully r e-assemble control box, taking care to avoid damage/pinching of wires.

