14
Operation
Please note that during charging process, battery and charger heat up
slightly.
The quick charger needs approx. 1 hour to fully charge the empty battery.
After charging process the green charging control lamp light up continu-
ously.
4. Remove the battery and unplug the power cord from the wall socket.
Checking Battery Capacity
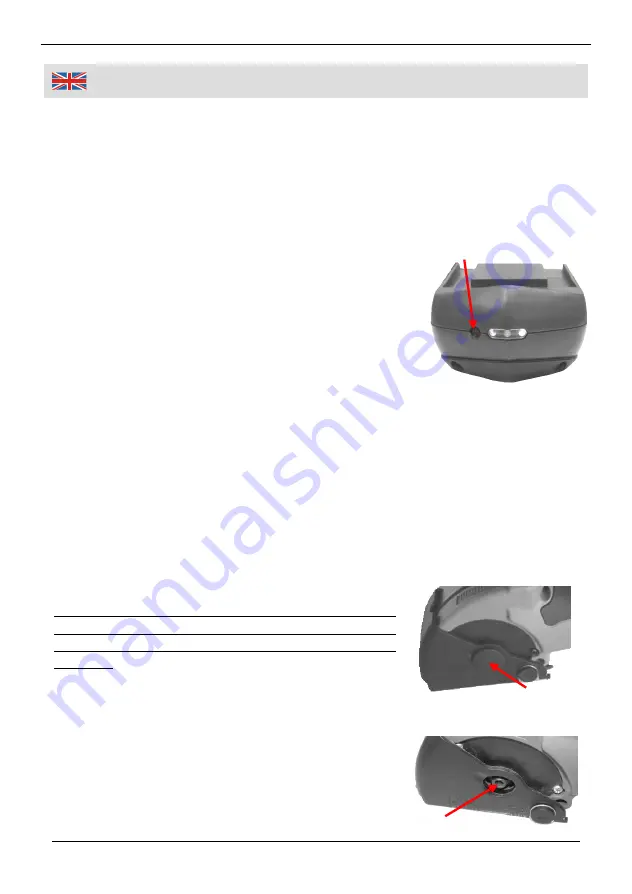
By pressing the button (A) on the battery you can
detect the battery capacity.
If the red LED is on, the battery is discharged.
If the red and the orange LEDs light up, the
battery is half-empty.
If all three LEDs light up, the battery is fully
charged.
If none of the LEDs light up, the battery is totally discharged and has
to be charged immediately.
Inserting and Removing the Battery
1. Slide the battery into the bottom side of the plunge saw until the locking
clip locks audibly and visibly. Make sure the battery can be inserted easily.
Do not force the battery.
2. For removing, first press the locking clip down and slide the battery in an
upright direction out of the machine.
Installing the Saw Blade
Always use sharp blades recommended by
Westfalia. When using dull blades the plunge saw
might stop frequently and a clean cut is not
possible.
1. Remove the battery from the toll before
inserting the blade.
2. Remove the plastic cap (B) on one side of the
safety hood (2).
3. Keep the driveshaft locking button (10) pressed
and insert the included Allen spanner into the
free end of the drive shaft. Loosen the screw by
A
C
B


