


11
Operation
Before first Use
Remove the angle grinder and the accessories for the packaging.
Keep packaging material out of reach of children. There is risk of
suffocation!
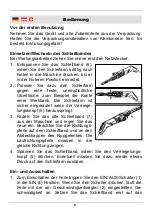
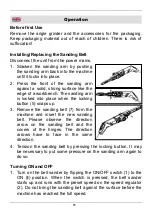
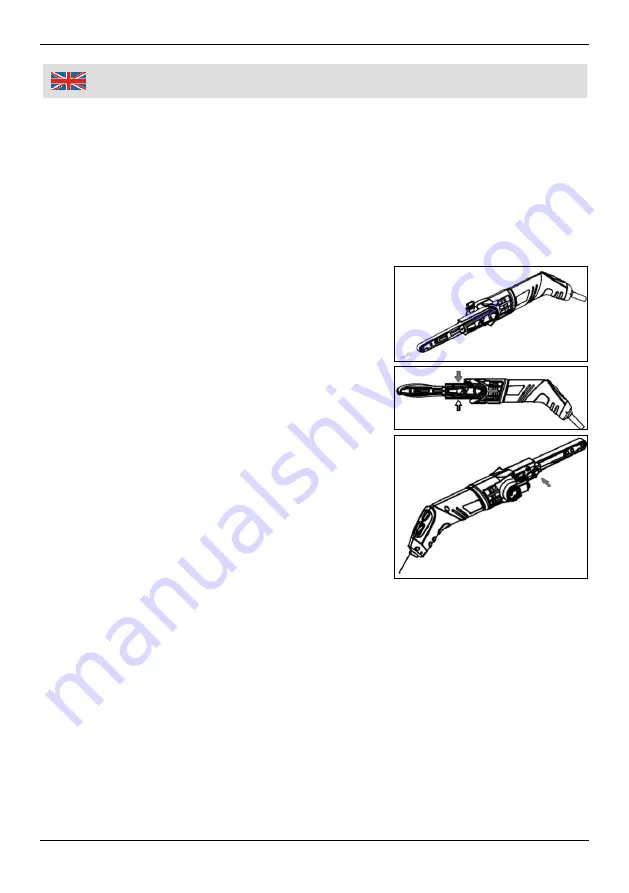
Installing/Replacing the Sanding Belt
Disconnect the unit from the power mains.
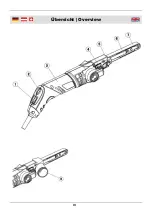
1. Slacken the sanding arm by pushing
the sanding arm back into the machine
until it locks into place.
2. Press the front of the sanding arm
against a solid, strong surface like the
edge of a workbench. The sanding arm
is locked into place when the locking
button (5) snaps up.
3. Remove the sanding belt (7) from the
machine and insert the new sanding
belt. Please observe the direction
arrow on the sanding belt and the
covers of the hinges. The direction
arrows have to face in the same
direction.
4. Tension the sanding belt by pressing the locking button. It may
be necessary to put some pressure on the sanding arm again to
do so.
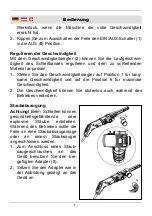
Turning ON and OFF
1. Turn on the belt sander by flipping the ON/OFF switch (1) to the
ON (
I
) position. When the switch is pressed, the belt sander
starts up and runs with the preset speed on the speed regulator
(2). Do not bring the sanding belt against the surface before the
machine has reached the full speed.
Summary of Contents for 85 27 05
Page 3: ...III Übersicht Overview ...
Page 20: ...Notizen Notes 16 ...


