12
Assembly Instructions
Now insert the plastic retainers (15) of the mounting pieces (14) into their
guides in the retainer (6) (figure B). Now mount the mounting pieces (14) and
the plastic retainers (15) with the Allen screws (5) in the slotted holes of the
retainer (6).
Use the adjusting screws (7) and (13) to adjust the angle grinder in a right
angle to the base plate (1) and mounted without slack on the retainer.
Adjust the saddle (2) after loosening the Allen screws (4) in such a way that
the cutting disc exactly dives into the slot in the base plate (1).
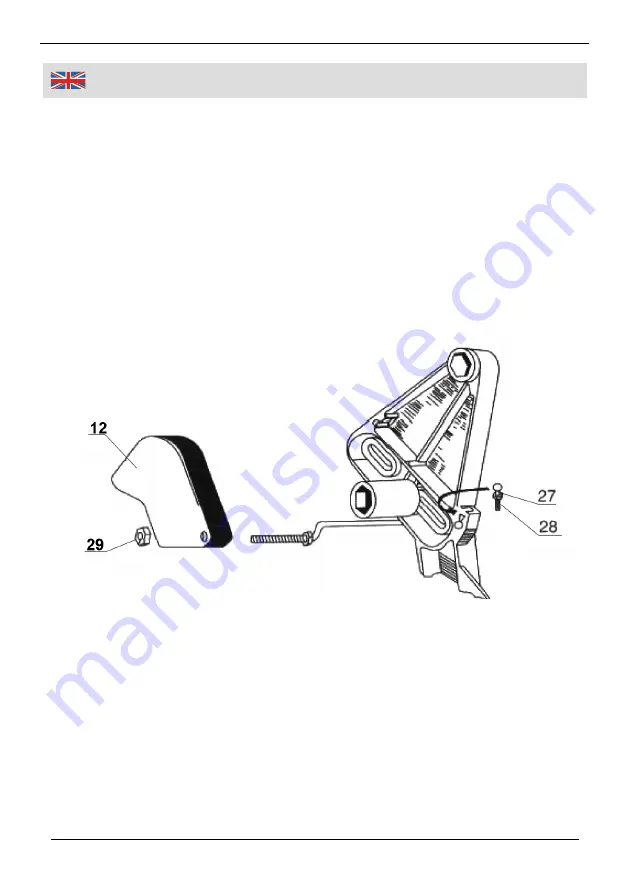
Now mount the safety hood (12). Attach the hood (12) to the metal rod (11)
and secure it with the nuts (29). Then, insert the metal rod into the
corresponding hole in the retainer (6) (figure C) and secure it with the nut (28)
and the screw (27).
After mounting, turn on the angle grinder and allow it to run for several
seconds. After that, pull the power plug of the angle grinder and check all
screws for tightness.
Fig. C


