background image


10 

Operation 

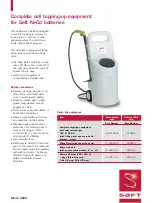
Preparation for Use, Charging of the System 

The internal battery has been pre-charged in the factory and must be 
completely charged before the first use to ensure a long service life. 

Attention! 

During periods of non-use the power pack should be recharged 

every month to preserve performance and service life. Please note that the 
battery discharged over a long period of non-use. 

Preparations for Charging 

1.  Make sure the 15 A fuse (13) is inserted into the provided compartment for 

the fuse (3) at the front of the unit is in place. If it is not there, insert the 
fuse into the compartment. Replacement fuses are additionally packaged 
in the accessory compartment at the back side of the unit.  

2.  The power pack should be charged after use, or if the control LEDs (7) 

light up yellow or red after switching the ON/OFF (2) to ON or before you 
plan to use it extensively. 

3.  While charging the indicator LED (9) lights up. It turns off when the 

charging cable is disconnected from the unit. 

Charging with the AC/DC Adapter 

1.  Set the ON/OFF switch (2) to OFF.  

2.  Connect the AC/DC adapter (12) to the 

charging socket (9) of the power pack and to 
a wall socket.  

The charging indicator LED 
lights up. A full charge can take, 
depending on the charging state 
of the battery, up to 36 hours. 
When the charging indicator LED 
turns off, the battery is fully 
charged.  

3.  Unplug the AC adapter from the 

power mains now. Use only the 
AC adapter supplied with the unit 
or an AC adapter recommended 
by Westfalia. 

Summary of Contents for 28 26 40

Page 1: ...Westfalia Bedienungsanleitung Nr 105743 ...

Page 2: ...Mobile Starthilfe und Stromversorgungsbox NFQ2800 Artikel Nr 28 26 40 Portable Power Source NFQ2800 Article No 28 26 40 Bedienungsanleitung Instruction Manual ...

Page 3: ... for you to handle the device appropri ately and help prevent misunderstandings and possible damage or injury Diese Bedienungsanleitung enthält wichtige Hinweise zur Inbetriebnahme und Handhabung Bewahren Sie diese Bedienungsanleitung für spätere Zwecke gut auf und legen Sie die Anleitung dem Produkt bei wenn Sie es an Dritte weitergeben Bitte machen Sie sich in der Reihenfolge der Kapitel mit dem...

Page 4: ...III Übersicht Overview 1 7 8 4 9 6 4 5 3 2 10 12 11 13 14 ...

Page 5: ...Batterieklemme Plus Red Battery Clamp Plus 7 Ladezustandsanzeige Charging State Indicator 8 12 V Ausgangsbuchsen 12 V Output Sockets 9 Ladebuchse und Ladeindikator Charging Socket Charging Indicator 10 Starthilfekabel Jumper Cables 11 12 V Kabel mit 10 A Sicherung 12 V Cable with 10 A Fuse 12 Netzteil 230 V 12 V AC DC Adapter 230 V 12 V 13 Ersatzsicherungen für Starthilfebox Replacement Fuses for ...

Page 6: ...ction Page 13 Changing the Fuse in the Cigarette Lighter Plug Page 14 Technical Data Page 15 Sicherheitshinweise Seite 2 Vorbereitung zum Betrieb Laden des Systems Seite 3 Vorbereiten zum Laden Seite 3 Laden mit dem Netzadapter Seite 3 Laden mit dem KFZ Ladekabel Seite 4 Ladezustandskontrolle Seite 4 Einsatz als Starthilfebox Seite 5 Einsatz als 12 V Quelle Seite 6 Kurzschlussschutz Seite 6 Sicher...

Page 7: ...e die betroffene Partie für mindestens 10 Minuten unter kaltem fließendem Wasser und suchen anschließend einen Arzt auf Legen Sie vor der Arbeit an Batterien bzw vor einem Starthilfeversuch Uhren Ringe Halsketten etc ab um Kurzschlüsse und Schäden zu vermeiden Legen Sie keine Metallgegenstände auf Batterien ab Rauchen Sie nicht und arbeiten Sie nicht mit offener Flamme bei Arbeiten an Batterien bz...

Page 8: ...lte aufgeladen werden wenn sie benutzt worden ist wenn die Ladezustandsanzeige 7 nach Einstellen des EIN AUS Schalters 2 in die ON Stellung Eingeschaltet gelb oder rot leuchtet oder wenn Sie die Starthilfebox intensiv benutzen wollen 3 Während des Ladens leuchtet der Ladeindikator 9 Er erlischt erst wenn der Akku vollständig aufgeladen ist Danach können Sie das Netzteil vom Gerät trennen Laden mit...

Page 9: ...el 11 mit der Ladebuchse 9 der Starthilfebox und der Zigarettenanzündersteckdose Ihres Fahrzeugs Der Ladeindikator beginnt zu leuchten 4 Eine Volladung benötigt je nach Zustand des internen Akkus bis zu 6 Stunden Trennen Sie dann auch die Starthilfebox vom Kfz Bordnetz um ein weiteres Entladen der Fahrzeugbatterie zu vermeiden Ladezustandskontrolle Um den Ladezustand des internen Akkus der Starthi...

Page 10: ...u versorgenden Fahrzeugs an erst die rote Batterieklemme Plus 6 an den Pluspol der Kfz Batterie dann die schwarze Klemme Minus 5 an einen blanken Massepunkt der Karosserie Die meisten Fahrzeuge verfügen dafür über einen geeigneten Anschlusspunkt in der Nähe der Batterie Bitte beachten Niemals die Minus Batterieklemme direkt am Minuspol der Batterie anschließen Eventuell entstehende Funken könnten ...

Page 11: ...n ihrer Batteriekapazi tät und Stromabgabefähigkeit max 15 A auch 230 V Geräte versorgen Beide 12 V Ausgangsbuchsen können gleich zeitig benutzt werden Insgesamt steht aber für beide Ausgänge lediglich die maximale Strombe lastbarkeit von 15 A zur Verfügung Die Starthilfebox kann aber auch für einen bequemen Anschluss von 12 V Geräten etwa an eine 12 V Auto Batterie im mobilen Einsatz eingesetzt w...

Page 12: ... Sie nie eine durchgebrannte Sicherung gegen eine Sicherung mit höherer Amperezahl auszutauschen oder eine defekte Sicherung zu überbrücken Dies kann zu schweren Schäden eventuell sogar zu einem Brand führen Sicherungswechsel im Zigarettenanzünderstecker Erfolgt beim Anschluss des Gerätes an die Zigarettenanzünderbuchse kein Laden der Ladeindikator 9 leuchtet nicht auf so kann die Siche rung im Zi...

Page 13: ... Startleistung max 300 A Kurzschlussschutz 15 A intern 10 A im Ladekabel Ladezeiten 24 36 h mit Netzteil 4 6 h mit Kfz Ladekabel Netzgerät 12 V 0 5 A Betriebstemperatur 10 C 45 C Lagertemperatur 15 C Gewicht 6 7 kg Abmessungen 325 x 190 x 295 mm Batterien gehören nicht in den Hausmüll Sie können sie kostenlos an uns zurück senden oder bei örtlichen Geschäften oder Batterie sammelstellen abgeben ...

Page 14: ...atches necklaces or similar items when working with batteries to avoid electric shock or short circuits Do not place metal items on any battery Do not smoke and do not work with a naked flame around batteries or motors Be very careful with metal tools around the car battery A short circuit between mass and the positive terminal can lead to a fire or an explosion It will definitely lead to a high a...

Page 15: ...ged in the accessory compartment at the back side of the unit 2 The power pack should be charged after use or if the control LEDs 7 light up yellow or red after switching the ON OFF 2 to ON or before you plan to use it extensively 3 While charging the indicator LED 9 lights up It turns off when the charging cable is disconnected from the unit Charging with the AC DC Adapter 1 Set the ON OFF switch...

Page 16: ...1 to the charging socket 9 of the power pack and the cigarette lighter socket of your car The charging indicator LED lights up 4 A full charge can take depending on the charging state of the battery up to 6 hours After that disconnect the power pack from the car s electric system to avoid draining the car s battery Charging State Indicator To check the charging state of the unit set the ON OFF Swi...

Page 17: ...lamp Plus 6 to the positive terminal of the dead battery Than attach the black battery clamp Minus 5 to a mass point on the car body Most vehicles are equipped with such a point somewhere close to the battery Attention Never attach the negative clamp directly to the negative termi nal of the battery Flying sparks may injure you or ignite gasses from the battery This can lead to serve injuries and ...

Page 18: ...tations of its charge and maximal power output max 15 A Both 12 V output sockets can be used at the same time Please keep in mind that there is only a total power output of 15 A for both sockets com bined The power pack can also be used to conveniently run 12 V devices off a 12 V car battery see picture The charge of the unit s internal battery will be preserved for as long as the car battery has ...

Page 19: ...fuse 3 and push it in as far as it will go Never try to replace a blown fuse with one of a higher rating or to bypass it in any way Severe damage or even a fire will result Changing the Fuse in the Cigarette Lighter Plug If the unit does not start to charge after connecting to the cigarette lighter charging indicator 9 does not light up the fuse in the cigarette lighter plug may have blown Replace...

Page 20: ...ity max 300 A Short Circuit Protection 15 A internally 10 A in the charging cable Charging Time 24 36 h with AC Adapter 4 6 h off Car Battery AC DC Adapter 12 V 0 5 A Operating Temperature 10 C 45 C Storing Temperature 15 C Weight 6 7 kg Dimensions 325 x 190 x 295 mm Rechargeable Batteries do not belong in the household garbage For battery disposal please check with your local council ...

Page 21: ...Notizen Notes 16 ...

Page 22: ... 3 3 2008 EN 62233 2008 Hagen den 25 August 2009 Thomas Klingbeil Qualitätsbeauftragter We the Westfalia Werkzeugcompany Werkzeugstraße 1 D 58093 Hagen declare by our own responsibility that the product Portable Power Source with AC DC Adapter WJG DC Article No 28 26 40 is according to the basic requirements which are defined in the European Directives 2006 95 EC Low Voltage Directive LVD 2004 108...

Page 23: ...ersand ch Internet www westfalia net Kundenbetreuung Customer Services Werter Kunde bitte helfen Sie mit Abfall zu vermeiden Sollten Sie sich einmal von diesem Artikel trennen wollen so bedenken Sie bitte dass viele seiner Komponenten aus wertvollen Rohstoffen bestehen und wiederverwertet werden können Entsorgen Sie ihn daher nicht in die Mülltonne sondern führen Sie ihn bitte Ihrer Sammelstelle f...

Reviews: