background image

MY BOOK ESSENTIAL

USER MANUAL

CONNECTING THE DRIVE AND GETTING STARTED

 – 14

In the Content Gauge for your My Book drive, the 

Additional Files

 category includes all 

of the files shown in the used space portion of your drive properties. This space is not 
available for backups.

Note:  

The small number of files that are shown in the 

Additional Files 

category 

when you first install the WD SmartWare software—before performing 
your first backup—represents the system and hidden files that your 
computer’s operating system put there when you installed the drive.

Drive Management Home Screen

The drive management Home screen is available after selecting 

Install Drive Settings

installing the software, completing the initial drive settings, and opening the 
WD SmartWare software. It has two tab-selected screen options:

•   Home—Provides a Content Gauge showing the capacity and contents of your 

My Book drive (see Figure 9 on page 12)

•   Settings—Manages the same security, diagnostics, and power settings as the 

WD SmartWare Drive Settings screen and provides a 

Preferences 

button for 

enabling the Backup and Retrieve functions (see Figure 17 on page 27)

As you copy files to your drive, the Content Gauge shows them in six categories:

•   Documents

•   Mail

•   Music

•   Pictures

•   Other

See “WD SmartWare Home Screen” on page 13 for a description of the file categories.

Note:  

The small number of files that are shown in the 

Additional Files 

category 

when you first install the WD SmartWare software—before copying any 
files to the drive—represents the system and hidden files that your 
computer’s operating system put there when you installed the drive.

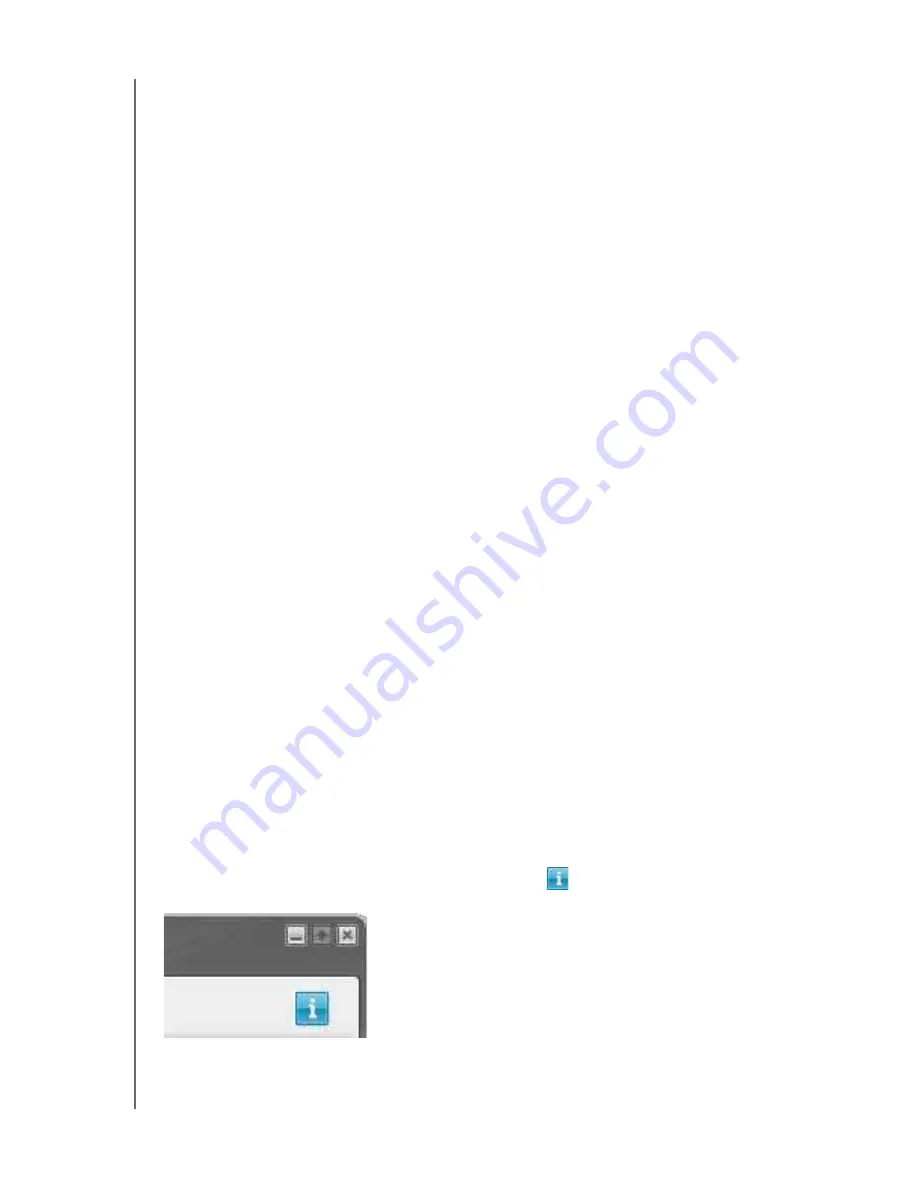
Viewing the Info/Online Help Topics

Each WD SmartWare screen provides easy access to online help information to quickly 
guide you through your backup, retrieve, and settings tasks. Whenever you are uncertain 

about what to do, just click the info/online help icon 

 in the upper-right corner of any 

screen:

To close the info/help screen after reading the online help, click the X icon in the upper-
right corner of the screen.

Summary of Contents for WDBAAF6400EBK - My Book Essential

Page 1: ...External Desktop My Book Essential User Manual My Book Essential User Manual ...

Page 2: ... WD product to get the latest updates and special offers Warranty RMA Services Get warranty product replacement RMA RMA status and data recovery information Knowledge Base Search by keyword phrase or answer ID Installation Get online installation help for your WD product or software Contacting WD Technical Support When contacting WD for support have your WD product serial number system hardware an...

Page 3: ... Getting Started 6 Connecting the Drive 6 Getting Started with the WD SmartWare Software 8 WD SmartWare Overview 12 WD SmartWare Home Screen 13 Drive Management Home Screen 14 Viewing the Info Online Help Topics 14 Getting Started Without the WD SmartWare Software 15 3 Backing Up Your Computer Files 16 About Backing Up Your Computer Files 16 Backing It All Up 18 Advanced Backup Capabilities 19 Sel...

Page 4: ... the Preferences Option 35 Customizing Your Drive Settings 35 Registering the Drive 37 Setting the Drive Sleep Timer 37 Erasing the Drive 38 Enabling the Backup and Retrieve Functions 40 Uninstalling the WD SmartWare Software 40 Uninstalling on Windows XP 40 Uninstalling on Windows Vista or Windows 7 41 Restoring the WD SmartWare Software and Disk Image 41 7 Checking Drive Health 42 8 Using the Dr...

Page 5: ...s XP Computers 59 Installing the Driver Automatically 59 Installing the Driver Manually 61 Installing on Windows Vista Computers 63 Installing the Driver Automatically 63 Installing the Driver Manually 64 Installing on Windows 7 Computers 66 B Compliance and Warranty Information 68 Regulatory Compliance 68 FCC Class B Information 68 ICES NMB 003 Compliance 68 Safety Compliance 68 CE Compliance For...

Page 6: ...e volumes on a shelf WD SmartWare software An easy to use backup solution that gives you the power to Protect your data automatically Relax Your data is secure Automatic continuous backup will instantly make a second copy whenever you add or change a file See your backup as it happens Seeing is believing Visual backup organizes and displays your content into categories and shows the progress of yo...

Page 7: ... drive WD SmartWare software included on the drive USB cable AC adapter Quick Install Guide Optional Accessories For information about optional accessories for this product visit Important For the latest WD product information and news visit our website at www westerndigital com For the latest software firmware and product documentation and information go to http products wdc com updates Figure 1 ...

Page 8: ...the Apple menu and select Software Update Disk Drive Format Your My Book Essential drive is preformatted as a single NTFS partition for compatibility with all updated Windows operating systems If you want to use the drive with a Mac computer see Reformatting the Drive on page 44 and Troubleshooting on page 57 Physical Description As shown in Figure 2 and Figure 3 on page 4 the My Book Essential dr...

Page 9: ...ly powers on If you leave the drive connected to your computer after using the power button to turn it off you must press the power button again to turn it back on USB 3 0 Interface Super Speed USB 3 0 supports data transfer rates up to 5 Gb s USB 3 0 is backward compatible with USB 2 0 and USB 1 1 Connection to a USB 2 0 or USB 1 1 port transfers data at the port speed USB 2 0 up to 480 Mb s USB ...

Page 10: ...ter your drive using the WD SmartWare software as described in Registering the Drive on page 37 Another way is to register online at register wdc com Handling Precautions WD products are precision instruments and must be handled with care during unpacking and installation Drives may be damaged by rough handling shock or vibration Always observe the following precautions when unpacking and installi...

Page 11: ... Connecting the Drive Getting Started with the WD SmartWare Software Getting Started Without the WD SmartWare Software Connecting the Drive To connect the My Book drive to your Windows computer 1 Depending on your region if required change the power adapter as follows 2 Turn on your computer 3 Connect the My Book drive as shown in Figure 4 Figure 4 Connecting the My Book Drive 1 2 EU KO EU KO US J...

Page 12: ...stem 7 For Windows XP one or two screens might appear depending on whether the AutoRun AutoPlay function is enabled or disabled a On Windows XP with AutoRun AutoPlay enabled the Welcome to WD SmartWare screen displays see Figure 5 b On Windows XP with AutoRun AutoPlay disabled click to open the My Book drive listing in Windows Explorer and double click the WD SmartWare application file to display ...

Page 13: ... do not want to install the WD SmartWare software go to Getting Started Without the WD SmartWare Software on page 15 instead Getting Started with the WD SmartWare Software To get started with the WD SmartWare software 1 The What would you like to do prompt on the Welcome to WD SmartWare screen provides three options for getting started with the WD SmartWare software 2 Read the license agreement an...

Page 14: ...nitial Backup screen for performing your first backup see Figure 6 on page 10 Here you can either Run your first backup See Backing Up Your Computer Files on page 16 before clicking Start Backup and then proceed to step 5 Skip the backup and display the WD SmartWare initial Drive Settings screen Figure 7 on page 10 See Password Protecting the Drive on page 27 and Registering the Drive on page 37 b...

Page 15: ...L USER MANUAL CONNECTING THE DRIVE AND GETTING STARTED 10 Figure 6 Initial Backup Screen Figure 7 Initial Drive Settings Screens WD SmartWare Initial Drive Settings Screen Drive Management Initial Drive Settings Screen ...

Page 16: ...e management initial Drive Settings screen This completes the getting started procedure after selecting Install Drive Settings In this case Opening the WD SmartWare software displays the drive management Home screen see Figure 9 on page 12 with only the Settings tab for performing all drive management functions see Customizing Your Drive Settings on page 35 Clicking the Settings tab displays the d...

Page 17: ...otection is continuous for as long as your My Book drive is connected to your computer Then whenever you disconnect and reconnect the drive to your computer the WD SmartWare software rescans your computer for new or changed files and resumes automatic continuous backup as before See your backup as it happens Seeing is believing Visual backup organizes and displays your content into categories and ...

Page 18: ...from your My Book drive to any location on your computer In the Content Gauge for your computer s hard drive all of your files that are available for backup are shown against a blue background in six categories where For a complete list of all included file extensions search for Answer ID 3644 in the WD Knowledge Base at http support wdc com Note that The System category shown against a dark gray ...

Page 19: ... 12 Settings Manages the same security diagnostics and power settings as the WD SmartWare Drive Settings screen and provides a Preferences button for enabling the Backup and Retrieve functions see Figure 17 on page 27 As you copy files to your drive the Content Gauge shows them in six categories Documents Mail Music Pictures Other See WD SmartWare Home Screen on page 13 for a description of the fi...

Page 20: ...ing the Drive on page 27 Customize your software and drive settings for the best possible performance see Managing and Customizing Your Drive on page 32 Check the operational condition of your drive with built in diagnostic features see Checking Drive Health on page 42 To forego these performance features and get started without installing the WD SmartWare software 1 Click Do Not Install on the We...

Page 21: ...by backing up any New file that is created on your computer or copied to your hard drive Existing file that is changed in any way This protection is automatic the WD SmartWare software does it for you without any action on your part just make sure to leave your My Book drive connected to your computer Note Automatic backup protection is continuous for as long as your My Book drive is connected to ...

Page 22: ...dentifies categories of files that have been backed up In the Content Gauge for your My Book drive the Additional Files category includes all of the files shown in the used space portion of your drive properties This space is not available for backups In the Content Gauges and the Detailed View content box Figure 10 Backup Screen This file category Includes files with these extensions Documents do...

Page 23: ...up The Backup screen displays a progress bar and a message indicating the amount of data that has been backed up The blue background in the Content Gauge for your computer s hard drive changes to yellow amber for all of the files that have not yet been backed up The gray background in the Content Gauge for your My Book drive changes to blue for each category as the backup completes You can continu...

Page 24: ... back up Changing the backup software settings Choosing the number of backup versions to keep Pausing the backup until your computer is idle Selecting Specific Files to Back Up To back up some of your computer files 1 On the Backup screen see Figure 10 on page 17 select Detailed View to open the backup files content box Important Appearance of a Caution message indicating that your drive is full m...

Page 25: ... Backup to back up the selected categories of files Changing the Backup Software Settings To optimize your backup you can Specify the number of backup versions to keep for each file Pause backups until your computer is idle To configure these backup options 1 Click the Settings tab to display the Settings screen see Figure 11 2 Click Set Up Software to display the Software Settings screen see Figu...

Page 26: ...trieves and you can choose to keep from 1 to 25 versions Keeping more versions Improves your ability to retrieve files from a longer back in time period Consumes more disk space To specify the number of backup versions that you want to keep for each file 1 On the Software Settings screen see Figure 12 click File History to display the Set File History dialog 2 Specify the number of file versions t...

Page 27: ... in the background using minimal computer resources while you are working on your computer If you want to pause all backup activity until your computer is idle you can by enabling the Backup Speed option 1 On the Software Settings screen see Figure 12 on page 21 click Backup Speed to display the Reduce Backup Speed dialog 2 Select or clear the Pause backup until computer is idle check box to enabl...

Page 28: ...g a File After selecting the drive on the Home screen to retrieve a file 1 Click the Retrieve tab to display the Retrieve screen see Figure 13 on page 24 2 In the Backed Up Volumes box select the WD SmartWare volume that you want to retrieve a file or folder from and click Select Destination to display the Select a destination for retrieved files screen see Figure 14 on page 24 3 On the Select a d...

Page 29: ...MY BOOK ESSENTIAL USER MANUAL RETRIEVING BACKED UP FILES 24 Figure 13 Retrieve Screen Figure 14 Select a Destination for Retrieved Files Screen ...

Page 30: ...older Click the appropriate file category button to list the files by category Pictures Music Movies Documents Other Mail Select the View icon to list individual files Type all or part of the file name in the search box using the question mark as a wildcard character to locate the file and press the Enter key to initiate the search To eliminate the search filter delete all of the text in the searc...

Page 31: ...mputer does not have sufficient disk space to complete the retrieve Retrieving a Folder To retrieve a folder from your drive and all of the files within a folder which may be across multiple categories in the retrieve files selection box see Figure 16 right click the folder and choose Select folder in all content categories Retrieving an Earlier Version of a File or Deleted Files In the retrieve f...

Page 32: ... you can Create a password Change a password Eliminate the need for a password To create a password and keep others from accessing the files on your drive 1 Click the Settings tab to display either the WD SmartWare Settings screen Figure 11 on page 20 or the drive management Drive Settings screen Figure 17 2 If you opened the WD SmartWare Settings screen click Set Up Drive to display the WD SmartW...

Page 33: ...ve Unlocking the Drive After you have created a password to keep others from accessing the files on your drive you will have to type your password to unlock the drive whenever You shut down and restart your computer You disconnect and reconnect the drive to your computer Your computer exits the sleep mode You will have to do this even if you do not have the WD SmartWare software installed on your ...

Page 34: ...ge above the Drive is locked message to display the WD SmartWare drive unlock screen 2 Type your password in the Password box 3 Click Unlock to unlock your drive and enable the WD SmartWare software Unlocking the Drive Without the WD SmartWare Software Whenever you connect your password protected drive to a computer that does not have the WD SmartWare software installed you can use the WD SmartWar...

Page 35: ...ovable Storage 2 Type your password in the Password box 3 Click Unlock to unlock your drive 4 At the Your drive is now unlocked prompt click Exit to close the WD SmartWare Drive Unlock utility Changing Your Password To change your password 1 Click Security on either the WD SmartWare Drive Settings screen or the drive management Drive Settings screen see Figure 17 on page 27 to display the Your Dri...

Page 36: ... Lock Feature To remove password protection from your drive 1 Click Security on either the WD SmartWare Drive Settings screen or the drive management Drive Settings screen see Figure 17 on page 27 to display the Your Drive is Secure dialog 2 Type your password in the Password box 3 Select the Remove security option 4 Click Update Security Settings to remove password protection from your drive and ...

Page 37: ...splays in the Windows taskbar By clicking the icon you can Open the WD SmartWare software Check the drive status Monitor icon alerts Safely disconnect the drive The following sections describe how to use the icon and other ways to do these things Opening the WD SmartWare Software If the WD SmartWare software does not start automatically you can start it by Clicking Start All Programs WD SmartWare ...

Page 38: ...ED to turn off before disconnecting the drive from the computer Using the Drive Power Button To safely disconnect the drive using the drive power button 1 Press the power button on the back of the My Book drive You might hear the drive power down 2 Wait for the power activity LED to turn off before disconnecting the drive from the computer IF the WD SmartWare icon flashes THEN the drive might be G...

Page 39: ...older By default the WD SmartWare software creates and uses a Retrieved Content subfolder in your My Documents folder To specify a different folder 1 Either create a new folder or determine which existing folder you want to use 2 On the Software Settings screen see Figure 12 on page 21 click Retrieve Folder to display the Set Retrieve Folder dialog 3 Click Browse and use the browse function to ide...

Page 40: ...og Customizing Your Drive Settings The WD SmartWare software makes it easy for you to quickly customize the settings of your drive for the best possible performance Security Create modify and disable passwords that keep others from accessing the files on your drive Registration Register your drive to receive free technical support during the warranty period and find out about software updates prod...

Page 41: ... and be kept up to date on the latest WD products Registration Registering the Drive on page 37 Run drive diagnostics and status checks Diagnostics Checking Drive Health on page 42 Specify an inactive time interval to turn off your drive Sleep Timer Setting the Drive Sleep Timer on page 37 Erase your drive so you can retrieve the space and start over with a fresh set of backups Drive Erase Erasing...

Page 42: ...r last name in the Last name box 5 Type your e mail address in the E mail address box 6 Select your language in the Preferred language box 7 Select or clear the Yes I want to receive communication check box to specify whether or not you want to receive e mail notifications about software updates product enhancements and price discount opportunities 8 Click Register Drive to register your drive Set...

Page 43: ...ng about the loss of data if you erase your drive 3 Click the I understand check box to signify that you accept the risk 4 Click Drive Erase to erase your drive After the drive erase operation completes go to support wdc com and see Knowledge Base Answer ID 5419 for information about downloading and restoring the WD SmartWare software and disk image on your My Book drive Note Erasing your drive al...

Page 44: ...s file management utility to open the WD Unlock virtual CD and double clicking the Unlock exe file Clicking Start My Computer opening the WD Unlock virtual CD listing under Devices with Removable Storage and double clicking the Unlock exe file 2 Make five attempts to unlock the drive by a Typing a password in the Password box b Clicking Unlock 3 The fifth invalid password attempt displays the Too ...

Page 45: ...ment Drive Settings screen see Figure 17 on page 27 click Preferences to display the Set Preferences dialog 2 Select the Enable Backup and Retrieve functions check box 3 Click Enable Backup Now to Add the Backup and Retrieve tabs to the Home screen display Add the Set Up Software and Set Up Drive options to the Settings screen Remove the Preferences option from the Drive Settings screen Uninstalli...

Page 46: ...mage In addition to deleting all of the data on your My Book drive erasing or reformatting the drive also removes the WD SmartWare software and all of the support files utilities online help and user manual files If you ever need to remove and reinstall the WD SmartWare software on your computer or move the drive to another computer and install the software there you will need to restore the WD Sm...

Page 47: ...n that continuously monitors key internal performance attributes of the drive A detected increase in drive temperature noise or read write errors for example can provide an indication that the drive might be approaching a serious failure condition With advanced warning you could take precautionary measures like moving your data to another drive before a failure occurs The result of a quick S M A R...

Page 48: ...MY BOOK ESSENTIAL USER MANUAL CHECKING DRIVE HEALTH 43 2 Click the button for the test that you want to run Quick SMART Status Quick Drive Test Complete Drive Test ...

Page 49: ...rtWare Software Reformatting the Drive Go to support wdc com and refer to the appropriate Knowledge Base Answer ID for information about reformatting a Windows drive 287 or 3323 for Mac OS X 1364 for FAT32 See Troubleshooting on page 57 for more information about reformatting a drive Restoring the WD SmartWare Software and Disk Image After you have reformatted your My Book drive for use on Mac com...

Page 50: ...cel b If you do want to use the Time Machine backup software click Use as Backup Disk The My Book icon now displays as Your My Book drive is now ready to use as an external storage device You can enhance its performance by installing the following software that is on the drive WD TURBO utility see Enhancing Performance with WD TURBO in the next section WD SmartWare software see Installing the WD S...

Page 51: ... the Extras folder on the screen that displays 2 Double click the WD TURBO Installer icon 3 Click Install on the WD TURBO Driver Installer screen 4 Read the license agreement and click Accept to continue 5 A message informs you that installing the drivers requires you to restart your computer to make them active Click Yes to continue ...

Page 52: ...en the computer restarts the My Book icon now looks like this where MY BOOK is the name you assigned to the volume when you reformatted the drive for use with the Mac computer Your My Book drive is now ready to use as an enhanced performance external storage device Installing the WD SmartWare Software To install the WD SmartWare software 1 Double click the My Book icon and then double click the WD...

Page 53: ...software is not installed 4 Click Install WD SmartWare to begin the installation 5 Read the license agreement and click Accept to continue 6 Type the password that you normally use to access the computer in the Password box and click OK 7 Wait for the installation to complete This could take several minutes When the installation completes the WD SmartWare Home screen displays see Figure 18 on page...

Page 54: ...ve tab to either back up from or retrieve files to a location other than your computer s main hard drive In the Content Gauge for your computer s hard drive all of your files that are available for backup are shown against a blue background in categories that are based on the following folders on your computer Music Movies Pictures Mail Documents Other Each category includes all of the files in th...

Page 55: ...n of your drive properties This space is not available for backups Note The small number of files that are shown in the Additional Files category when you first install the WD SmartWare software before performing your first backup represents the system and hidden files that your computer s operating system put there when you installed the drive Using the WD SmartWare Icon After you have installed ...

Page 56: ...rive s serial number and the temperature condition of the drive 1 Click the WD SmartWare icon to display a list of drives and select the My Book drive 2 If the drive is unlocked not encrypted the submenu displays the serial number of the drive the space available and the temperature condition If the drive is locked a Click Unlock Drive on the submenu to display the WD SmartWare Drive Unlock screen...

Page 57: ...e WD SmartWare Icon To safely dismount the drive using the WD SmartWare icon 1 Click the WD SmartWare icon to display a list of drives 2 Select the My Book drive and then on the submenu select Unmount Volumes If the drive has more than one volume a prompt asks you to select the volume You might hear the drive power down 3 Wait for the drive icon to disappear from the desktop before disconnecting t...

Page 58: ...of the My Book drive You might hear the drive power down 2 Wait until the drive icon to disappear from the desktop before disconnecting the drive from the computer Unlocking the Drive After you have created a password to keep others from accessing the files on your drive you will have to type your password to unlock the drive whenever You shut down and restart your computer You disconnect and reco...

Page 59: ...eep mode an unlock screen might not display when you reactivate it To unlock the drive you can use either the WD Unlocker VCD as described in Unlocking the Drive Without the WD SmartWare Software on page 55 My Book icon To unlock the drive manually using the WD SmartWare icon 1 Click the WD SmartWare icon in the bar at the top right corner of the screen 2 Select the My Book drive and then click Un...

Page 60: ...re Drive Unlock utility to unlock the drive there The WD SmartWare software provides the Drive Unlock utility on a virtual CD drive VCD that appears on your desktop whenever the drive is locked To unlock the drive without the WD SmartWare software installed 1 Double click the WD Unlocker VCD icon and double click the Drive Unlock icon on the screen that appears 2 Type your password in the Password...

Page 61: ...nd double click the Extras folder on the screen that displays 2 Double click the WD SmartWare Uninstaller icon 3 Click Uninstall on the WD SmartWare Uninstall screen Important You can easily uninstall the WD SmartWare software However you will need to restart the backup job manually after reinstalling the software as uninstalling deletes all existing backup job configurations See Backing Up Your C...

Page 62: ...rboard be sure to install the appropriate chipset support for your motherboard Refer to your motherboard or system manual for more information Q What happens when a USB 3 0 or USB 2 0 device is plugged into a USB 1 1 port or hub A USB 3 0 and USB 2 0 are backward compatible with USB 1 1 When connected to a USB 1 1 port or hub a USB 3 0 or USB 2 0 device operates at the USB 1 1 full speed of up to ...

Page 63: ...led before connecting your WD USB 3 0 external storage product The drive is not recognized correctly unless USB 3 0 or USB 2 0 root hub and host controller drivers are installed Contact the adapter card manufacturer for installation procedures Q Why won t my computer boot when I connect my USB drive to the computer before booting A Depending on your system configuration your computer may attempt t...

Page 64: ...Installing on Windows 7 Computers Installing on Windows XP Computers After you physically connect the drive as shown in Figure 4 on page 6 the Found New Hardware Wizard screen displays Note If Autoplay is enabled two additional screens might appear at the same time as the Found New Hardware Wizard screen If they appear close them You can use the Found New Hardware Wizard to install the SES driver ...

Page 65: ...MY BOOK ESSENTIAL USER MANUAL INSTALLING THE SES DRIVER 60 4 Select Install the software automatically and click Next 5 When the installation completes click Finish ...

Page 66: ...the driver manually 1 On the Found New Hardware Wizard screen select No not this time to inhibit a connection attempt to Windows Update 2 Click Next to continue 3 Select Install from a list or specific location and click Next 4 Browse to My Computer and a Double click the My Book drive b Double click the Extras folder c Select WD SES Device Driver ...

Page 67: ...MY BOOK ESSENTIAL USER MANUAL INSTALLING THE SES DRIVER 62 d Click Next 5 When the installation completes click Finish ...

Page 68: ...ically if your computer is connected to the Internet Manually whether your computer is connected to the Internet or not Installing the Driver Automatically To install the SES driver automatically your computer must be connected to the Internet 1 Verify that your computer is connected to the Internet 2 On the Found New Hardware wizard screen click Locate and install driver software 3 On the Found N...

Page 69: ...to the Internet install the driver manually 1 On the Found New Hardware wizard screen click Locate and install driver software 2 On the Found New Hardware WD SES Device wizard screen click Don t search online 3 At the Install the disc that came with your WD SES Device prompt click I don t have the disc Show me other options ...

Page 70: ...USER MANUAL INSTALLING THE SES DRIVER 65 4 Browse to Computer and a Double click the My Book drive b Double click the Extras folder c Select WD SES Device Driver d Click Next 5 When the installation completes click Close ...

Page 71: ...fter you physically connect the drive as shown in Figure 4 on page 6 use the Windows 7 Computer Management utility to install the SES driver 1 Open All Programs and click Computer Manage 2 Under Computer Management Local click Device Manager Unknown Device and right click Update driver software ...

Page 72: ...G THE SES DRIVER 67 3 Click Browse my computer for driver software 4 Browse to Computer double click the My Book drive double click the Extras folder and select WD SES Device Driver 5 Click Next 6 When the installation completes click Close ...

Page 73: ... est conforme à la norme NMB 003 du Canada This device complies with Canadian ICES 003 Class B Safety Compliance Approved for US and Canada CAN CSA C22 2 No 60950 1 UL 60950 1 Safety of Information Technology Equipment Approuvé pour les Etats Unis et le Canada CAN CSA C22 2 No 60950 1 Sûreté d équipement de technologie de l information This product is intended to be supplied by a listed limited po...

Page 74: ...ed will be returned to you at your expense Authorized returns must be shipped in an approved shipping container prepaid and insured to the address provided on your return paperwork Your original box and packaging materials should be kept for storing or shipping your WD product To conclusively establish the period of warranty check the warranty expiration serial number required via support wdc com ...

Page 75: ... user serviceable products and the specific alteration is within the scope of the applicable instructions as found at support wdc com accident or mishandling while in the possession of someone other than WD Subject to the limitations specified above your sole and exclusive warranty shall be during the period of warranty specified above and at WD s option the repair or replacement of the Product Th...

Page 76: ... registration 37 security 27 sleep timer 37 E Environmental compliance China 69 Erase Drive screen 38 40 Erasing the drive 38 CAUTION about erasing the drive 38 F FAQs USBs 57 FCC Class B information 68 File categories defined 13 17 history drive setting 34 history screen 21 Flashing icon alerts 33 Formatting the drive 57 Front and back views 3 Full Media Scan 42 H Handling precautions 5 Hardware ...

Page 77: ...9 Set preferences screen 35 retrieve folder screen 34 sleep timer screen 37 Setting the drive sleep timer 37 SMART Status Check 42 Software Settings preferences 34 35 retrieve folder 34 system throttling 34 Space available on a Mac 56 on Windows 32 Settings See Drive Settings Status check 32 on a Mac 56 on Windows 32 System file category defined 50 file category defined 13 18 throttling software s...

Page 78: ...rights of WD WD reserves the right to change specifications at any time without notice Western Digital WD the WD logo My Book and My Passport are registered trademarks and My Passport Essential WD SmartWare and Data Lifeguard are trademarks of Western Digital Technologies Inc Other marks may be mentioned herein that belong to other companies 2010 Western Digital Technologies Inc All rights reserve...

Reviews: