background image

W

ESTEEL

 - A

XIAL

 F

LOW

 A

ERATION

 F

AN

4. O

PERATION

3HP, 5HP, 7HP, 10HP, & 15HP

4.1. S

TART

-U

P

198941

15

4. Operation

4.1. START-UP

1.  Open bin roof vents.
2.  Turn on power to fan.

3. For 

230V models

, move the toggle switch to the START position (this is the 

spring-loaded or momentary position of the switch). 

4. For 

460V/575V models

, press the green START button and hold 

momentarily until fan starts. Fan should continue to run once green button is 
released.

5.  If the fan does not start or if it stops running, refer to the troubleshooting 

section.

4.2. BREAK-IN

Although there are no operational restrictions on the machine when used for the 
first time, it is recommended that the following items be checked:

B

EFORE


STARTING

:

• Read the power unit’s operation manual.
• Ensure that the fan is properly attached to the grain bin and properly sup-

ported.

• During the first few minutes of operation, ensure that the unit is running prop-

erly.

A

FTER


OPERATING


FOR

 1/2 

HOUR

:

• Check to see if there is excessive vibration in the fan. If there is, stop the fan 

and consult your local dealer or the factory.

• Check that all guards are installed and are working as intended.

A

FTER


OPERATING


FOR

 5 

AND

 10 

HOURS

:

• Check that all guards are installed and are working properly.

Warning: 

Before continuing, ensure you have read and understand the relevant information 

in the safety section. Safety information is provided to help prevent serious injury, death, or 
property damage.

NOTICE

Continual use of a vibrating fan will cause premature failure 
of motor and bearings. It will also cause metal fatigue in the 
fan wheel assembly and fan housing.

Summary of Contents for 10HP

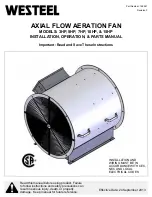
Page 1: ... property damage Keep manual for future reference Part Number 198941 Revision 3 AXIAL FLOW AERATION FAN MODELS 3HP 5HP 7HP 10HP 15HP INSTALLATION OPERATION PARTS MANUAL Important Read and Save These Instructions INSTALLATION AND WIRING MUST BE IN ACCORDANCE WITH CEC NEC AND LOCAL ELECTRICAL CODES Effective Date 24 September 2013 ...

Page 2: ...procedures required for this product Periodic reviews of this manual with all employees should be standard practice For your convenience we include this sign off sheet so you can record your periodic reviews a Standards include organizations such as the American Society of Agricultural and Biological Engineers American National Standards Institute Canadian Standards Association International Organ...

Page 3: ...l Installation 10 2 6 2 Decal Locations 10 3 Installation 13 3 1 Before You Begin 13 3 2 Location Mounting 13 3 3 Electric Motor Wiring 13 4 Operation 15 4 1 Start Up 15 4 2 Break In 15 4 3 Shutdown 16 4 4 Emergency Stop 16 4 5 Application Requirements 17 5 Maintenance Storage 19 5 1 Maintenance 19 5 1 1 Cleaning 19 5 1 2 Servicing Part Replacement 19 5 2 Storage 20 6 Troubleshooting 21 7 Appendix...

Page 4: ...WESTEEL AXIAL FLOW AERATION FAN 3HP 5HP 7HP 10HP 15HP 4 198941 ...

Page 5: ... after installation your fan will provide you with many years of trouble free service Safe efficient and trouble free operation of your fan requires that you and anyone else who will be involved with this equipment read and understand all safety instructions and procedures contained within this manual A sign off form is provided on the inside front cover for your convenience Keep this manual handy...

Page 6: ...1 INTRODUCTION WESTEEL AXIAL FLOW AERATION FAN 3HP 5HP 7HP 10HP 15HP 6 198941 ...

Page 7: ...e of the signal words DANGER WARNING CAUTION and NOTICE with the safety messages The appropriate signal word for each message has been selected using the definitions below as a guideline The Safety Alert symbol means ATTENTION BE ALERT YOUR SAFETY IS INVOLVED DANGER Indicates an imminently hazardous situation that if not avoided will result in serious injury or death WARNING Indicates a hazardous ...

Page 8: ...ining the equipment All accidents can be avoided Equipment owners must give instructions and review the information initially and annually with all personnel before allowing them to operate this product Untrained users operators expose themselves and bystanders to possible serious injury or death Use this equipment for its intended purposes only Do not modify the equipment in any way Unauthorized ...

Page 9: ...installed properly 2 4 STORAGE SAFETY Store the unit in a dry clean area away from human activity Do not permit children to play on or around the stored machine 2 5 BIN ROOF SAFETY To prevent bin damage from aeration Roof vents should be sized at 1 ft2 for every 1000 ft3 min of air to minimize condensation Operate fan as intended with positive pressure Positive pressure is shown in Figure 2 1 with...

Page 10: ... 10 C 2 Decide on the exact position before you remove the backing paper 3 Align the decal over the specified area and carefully press the small portion with the exposed sticky backing in place 4 Slowly peel back the remaining paper and carefully smooth the remaining portion of the decal in place 5 Small air pockets can be pierced with a pin and smoothed out using the sign backing paper 2 6 2 SAFE...

Page 11: ...WESTEEL AXIAL FLOW AERATION FAN 2 SAFETY FIRST 3HP 5HP 7HP 10HP 15HP 2 6 SAFETY DECALS 198941 11 Figure 2 2 Safety Decal Locations ...

Page 12: ...2 SAFETY FIRST WESTEEL AXIAL FLOW AERATION FAN 2 6 SAFETY DECALS 3HP 5HP 7HP 10HP 15HP 12 198941 Figure 2 3 Safety Decal Locations ...

Page 13: ...n ner to support the fan s weight 3 3 ELECTRIC MOTOR WIRING Voltage amperage and rpm s are located on the specification plate on the fan housing A wiring diagram is located on the inside of the fan electrical box lid Use a separate circuit from the distribution panel for the fan Installing a time delayed circuit breaker will allow for start up current mini mum requirement is 2 5 times the maximum ...

Page 14: ...zes HP PHASE MOTOR VOLTS CONDUCTOR SIZES AWG FOR VARIOUS MOTOR TO TRANSFORMER DISTANCES 100 FT 150 FT 200 FT 300 FT 500 FT 5 1 3 3 230 230 460 6 10 12 4 8 12 4 8 12 2 6 10 0 4 8 7 5 1 3 3 230 230 460 6 8 12 4 6 12 3 6 12 1 4 10 0 2 8 10 3 3 230 460 6 12 4 12 4 12 4 10 1 8 15 3 3 230 460 6 12 4 10 4 10 2 8 0 6 20 3 3 230 460 4 10 2 8 8 2 1 6 000 4 25 3 3 230 460 2 8 2 8 2 6 0 6 000 4 30 3 3 230 460...

Page 15: ...ARTING Read the power unit s operation manual Ensure that the fan is properly attached to the grain bin and properly sup ported During the first few minutes of operation ensure that the unit is running prop erly AFTER OPERATING FOR 1 2 HOUR Check to see if there is excessive vibration in the fan If there is stop the fan and consult your local dealer or the factory Check that all guards are install...

Page 16: ... the inlet screen and fan wheel assembly for damage Repair or replace as required EXCESSIVE FAN VIBRATION OR NOISE 1 Immediately shut down and lock out power source 2 Inspect inlet for an obstruction remove if necessary 3 Restart fan to see if it is still vibrating excessively If it is immediately shut off fan and lock out power source 4 Contact your local dealer for inspection of the fan wheel as...

Page 17: ...ERATION 3HP 5HP 7HP 10HP 15HP 4 4 EMERGENCY STOP 198941 17 4 5 APPLICATION REQUIREMENTS This aeration fan must only be used for aeration and natural air drying of grain products A downstream heater can be added if extra drying is required ...

Page 18: ...4 OPERATION WESTEEL AXIAL FLOW AERATION FAN 4 4 EMERGENCY STOP 3HP 5HP 7HP 10HP 15HP 18 198941 ...

Page 19: ...s any service part replacement work required on the fan it is important to reinstall the fan wheel assembly in exactly the same place Failure to do so will cause premature wear vibration and part failure Ensure the edge of the inlet cone fit into the wheel cover covers approximately 1 2 of the lip on the face plate of the wheel Warning Before continuing ensure you have read and understand the rele...

Page 20: ...emoved from the fan Inspect electrical wires and repair if necessary Inspect all parts and components and repair or replace as required If fan must be stored outside it should be completely covered with a tarp to ensure that foreign material and the weather will not affect the fan If the fan is to be stored inside it should be in a clean dry location ...

Page 21: ... If wire size is correct call power company Internal overload tripped Let motor cool off then retry if symptoms persist check amperage draw if high correct if not thermal overload could be tripping out at incor rect temperature Undersize wiring Refer to wire sizing charts for correct size Low line voltage at fan If wire size is correct call power company Defective magnetic contactor Replace contac...

Page 22: ...6 TROUBLESHOOTING WESTEEL AXIAL FLOW AERATION FAN 3HP 5HP 7HP 10HP 15HP 22 198941 ...

Page 23: ...X 80534 5 HP 3 Phase 24 Dia 460 480 60 265 WX 80535 5 HP 3 Phase 24 Dia 575 600 60 265 WX 80711 7 HP 1 Phase 24 Dia 208 230 60 265 WX 80732 7 HP 3 Phase 24 Dia 208 230 60 265 WX 80734 7 HP 3 Phase 24 Dia 460 480 60 265 WX 80735 7 HP 3 Phase 24 Dia 575 600 60 265 WX 81011 10 HP 1 Phase 24 Dia 208 230 60 350 WX 81032 10 HP 3 Phase 24 Dia 208 230 60 350 WX 81034 10 HP 3 Phase 24 Dia 460 480 60 350 WX...

Page 24: ...7 APPENDIX WESTEEL AXIAL FLOW AERATION FAN 7 1 PARTS LIST 3HP 5HP 7HP 10HP 15HP 24 198941 AXIAL FAN 3HP 5HP 7HP 10HP 15HP ...

Page 25: ... 2 GGX 8122 AXIAL HOUSING 28 1 3 GGX 8113 AXIAL BLADE 3HP 18 1 3 GGX 8117 AXIAL BLADE 5HP 24 1 3 GGX 8118 AXIAL BLADE 7HP 24 1 3 GGX 8119 AXIAL BLADE 10HP 24 1 3 GGX 8123 AXIAL BLADE 15HP 28 1 4 GGF 8067 INLET SCREEN 18 1 4 GGI 8100 INLET SCREEN 24 1 1 1 4 GGX 8124 INLET GUARD 28 1 5 GGX 8114 ELECTRICAL BOX COVER AXIAL 1 1 1 1 1 6 GGX 8115 ELECTRICAL BOX AXIAL 1 1 1 1 1 7 GGF 8041 STARTER CONTACTO...

Page 26: ...7 APPENDIX WESTEEL AXIAL FLOW AERATION FAN 7 1 PARTS LIST 3HP 5HP 7HP 10HP 15HP 26 198941 7 2 ELECTRICAL SCHEMATICS Figure 7 1 Figure 7 2 ...

Page 27: ... TO DRY GRAIN When natural air drying or when grain drying with a supplemental heater you need roughly 1HP for every 1000BU of grain When aerating you need roughly 1HP for every 10 000BU of grain These are approximations only as the height of grain influ ences the required power as well Consult your local dealer to accurately size a fan WHEN CAN I BEGIN TO HARVEST With a complete natural air dryin...

Page 28: ...event the drying front from crusting over and restricting airflow DOES FAN OPERATION AT NIGHT OR IN HIGH HUMIDITY CONDITIONS REVERSE THE DRYING PROCESS We tend to think that a fan will force moisture back into a bin in high humidity conditions However it is much more difficult to put moisture back into the grain than it is to take it out In fact grain in the bottom of the bin that may be a little ...

Page 29: ... drying chart based on a complete Aeration System Note If you add 1 or 2 loads of grain at 18 moisture into the bin assume the bin to be at 18 average moisture don t reduce the average if some loads are at a lower percentage Note Do not count the first day in the drying process it takes 14 16 hours for the bin to equalize its temperature WHEN NATURAL AIR DRYING OR WHEN USING SUPPLEMENTAL HEAT WHEN...

Page 30: ...7 APPENDIX WESTEEL AXIAL FLOW AERATION FAN 7 3 GRAIN DRYING AERATION TIPS 3HP 5HP 7HP 10HP 15HP 30 198941 Figure 7 4 Grain Drying Charts ...

Page 31: ...fect attributable to repair of the unit outside the Manufacturer s facilities or those of an authorized dealer or the installation of unapproved parts on the unit in the Manufacturer s judgment to affect it s performance or reliability or which has been subject to misuse negligence or accident d Any damage attributable to accident or to lightning power surge brownout leaking damage or connection t...

Page 32: ...450 Desautels Street P O Box 792 Winnipeg Manitoba CANADA R3C 2N5 Phone 204 233 7133 Fax 204 235 0796 ...

Reviews: