


Install Prep
Page 6
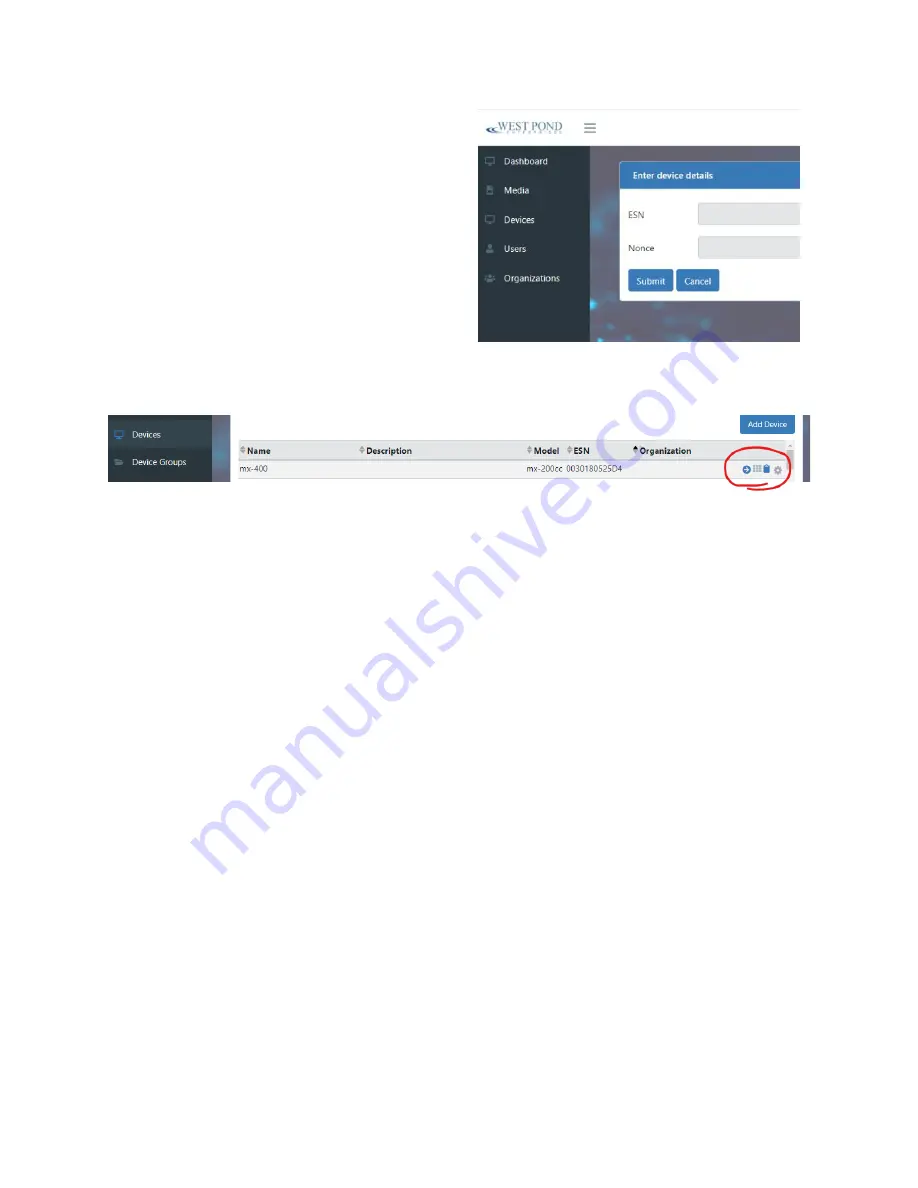
On FlexDM.net, navigate to the Devices page and
then select “Add Device”. Enter the information and
submit.
Once the device has been added, you will see your
device. See image below. The arrow icon will open
your FlexStream units web UI. The second icon
indicates if it is shared with other organizations. The
third, clipboard, icon provides information about the
unit and its FlexDM connection, the last icon is
configuration. Click on the configuration icon and
provide your unit with a Name and a Description (what it is used for). This completes the FlexDM.net
installation.
Connecting the FlexStream TV network monitor the in-house cable TV
network
On the back of the unit, MX-400 or MX-200, there is an M1 port. You and West Pond support personnel
will use this port to monitor your in-house cable TV distribution network. Connect this port to a coax
wire that would normally plug directly into a TV or cable TV set top box. Once connected the network
information can be found on the FlexStream unit web UI Monitor page. This is a very important step in
configuring you unit. West Pond will use this information to ensure it generates the proper cable TV
signals to add a channel on your network.
Connecting HDMI source (if using)
Lastly, if you are using an HDMI port for the in-house channel media, you will need to connect that
source to the HDMI capture port. If that source is a DVD player or a PC, you may need to install an HDMI
splitter as well. When correctly connected the blue LED behind the pin hole next to the HDMI port, will
light solid blue. If pulsing blue, the connection has not been made.


