background image

7

•  Assembly requires two persons.

•  Place all parts in a cleared area and remove the 

packing materials. Do not dispose of the packing 

materials until you finish all assembly steps.

•  After shipping, there may be an oily substance 

on the exterior of the treadmill. This is normal. If 

there is an oily substance on the treadmill, wipe 

it off with a soft cloth and a mild, non-abrasive 

cleaner.

•  Left parts are marked “L” or “Left” and right parts 

are marked “R” or “Right.”

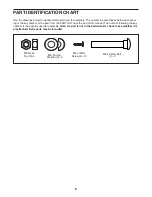
•  To identify small parts, see page 6.

•  Assembly requires the following tools:

the included hex key

one adjustable wrench

one Phillips screwdriver

To avoid damaging parts, do not use power tools. 

ASSEMBLY

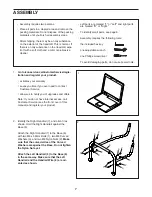
2.   Identify the Right Handrail (7), and orient it as 

shown. Hold the Right Handrail against the 

Base (6).

   Attach the Right Handrail (7) to the Base (6) 

with two M8 x 50mm Bolts (1), two M8 Curved 

Washers (3), and two M8 Nylon Nuts (2). Make 

sure that the curved sides of the Curved 

Washers are against the Base. Do not tighten 

the Nylon Nuts yet.

   Attach the Left Handrail (5) to the Base (6) 

in the same way. Make sure that the Left 

Handrail and the Handrail Wire (8) are ori-

ented as shown. 

1

7

5

6

2

3

8

2

1.  

Go to iconservice.ca/CustomerService/regis-

tration and register your product.

  •  activates your warranty
  •   saves you time if you ever need to contact 

Customer Service

  •   allows us to notify you of upgrades and offers

   Note: If you do not have Internet access, call 

Customer Service (see the front cover of this 

manual) and register your product.

1

2

3

2

3

2

3

1

Summary of Contents for CARDIO STRIDE 4.0

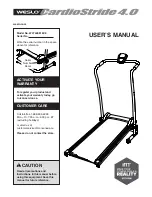
Page 1: ...before using this equipment Save this manual for future reference weslo com ACTIVATE YOUR WARRANTY To register your product and activate your warranty today go to iconservice ca CUSTOMER CARE Call to...

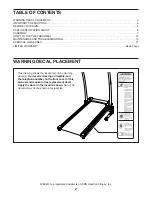
Page 2: ...TO FOLD THE TREADMILL 14 MAINTENANCE AND TROUBLESHOOTING 15 EXERCISE GUIDELINES 17 LIMITED WARRANTY Back Cover TABLE OF CONTENTS This drawing shows the location s of the warning decal s If a decal is...

Page 3: ...one person on the treadmill at a time 12 Wear appropriate exercise clothes while using the treadmill Do not wear loose clothes that could become caught in the treadmill Athletic support clothes are r...

Page 4: ...r insert any object into any opening on the treadmill 24 Servicing other than the procedures in this manual should be performed by an autho rized service representative only 25 Over exercising may res...

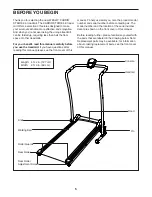
Page 5: ...enefit read this manual carefully before you use the treadmill If you have questions after reading this manual please see the front cover of this manual To help us assist you note the product model nu...

Page 6: ...tify small parts used for assembly The number in parentheses below each draw ing is the key number of the part from the PART LIST near the end of this manual The number following the key number is the...

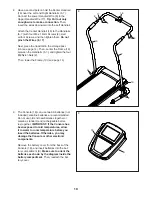
Page 7: ...ASSEMBLY 2 Identify the Right Handrail 7 and orient it as shown Hold the Right Handrail against the Base 6 Attach the Right Handrail 7 to the Base 6 with two M8 x 50mm Bolts 1 two M8 Curved Washers 3...

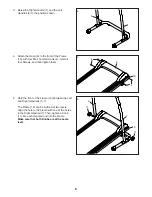
Page 8: ...the Left and Right Handrails 5 7 The Frame 10 can be inclined at two levels Align the hole in the Frame with one of the holes in the Right Handrail 7 Then tighten a Knob 11 into each Handrail and into...

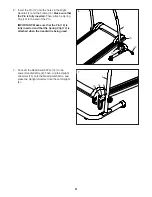
Page 9: ...mmet into the Left Upright 5 14 8 15 5 6 Insert the Pin 12 into the holes in the Right Handrail 7 and the Frame 10 Make sure that the Pin is fully inserted Then attach a Spring Clip 13 to the end of t...

Page 10: ...batteries as shown by the diagram inside the battery compartment Then reattach the bat tery cover 9 18 A 8 Have a second person hold the Center Handrail 16 near the Left and Right Handrails 5 7 Conne...

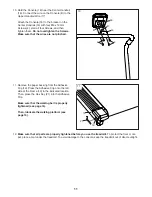
Page 11: ...he indicated location Then press the Hex Key 21 into the Adhesive Clip Make sure that the walking belt is properly tightened see page 16 Then lubricate the walking platform see page 15 19 21 10 11 10...

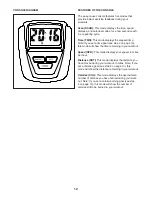
Page 12: ...mode will show the time remaining in your workout Speed SPD This mode displays your speed in miles per hour Distance DST This mode displays the distance you have moved during your workout in miles No...

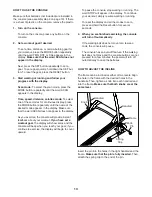
Page 13: ...e the console will provide instant feedback about your workout If you have set a workout goal the display will show zeros and the console will beep when you reach your goal if you continue to exercise...

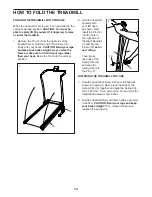
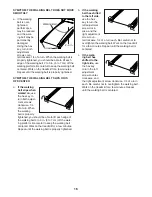
Page 14: ...on 2 Hold the treadmill securely with your left hand as shown Next insert the Pin 12 into the hole in the right side of the Right Handrail 7 and into the Frame 10 as far as it will go Then press the e...

Page 15: ...the lubricant TROUBLESHOOTING Most treadmill problems can be solved by follow ing the simple steps below Find the symptom that applies and follow the steps listed If further assis tance is needed see...

Page 16: ...lt is properly tightened you should be able to lift each edge of the walking belt 2 to 3 in 5 to 7 cm off the walk ing platform Be careful to keep the walking belt centered Walk on the treadmill for a...

Page 17: ...stem you must perform aerobic exercise which is activity that requires large amounts of oxygen for prolonged periods of time For aerobic exercise adjust the intensity of your exercise until your heart...

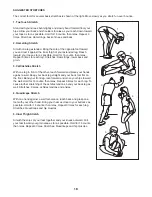
Page 18: ...lles Stretch With one leg in front of the other reach forward and place your hands against a wall Keep your back leg straight and your back foot flat on the floor Bend your front leg lean forward and...

Page 19: ...19 NOTES...
Page 20: ...s No other warranty beyond that specifically set forth above is authorized by ICON ICON is not responsible or liable for the following damages 1 indirect special or consequential dam ages arising out...

Reviews: