


The Style Editor Explained
The Style Editor allows you to edit an existing style / Realdrum. You can edit values such as volume, pan, effects, sounds
per track, parts, One Touch Settings as well as Tempo and part usage here.
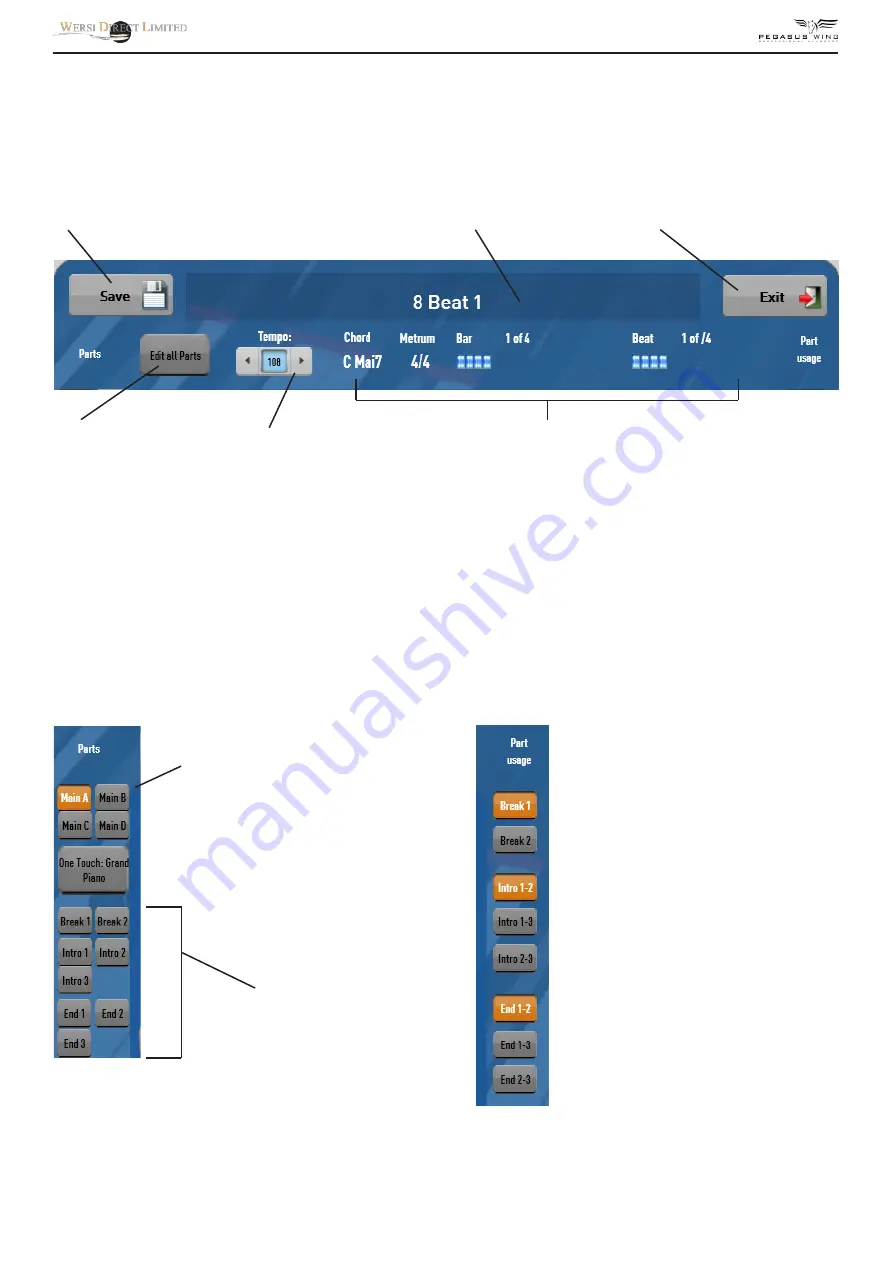
Save Button - use this to save a style
or Realdrum that you have edited.
Style name - Click on this long bar
to open the virtual typewriter to
edit the style name.
Press this button to Exit the Style
Editor and return to the Acc Volume
Mixer.
Edit All Parts - This
button means that any
changes you make to an
individual Style Track,
will also affect all other
parts.
So, if you change the
sound of Acc 1 on Main A,
all other parts (Main B,
Main C, Intros / Endings
etc) will also be changed.
Tempo -
you can
decrease
or increase
the tempo
here.
Style Information (Chord, Metrum, Bar etc)
This information is directly to the time signature of the Style (4/4 in our
example), how many bars there are in this style part (4 bars in our ex-
ample).
You can also see a beat counter. This tracks the beats and lights up like a
virtual LED when in play mode.
Chord: Also, you can see what chord is being played by the Left Hand.
Parts -
This is where you select the Style
Part that you wish to edit, if you’re not
editing with the ‘Edit all’ button. Simply
press on the part button and it will high-
light in Orange.
One Touch Setting -
This box shows us
what One Touch Setting is assigned to
Main A, Main B, Main C and Main D. See
chapter ‘One Touch Settings’ for informa-
tion on how to assign One Touch Settings.
Parts -
This is where you select the Style
Part that you wish to edit, if you’re not
editing with the ‘Edit all’ button. Simply
press on the part button and it will high-
light in Orange.
Parts Usage -
Because your Pegasus
Wing has only 1 Break button and only
2 intro / ending buttons on the left hand
panel, you can only access 1 of the 2
breaks and 2 of the 3 intro / endings at
any one time.
This is because when the Pegasus Wing
was first designed, it was supposed to be
an entry level arranger keyboard. Since
the initial release, we’ve updated and
improved the Pegasus Wing to the point
where we have now allowed access to all
parts of a style. So that you’re not lim-
ited, we’ve now allowed users access to
choose what parts they’d like the actual
panel buttons to trigger.
The parts highlighted in orange clearly
show that in our example, the Break
button will play Break 1, while the Intro
buttons will play Intro 1 and Intro 2 and
the Ending buttons will play Ending 1
and Ending 2 style parts.
Summary of Contents for Pegasus Wing V2
Page 1: ...Pegasus Wing V2 R0 03 User Manual Revision 2 Gedownload bij www wersi fan nl ...
Page 34: ......
Page 35: ......
Page 36: ......


