background image

OPERATION

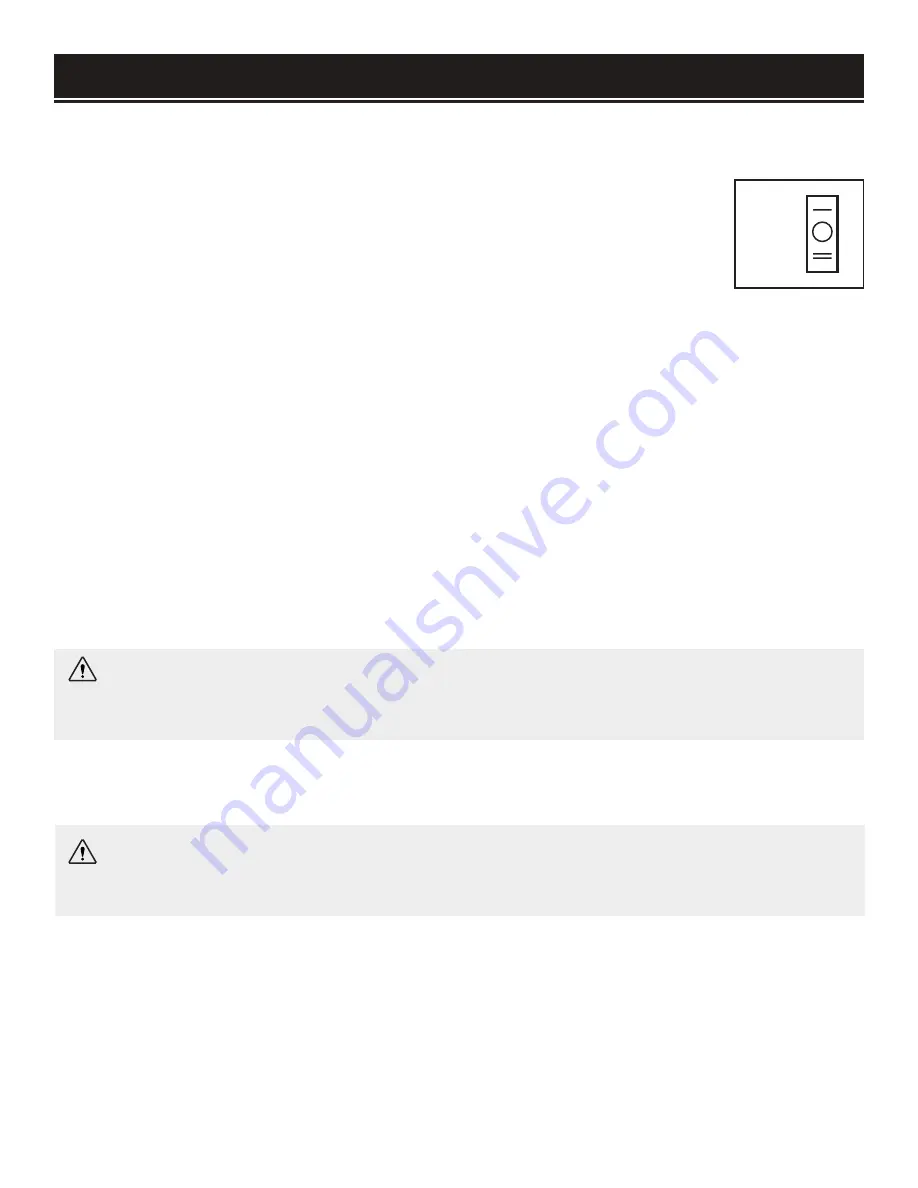
TWO SPEED SWITCH (FIG. 1)

1. Switch the heat gun off (position 

"O")

 and plug the heat gun into an AC 120V 60 Hz receptacle.

2. Toggle the two speed power switch to select the desired heat output and fan speed.

A.  To select the low heat, low speed, toggle the switch up to the "I" setting. 

B.  To select the high heat, high speed, toggle the switch down to the "II" setting.

3. To turn the heat gun off, toggle the switch to the middle setting marked with the "

O.

"

4. Unplug the heat gun after use. Allow the heat gun to cool down, and then safely store the heat gun. 

NOTE:

 It is best to start on the low setting and test it on a small section of your workpiece, or a piece of 

similar scrap material, and proceed to the higher setting if necessary. You may need to hold the heat gun 

further away from your workpiece when using the higher setting. The low setting is a good starting place to 

avoid overheating or damage to the workpiece.

REMOVING PAINT

1. Toggle the two speed switch to the low setting. 

2. Aim the hot air nozzle towards the painted surface, leaving about 1 inch of space between the nozzle and 

the surface. It will take approximately 15 seconds for the tool to reach its full heat potential.

3. Move the heat gun slowly and evenly from side to side to evenly distribute the heat. 

WARNING:

 Do not hold the heat gun over one spot; be sure to move the tool from side to side to 

evenly distribute the heat. Keep your hands away from the nozzle while scraping the paint. If your 

hand gets too close to the nozzle, you may get burnt. Wear heat-resistant gloves to prevent burns.

4. When the paint begins to soften and blister, you can begin scraping the paint off using a flat edge tool with 

smooth, even strokes. If you wait too long to scrape the paint, it will cool and re-harden. Clean your scraper 

often to create clean paint removal. Test the high setting if this method does not work.

NOTE: 


• It is best to use a smooth, downward scraping motion to prevent as much damage to the surface as pos-

sible.


• Some paints will become tougher to strip with prolonged heating. Be sure to try different heating times to 

develop the best method of paint removal for your specific job.


• This tool is designed to remove oil and latex based paints.


• This too will NOT remove stains or primers that are applied to wood.


• Protect surfaces that you do not want to remove paint from. For example, if you are stripping the paint 

from a door, use a nonflammable material to shield the door frame to prevent stripping the paint from it. 

WARNING:

 Excessive heat may crack glass. DO NOT concentrate heat towards any type of glass 

surface. If you are stripping paint from a surface that is near glass, use the glass protection noz-

zle. For example, if you are stripping a window pane, the glass protection nozzle must be used.

Low

High

OFF

Fig. 1

10

Summary of Contents for HG1022

Page 1: ...tention to the rules for safe operation warnings and cautions If you use your tool properly and for its intended purpose you will enjoy years of safe reliable service IMPORTANT MODEL HG1022 DUAL TEMPE...

Page 2: ...Assembly Adjustments 9 Operation 10 Maintenance 11 Troubleshooting Guide 12 Exploded View Parts List 13 Warranty Statement 15 SPECIFICATIONS Model Number HG1022 Motor 120V 60 Hz Motor Speed 3500 RPM C...

Page 3: ...cover all possible conditions and situations that may occur WEN reserves the right to change this product and specifications at any time without prior notice Keep this manual available to all users du...

Page 4: ...ic shock 2 Avoid body contact with earthed or grounded surfaces such as pipes radiators ranges and refrigera tors There is an increased risk of electric shock if your body is earthed or grounded 3 Do...

Page 5: ...must be repaired 3 Disconnect the plug from the power source and or the battery pack from the power tool before making any adjustments changing accessories or storing power tools Such preventive safet...

Page 6: ...OK into the hot air nozzle during or directly after operation 9 NEVER BLOCK the inlet grill slits on the side of the gun or obstruct the air flow of the unit while the gun is on 10 DO NOT STORE the to...

Page 7: ...ft 50 ft 100 ft 150 ft 6 3A 18 gauge 16 gauge 14 gauge 12 gauge 12 5A 14 gauge 12 gauge Not Recommended GUIDELINES AND RECOMMENDATIONS FOR EXTENSION CORDS ELECTRICAL INFORMATION insulation IMPORTANT S...

Page 8: ...ng until everything is removed TOOL PURPOSE This heat gun is designed to strip paints and varnishes thaw frozen pipes and soften adhesives for easy removal of linoleum and floor tile as well as sticke...

Page 9: ...s or other enclosures such as insulation Only thaw pipes that are fully exposed DO NOT thaw PVC piping WARNING Wear a respiratory mask to prevent inhaling toxic or dangerous fumes Wear safety goggles...

Page 10: ...heat gun over one spot be sure to move the tool from side to side to evenly distribute the heat Keep your hands away from the nozzle while scraping the paint If your hand gets too close to the nozzle...

Page 11: ...WEN replacement parts Use of other parts may be hazardous or induce product failure CAUTION Most plastics are susceptible to damage from various types of commercial solvents Do not use any solvents o...

Page 12: ...tch Stop using the tool and contact customer service at 800 232 1195 M F 8 5 CST for assistance Defective Motor Stop using the tool and contact customer service at 800 232 1195 M F 8 5 CST for assista...

Page 13: ...EXPLODED VIEW PARTS LIST 13 1 2 3 4 5 6 7 10 11 19 20 21 22 23 24 25 26 27 28 12 13 14 15 16 17 18 9 8...

Page 14: ...010 LED 1 11 HG1022 011 Air Duct Ring 1 12 HG1022 012 Screw 3 13 HG1022 013 Fan 1 14 HG1022 014 Screw 2 15 HG1022 015 Screw 2 16 HG1022 016 Motor Support 1 17 HG1022 017 Motor 1 18 HG1022 018 Diode 1...

Page 15: ...purchaser The product must be shipped in its original container or an equivalent properly packed to withstand the hazards of shipment The product must be fully insured with a copy of the warranty car...

Page 16: ...THANKS FOR REMEMBERING...

Reviews: