background image


20 

720x576_50i 

720x480_60i: 

720x480_60i 

720x576_50i 

720x576_50i 


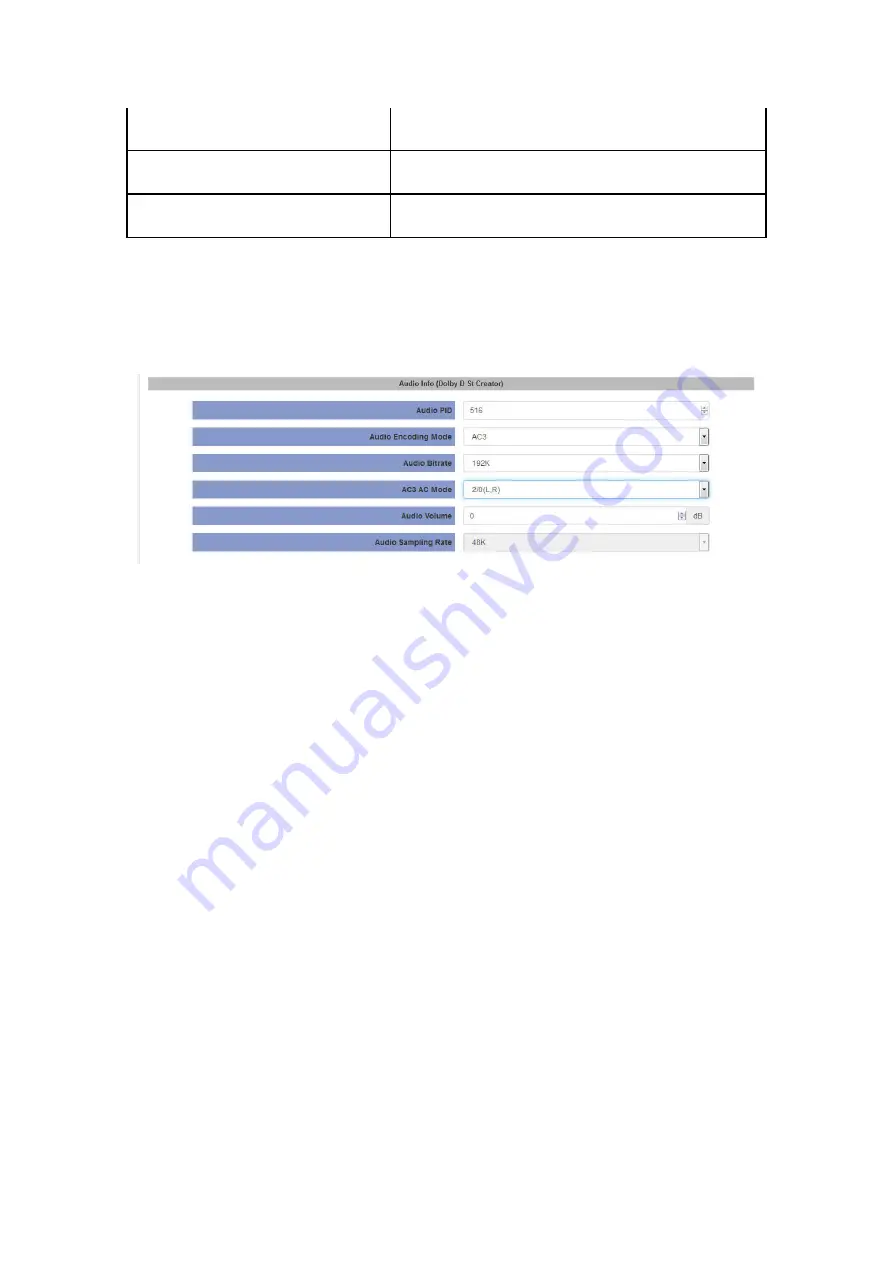
Audio Info(Dolby D St Creator)   


Pic-3.2.2.4 


Audio Source: 

Audio HDMI/MIC


Audio PID: 

ranging from 32-8190


Audio Encoding Mode: 

AC3/MPEG1 Layer2/MPEG2 AAC-LC/MPEG4 AAC-LC


Audio Bitrate:   

User can choose certain bitrate 


AC3 AC mode: 

1+1(L,R) 


Audio Volume: 

-12 - 12


Audio Sampling Rate: 

48K is fixed output audio sampling rate


Click Apply button to make the new configuration into effect when finishing the setting. 

Click Start button to make the encoding into effect; 


Live Status 

Summary of Contents for NB100U

Page 1: ...NB100U Portable Encoder User Manual V1 0...

Page 2: ...duction to product installation product characteristics and product settings etc It is highly suggested users to go through this document before actually operating the device Intended Readers This man...

Page 3: ...that accompanies this product This symbol indicates important operating or maintenance instructions Please use the cable of good quality and make sure the connector is in good condition Please do not...

Page 4: ...by implication estoppel or otherwise any license or right under any copyright or patent whether or not the use of any information in this document employs an invention claimed in any existing or late...

Page 5: ...y the instructions that are included in the operating instructions Refer all servicing and installation to qualified service personnel only Electric shock can cause personal injury or even death Avoid...

Page 6: ...nt where they exit from the apparatus Only use attachments accessories specified by the manufacturer Use only with the cart stand tripod bracket or table specified by the manufacturer or sold with the...

Page 7: ...xpose this apparatus to rain or moisture The apparatus shall not be exposed to dripping or splashing and no objects filled with liquids such as vases shall be placed on the apparatus Revision History...

Page 8: ...d Connection 10 2 4 1 Power Connection 10 2 4 2 Connection Setup for Web Management 10 2 4 3 Connection Setup for HDMI CVBS SDI signal input 11 3 OPERATION GUIDE 11 3 1 Front Panel Operation 11 3 1 1...

Page 9: ...and local playback and recording 1 2 Front Panel Rear Panel Overview Front Panel 2 1 1 Power status indicator This LED light is turned on when the StreamCast is power on Signal Lock status indicator...

Page 10: ...INSTALLATION 2 1 Installation Procedure 2 2 Preparation before Installation Before installation the installation personnel should read through and confirm the followings Preparation before Installatio...

Page 11: ...x1 User Guide x1 2 4 Equipment Wiring and Connection To avoid electric shock and damage to the equipment before setting up the wiring connection please power off the equipment and all other connected...

Page 12: ...t Connect the Power port and the unit is powered up and starts the initialization The LCD screen lights up and displays information as below The initialization takes about 20 seconds to complete and t...

Page 13: ...34 OK Back Playback Playback Mode Sequence Clrcle Single Clrcle List Clrcle Random Playback IP x x x x OK Playback Port 1234 OK Back Recorded Recording Input Auto HDMI YPbPr SDI AV Back System Network...

Page 14: ...106 Please modify the management server s IP address or NB100u IP address to be in the same IP section To ensure that the equipment is smoothly connected to the network 3 Open any web browser e g Mozi...

Page 15: ...ing Click to enter desire working mode PIC 3 2 2 Live Mode to encode a live channel via HDMI SDI CVBS input and IP output Playback Mode to play the recorded TS from external USB disk Recording Mode to...

Page 16: ...ng User can view RTSP URL Ethernet RTSP URL Wireless 15 Pic 3 2 2 1 This interface provides the main parameters of encoding and broadcasting Please check and set according to the following items Auto...

Page 17: ...L Ethernet RTP Setting User can set RTP IP Port parameter RTMP Setting User can set RTMP FMS URL Stream Port Encryt parameter 16 Pic 3 2 2 1 2 HLS URL Ethernet parameter Pic 3 2 2 1 3 parameter Pic 3...

Page 18: ...streaming please click the chars in blue It will reflect to the new page to set the detailed parameters for It contains three parts of configuration Stream info Video info and Audio info Dolby D Pic...

Page 19: ...Baseline Video Level Automatic 4 2 18 Empty BitRate there may be a PCR error if set to 0 Pic 3 2 2 3 3 2 2 3 base on the source you selected in basic setting page ranging from 16 8190 Exclude 8187 Au...

Page 20: ...t will be remained otherwise the output resolution will changed to Auto automatically input signal preset output signal 1920x1080_30p 1920x1080_30p 1280x720_30p 720x480_60i 1920x1080_60i 1920x1080_30p...

Page 21: ...0 Audio Encoding Mode AC3 MPEG1 Layer2 MPEG2 AAC LC MPEG4 AAC LC Audio Bitrate User can choose certain bitrate AC3 AC mode 1 1 L R Audio Volume 12 12 Audio Sampling Rate 48K is fixed output audio samp...

Page 22: ...e real time status of encoding and streaming 3 2 4 Playback mode Basic Setting 1 Plug one USB disk to USB port on the front panel of the NB100Uto play the TS from the disk 2 Click the PLAYBACK icon to...

Page 23: ...lan Playback Status This page displays the status of Playback 22 The Playback interface will save and display the TS list from memory of the last USB disk If to add new Play list The default play list...

Page 24: ...d or the there is not enough space on the disk it is not able to start the recording The minimum available free space is 10MB The NB100U will overwrite the first file it created when the free space is...

Page 25: ...IP address Subnet Mask Gateway and 24 the Network parameters checking setting Language setup time setup upgrade log and system info checking Pic 3 3 6 1 Pic 3 3 6 1 This page shows status of network r...

Page 26: ...may require up to one minute Pic 3 3 6 3 Wi Fi Hotspot This page shows how to set a Wi Fi Hotspot which enable PC Hand phone or Tablet PC to log in via wireless connection to the device Wi Fi Enable...

Page 27: ...or Internet time Pic 3 3 6 5 Upgrade to upgrade new version software by select a file and click the Arrow button It will take several minutes to finish the upgrading and after that it will automatica...

Page 28: ...6 7 1 Debug User can check the debug info which is usually used for R D Pic 3 3 6 7 2 Configuration User can export configuration including system and service configuration in this tab Pic 3 3 6 7 3 L...

Page 29: ...28 Pic 3 3 6 7 4 System information User can check system info in this tab Pic 3 3 6 7 5...

Reviews: