33
2583070000/00/04.2018
6 Operating the machine
► Always ensure before switching on that the
power cable is in a fault-free condition.
► Switch the machine on (Fig. 3.1,
15
).
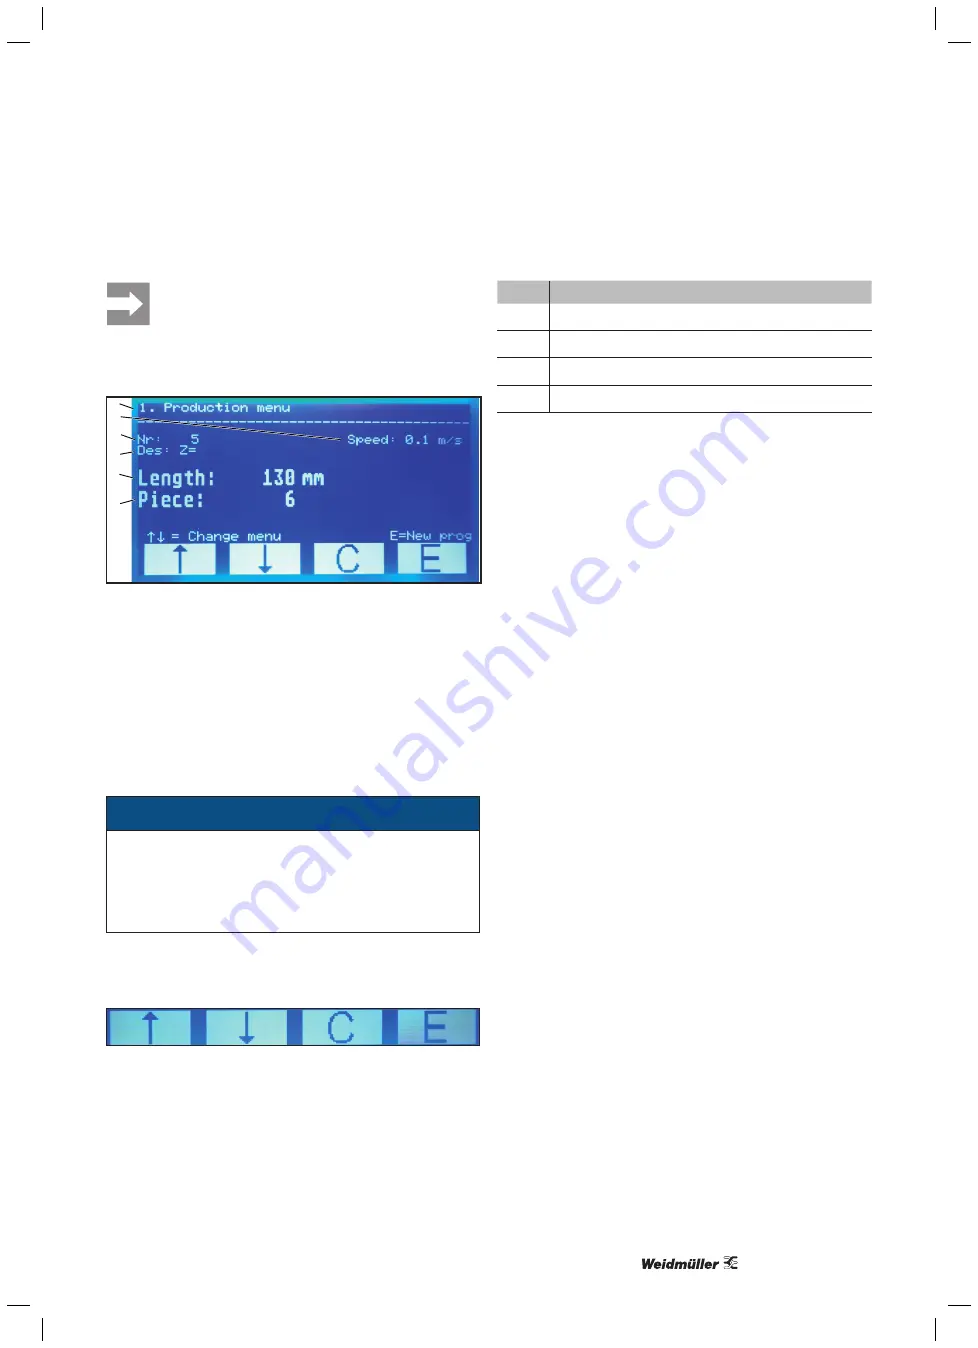
The production menu is displayed on the screen.
1
3
4
2
5
6
Figure 6.1 Display with production menu
The display indicates the current operating condition:
1 Active menu
2 Program number
3 Name
4 Length
5 Piece quantity
6 Cable feed speed
6.1 Using the touch-screen
ATTENTION
The display may become damaged!
The display may be scratched by the use of unsuitable
tools.
► Operate the touch display with the finger or a sili-
cone-tipped stylus.
If the operating menus are displayed on the screen, only
the bottom four fields are touch-sensitive. With this you can
navigate through the program.
Figure 6.2 Touch fields in the operating menus
Button Functions
Select menu (move forwards) or increase value
Select menu (move backwards) or reduce value
C
Exit menu
E
Activate selected menu or set value
► To select an operating menu, press the
arrow buttons
.
► To switch to the selected menu, press
E
.
► Move to the desired point inside a menu using the
arrow
keys
.
► To activate a selected point, press
E
.
► To exit the menu, press
C
.
For the operator, the menus 1-3 are relevant.
Here you can:
Menu 1: Modify the speed
Menu 2: Look up wiring data
Menu 3: Registering as an installer or technician
For the setter, the menus 4-7 are relevant.
Here you can:
Menu 4: Load USB data
Menu 5: Modify program parameters
Menu 6: Modify subdivision of memory
Menu 7: Resetting the daily piece quantity
The remaining menus are only intended for servicing.
6.2 Select program
Every program in normal operation includes the following
settings:
– Program number
– Name
– Length
– Piece quantity
► Select from production menu if not already displayed.
► Press
E
.
► Use the arrow keys to set the number of the program
you wish to use.
► Press
E
to activate the program.
► Proceed as described in section 6.4.
Summary of Contents for 25800100000
Page 2: ......
Page 44: ...2583070000 00 04 2018 44 Elektroanschlussplan Electrical connection layout...
Page 45: ...45 2583070000 00 04 2018...
Page 46: ...2583070000 00 04 2018 46...


