

6
OPERATING INSTRUCTIONS
Use only a voltage supply as specified on
your unit.
SELECT AN EXTENSION CORD
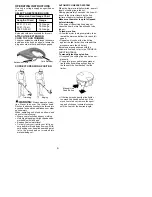
Extension Cord Gauge Chart
Length of Cord
Gauge
25 Ft. (7.5 m)
50 Ft. (15 m)
100 Ft. (30 m)
18 Gauge
16 Gauge
16 Gauge
Extension cords are available for this unit.
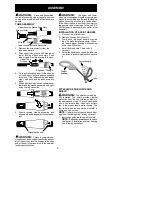
ATTACH THE EXTENSION
CORD TO YOUR TRIMMER
Loop your extension cord through the handle
and around the hook as shown. Insure the
plug and cord are firmly and fully engaged.
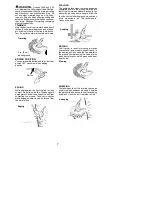
CORRECT OPERATING POSITION
Trimming
Edging
WARNING:
Always wear eye protec-
tion. Never lean over the trimmer head.
Rocks or debris can ricochet or be thrown into
eyes and face and cause blindness or other
serious injury.
When operating unit, stand as shown and
check for the following:
•
Wear eye protection and heavy clothing.
•
Hold trigger handle with right hand and as-
sist handle with left hand.
•
Keep unit below waist level.
•
Cut only from your right to your left to en-
sure debris is thrown away from you. With-
out bending over, keep line near and paral-
lel to the ground and not crowded into
material being cut.
Cord Retainer
Extension Cord
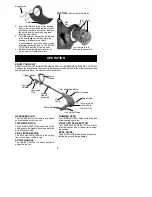
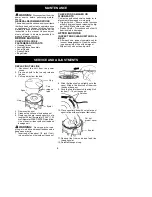
AUTOMATIC LINE FEED SYSTEM
When the trimmer is initially started, a small
length of cutting line is fed out.
After approximately 5 seconds, the line will
be cut to the correct length by the line
limiter as the motor reaches full speed.
Make sure the motor is up to full speed
before trimming.
If the noise of the cutting line being cut
cannot be heard, more line will need to be
fed out.
To feed more line:
•
Allow the motor to stop completely; then,
restart the motor and allow it to reach full
speed.
•
Repeat until you hear the line hitting
against the line limiter (do not repeat this
procedure more than 6 times).
If problems are experienced with the
automatic line feed, refer to the TROUBLE-
SHOOTING TABLE.
To manually feed the nylon line:
•
If required, the cutting line can be fed out
manually.
•
To operate, press and release manual
line feed button while gently pulling on
the line until the line reaches the line
limiter.
•
If the line extends past the line limiter,
too much line has been fed out. If too
much line is fed out, remove the spool
cap and click spool counterclockwise
until the line is at the desired length.
Manual Line
Feed Button


