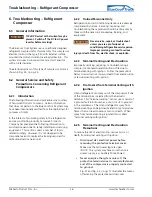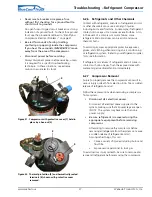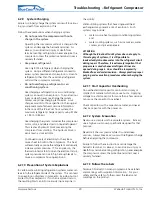
Compressor Replacement and System Service
www.webasto.us
37
Webasto Product N.A., Inc.
™
1. Evacuate the system to 29 inches vacuum. Break
vacuum with refrigerant to be used for final charging
of system and vapor charge to 35-50 pounds gauge
pressure. Leave vapor charge in system for a
minimum of five minutes. Reduce pressure to 0
gauge pressure.
2. Repeat step 1.
3. Evacuate system to 29 inches vacuum. Charge
system with the specified kind and quantity of
refrigerant.
Never use a compressor to evacuate a
system. Instead, use a high vacuum
pump specifically designed for that
purpose.
Never start the compressor while it is under deep
vacuum. Always break a vacuum with refrigerant charge
before energizing the compressor.
Failure to follow these instructions can damage the
hermetic terminal and may result in terminal venting. As
always, to reduce the risk of serious injury or death from
fire due to terminal venting, never energize the
compressor unless the protective terminal cover is
securely fastened.
D. Charge the System and Check the Pressure
Drop
Charge the system and place in operation. Follow the
safety precautions outlined in “System Charging” on
page 29. Immediately after startup, check the pressure
drop across the suction line filter-drier. This will serve
two purposes:
•
Verify that the drier selection was correct; that is,
large enough.
•
Serve as a base point to which subsequent
pressure checks can be compared.
Because the permissible pressure drop across the drier is
relatively small, it is suggested that a differential pressure
gauge be used for the measurement.
E. Measure the Pressure Drop
After the system has been operating for an hour or so,
measure the pressure drop across the suction line filter-
drier.
In the case of Compressor Housing Contamination, little
change should be noted. The pressure drop will, in most
instances, be below that tolerable for a permanent
installation as described in “Install Replacement
Compressor and Components” on page 36.
On the other hand, where Systems Contamination
occurred, an increased pressure drop will be measured.
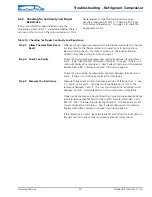
Change the suction filter-drier
and
the liquid line filter-
drier whenever the pressure drop approached or exceeds
9 psi allowed for temporary operation during cleanup.
Keep changing both the suction and liquid line filter-
driers until the pressure drop stabilizes at or below 2 psi
for permanent operations in a system (see “Install
Replacement Compressor and Components” on
page 36). At this point, it is the service person’s option as
to whether to leave the suction drier in the system or
remove it from operation.
If the system is to be opened to permit the permanent
removal of the suction filter-drier then the liquid line
filter-drier should be changed once more.
F.
Test for Acidity if Multiple Motor Failures
Have Occurred
If the system has suffered multiple motor failures, it is
advisable that the oil of the replacement be tested after
Section E and judged acid free before the system is
considered satisfactorily cleaned.
An oil sample may be taken from a hermetic system if at
the time the replacement compressor was installed an oil
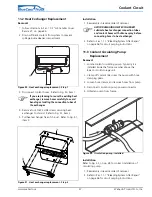
trap is installed in the suction line (see Fig. XXX).
When the trapped oil level appears in the sight glass (less
than an ounce is needed) the oil may be
slowly
transferred to the beaker of the acid test kit as available
from several manufacturers. A reading of less that 0.05
acid number is an indication that the system is free of
acid. A reading of higher than 0.05 means continued
cleaning is required. Return to B2 on page 36.
G. Monitor the System
The above procedure for the cleanup of hermetic systems
after motor failure through the use of suction line filter-
drier will prove satisfactory in most instances
provided
the system is monitored and kept clean by repeated drier
changes, if such are needed. The failure to follow these
minimum cleanup recommendations
will result in an
excessive risk of repeat motor failure.
WARNING


