4
Installation Procedure
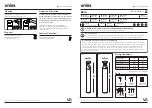
Installation – Pole
1) Switch off mains electrical supply.
2) Check that rating shown on luminaire label conforms
with mains electrical supply.
3) Feed mains cable
C
into column
D
, while setting
bracket/luminaire assembly in position. Tighten
screws
E
.
4) Trim mains cable
C
to the desired length and con-
nect the leads to their respective terminals at the
base of the pole (L = Phase, N = Neutral,
= Earthing)
Installation – Wall bracket
1) Switch off mains electrical supply.
2) Check that rating shown on luminaire label conforms
with mains electrical supply.
3) Access mounting
ƃ
ange
J
by loosening screws
K
.
4) Determine positions for
Ƃ
xing screws
L
. Ensure
arrow mark
R
on
ƃ
ange
J
aims upwards. Drill rele-
vant holes and insert wall plugs
M
.
Warning:
Ensure not to damage any electric cable,
water pipe or other devices while drilling holes.
5) Feed mains supply cable
N
(and second cable for
through wiring, if required) through packing ring(s)
O
, while setting and securing mounting
ƃ
ange
J
in position. The pre-installed packing ring(s)
O
are
suitable for cable diameters 7 to 9.5 mm. For larger
cable diameters (9.5 to 12 mm) use the auxiliary
packing ring(s). Tighten pressure screws
S
.
To secure mounting
ƃ
ange
J
, insert screws
L
, and
tighten.
6) Connect mains supply cable
N
to the respective
terminals in terminal connectors
P
(L = Phase,
N = Neutral, = Earthing)
7) Position luminaire/wall bracket
Q
by attaching
to mounting
ƃ
ange
J
and secure in position by
tightening screws
K
.


