background image

6

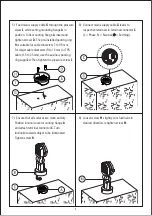
6)  Connect mains supply cable 

G

 leads to 

respective terminals in terminal connector 

C


(L = Phase, N = Neutral,   = Earthing).

8) Loosen screw 

M

 slightly. Aim luminaire in 

desired direction, retighten screw 

M

.

I

Tighten screw


B

luminaire towards object to be illuminated.


and attach terminal connector


C

. Turn


Position luminaire over mounting


ƃ

ange


A


Ensure that all surfaces are clean and dry.


7)

ring supplied. Then tighten the


 pressure screw


I

.

cable (1.5 to 2.5mm), use the


 auxiliary packing 

For larger cable diameters (9 to 12 mm) or TPS 

H


is suitable for cable diameters 7 to 9.5 mm.


tighten screws


D

. The pre-installed packing ring


position. To


Ƃ

x mounting


ƃ

ange


A

, insert and


screw


I

, while setting mounting


ƃ

ange


A


in


Feed mains supply cable


G


through the pressure


5)

Summary of Contents for FLC121

Page 1: ...ning Ensure that all required surge protection measures are in place and activated prior to luminaire installation Also disconnect luminaires before operating high power devices such as for example el...

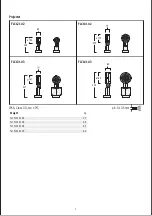
Page 2: ...1 Projector 60 300 105 FLC121 2 FLC131 2 FLC141 3 80 180 430 Weight kg for FLC121 2 1 7 for FLC131 2 2 5 for FLC141 3 4 4 6 5 10 5 mm 407 for FLC131 3 3 7 FLC131 3 IP66 Class I II ta 40 C...

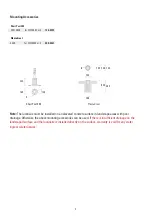
Page 3: ...02 8 108 350 400 Planted root ingress related issues landscaped surface and the luminaire is installed directly on the surface warranty is void for any water drainage Otherwise the above mounting acce...

Page 4: ...cial maintenance work is required Do not use high pressure cleaners In case of component failure due to abnormal circumstances or at end of life replacement must be carried out by a suitably quali ed...

Page 5: ...lling and connecting the luminaire Notice If the luminaire is modi ed by anybody other than the original manufacturer then the warranty will no longer be valid and shall become the full respon sibilit...

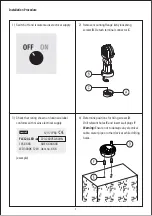
Page 6: ...Drill relevant holes E and insert wall plugs F Warning Ensure not to damage any electrical cable water pipe or other devices while drilling holes 2 Remove mounting ange A by loosening screws B Detach...

Page 7: ...inal connector C Turn Position luminaire over mounting ange A Ensure that all surfaces are clean and dry 7 ring supplied Then tighten the pressure screw I cable 1 5 to 2 5mm use the auxiliary packing...

Page 8: ...42 0035 info usa we ef com www we ef com WE EF LEUCHTEN Germany Tel 49 5194 909 0 Fax 49 5194 909 299 info germany we ef com WE EF LUMIERE France Tel 33 4 74 99 14 44 Fax 33 4 74 99 14 40 info france...

Reviews: