Problem
Possible Cause
Solution
Heating Indicator
is on, but floors
do not feel warm
Setpoint too low to feel
warm to the touch
Increase the setpoint
Faulty wiring
Have the sensor and power lead wiring checked by a certified
electrician
Heating Indicator
does not follow
thermostat
heating
Faulty wiring
Have the communication wiring checked by a certified electrician
Lost connection
(Wireless Indicator blinking)
The wireless signal from the ConnectPlus is getting blocked or
interfered with
Power Indicator
is off
Power off at the breaker
Check the breaker or fuse in the electrical panel supplying power to
the relay
Faulty Wiring
Have the power supply wiring checked by a certified electrician
SunTouch warrants this control (the product) to be free from defect in material and workmanship for a period of (3) years from the date of original purchase
from authorized dealers. During this period, SunTouch will replace the product or refund the original cost of the product at SunTouch’s option, without charge,
if the product is proven defective in normal use. Please return the control to your distributor to begin the warranty process.
This limited warranty does not cover shipping costs. Nor does it cover a product subjected to misuse or accidental damage. This warranty does not cover the
cost of installation, diagnosis, removal or reinstallation, or any material costs or loss of use.
This limited warranty is in lieu of all other warranties, obligations, or liabilities expressed or implied by the company. In no event shall SunTouch be liable for
consequential or incidental damages resulting from installation of this product. Some states or provinces do not allow limitations on how long an implied warranty
lasts, or the exclusion or limitation of incidental or consequential damages, so the above exclusions or limitations may not apply to you. This warranty gives you
specific legal rights and you may also have other rights that vary from state to state.
It is strongly recommended that a qualified, licensed electrician install the heating cables and related electrical
components. If problems with the system arise, please consult the troubleshooting guide below.
Troubleshooting Guide
Limited 3 Year Warranty
Operation
Any electrical troubleshooting work should be performed with the power removed from the circuit, unless
otherwise noted.
Power Up
• Switch on the circuit power supply at the breaker
• The Power Indicator will illuminate
Heating Operation
The R4 Relay provides additional capacity for spaces
that are larger than a SunStat
®
ConnectPlus thermostat
can control. The R4 Relay energizes the connected mat
or cable any time the thermostat determines that heat
is required. When the thermostat signals the relay to
operate, the Heating Indicator is illuminated.
GFCI Testing and GFCI Light Operation
• Press the TEST button on the GFCI monthly to verify
that it is operational. The GFCI RESET light will flash
red. To resume normal operation, press the RESET
button.
• If pressing TEST does not display a flashing red GFCI
RESET light, protection is lost, and the unit will need
replacement.
Make sure the mortar has had time to fully cure before operating the system for more than a brief test.
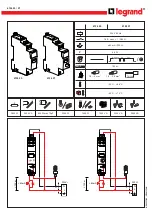
• Top Icon: Power Indicator is on when power
is supplied to the R4 Relay
• Middle Icon: Heating Indicator is on when
the R4 Relay is heating
• Bottom Icon: Wireless Indicator
- On when paired with ConnectPlus
- Blinking when paired connection is lost
• If the GFCI RESET light continues to flash after pressing
the RESET button, protection is lost, and the unit will need
replacement.
• If the GFCI trips during normal operation, press the RESET
button to resume operation. If it trips again, the floor heating
system should be inspected and tested by a qualified
electrician.
• If the GFCI TEST light stays on solid, a welded relay has
occurred, and the unit will need replacement.
Power Off
• Suspend R4 Relay operation by turning off the connected
or paired ConnectPlus
Wireless Pairing
• Put the ConnectPlus into pairing mode: Menu > Settings
> Paired Devices > Pair Device
• Press and hold RESET button on the R4 Relay for 3 seconds
• To unpair the R4 Relay and reboot, press and hold the
RESET button on the R4 Relay for 10 seconds
IOM-ST-R4 Relay 2245
EDP# 81021054
© 2022 Watts
USA:
T: (888) 432-8932 • SunTouch.com
Canada:
T: (888) 208-8927
Latin America:
T: (52) 55-4122-0138 • SunTouch.com


