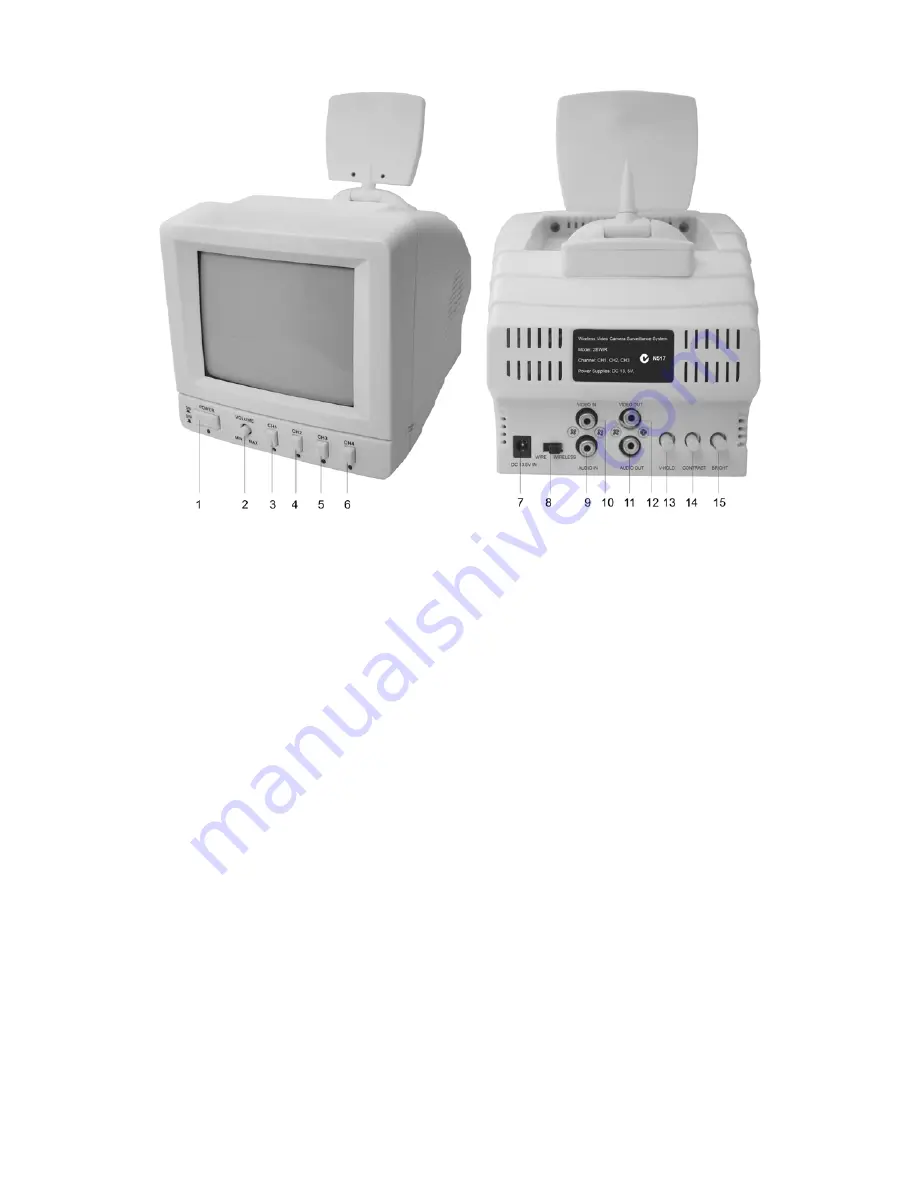
3
Operation
1.
Power Switch
Use this button to turn the unit on and off.
2.
Volume Adjustment
Use this dial to adjust the audio volume.
3.
Channel 1 Button
Depress to view the scene on Channel 1 camera
4.
Channel 2 Button
Depress to view the scene on Channel 2 camera.
5.
Channel 3 Button
Depress to view the scene on Channel 3 camera
“Automatic Camera Switching” is available, simply press both channel’s
buttons and the monitor will switch channels every 3 seconds.
6.
Channel 4 Button
Not Used
7.
Power Connection
Connect 13.5V power supply to operate the monitor.
8.
Reception Selection
Set to Wireless Only.
9.
Audio
In
Not
Used
10.
Video
In
Not
Used
11. Audio Output Socket
Connect to the audio part of your AV cable from your TV / VCR (Optional).
12. Video Output Socket
Connect the video part of your AV cable, from your TV / VCR (Optional).
13. Vertical Hold Adjustment
Use this dial to adjust the vertical hold of the picture if necessary i.e. to stop
your picture scrolling.
14.
Contrast
Adjustment
Use
this
dial
to adjust the contrast of the picture.
15. Brightness Adjustment
Use this dial to adjust the brightness of the picture.
1 A


