background image

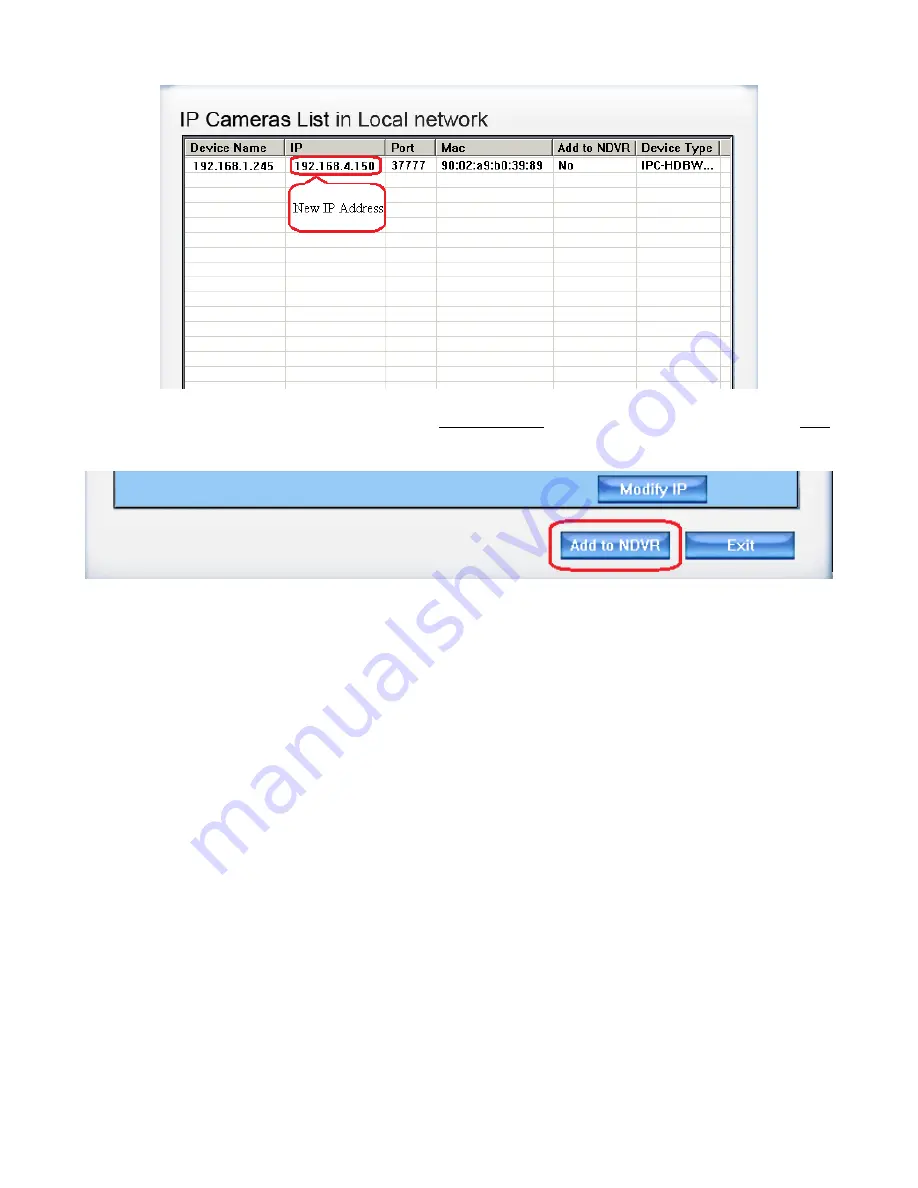
Next, add it to the DVR software by clicking the Add to NDVR button at the bottom then click the Exit
button. The IP Camera Device List should now have your connected camera.

**Note** If your camera is not registered and you purchased it from Watcher Products, please contact 
our Technical Support for camera registration.

Watcherproducts.com          ♦          Watcher Products          ♦          877-289-2824          13

Summary of Contents for XL Series

Page 1: ...IP Camera Installation and Setup Guide XL Series DVR NVR Models Watcherproducts com Watcher Products 877 289 2824 1...

Page 2: ...Watcherproducts com Watcher Products 877 289 2824 2...

Page 3: ...Watcherproducts com Watcher Products 877 289 2824 3...

Page 4: ...have one uplink so these would be better suited for an endpoint that is not connecting to any other switches It would also be a great idea to get a full gigabit 16 port switch each port is gigabit sp...

Page 5: ...before setting up cameras Close the DVR software and in the bottom right hand corner find the Networking icon and right click on it and go to Open Network and Sharing Center In upper left hand corner...

Page 6: ...nection Status window Click on the Properties button on the bottom left This will bring up the Local Area Connection Properties Double click the Internet Protocol Version 4 TCP IPv4 Watcherproducts co...

Page 7: ...4 100 and no Default Gateway is needed The DNS server addresses are not used with the camera network Make sure that this address does not conflict with any other addresses on the store network Once do...

Page 8: ...ons click on the ADD DEL IPC Step 2 This will bring up the IP Camera Device List which will be empty for your first camera From here you want to click on the IPC Search button in the lower right Note...

Page 9: ...Series For third party cameras you will have to use the ONVIF_V2 3 selection IMPORTANT Third Party cameras are not registered by Watcher Products and will require a 50 registration fee per camera to...

Page 10: ...ce the camera has been found you will see it in the list with it s default IP address Single click to select the camera the background will turn blue for that camera across the table row Step 4 Now it...

Page 11: ...192 by double clicking it The background will turn blue and you can begin typing the IP address of the camera Whenever you hit period the selection will automatically change to the next set of number...

Page 12: ...orrect parameters have been entered in each field click the Modify IP button After a short delay the camera should be listed in the IP Cameras List with the new IP address Click the Update IP List but...

Page 13: ...en click the Exit button The IP Camera Device List should now have your connected camera Note If your camera is not registered and you purchased it from Watcher Products please contact our Technical S...

Page 14: ...To name your camera from the IP Camera Device List select the camera with a single click the background will turn blue and hit the Mod Cam button below the list and to the left Change the Server Name...

Page 15: ...d Login Pass for the cameras They need this password to be left on default to connect to the software Now in the IP Camera Device List the camera should have the camera name in the Device Name column...

Page 16: ...Watcherproducts com Watcher Products 877 289 2824 16...

Page 17: ...e recording schedule in Camera Setup To get to Camera Setup click on the Setup button then the Camera Setup button Then under Group Setup turn the corresponding camera on in the schedule It will turn...

Page 18: ...dingly depending on the camera type 2 Handling Motion Alarm This turns motion detection on for the camera Check this tick box to enable motion detection 3 Motion Detection Area Buttons These buttons w...

Page 19: ...settings click the Save button in the bottom right and then Exit Your camera should now be detecting and recording motion in the DVR This is apparent by the little running man icon in the upper right...

Reviews: