background image


16   

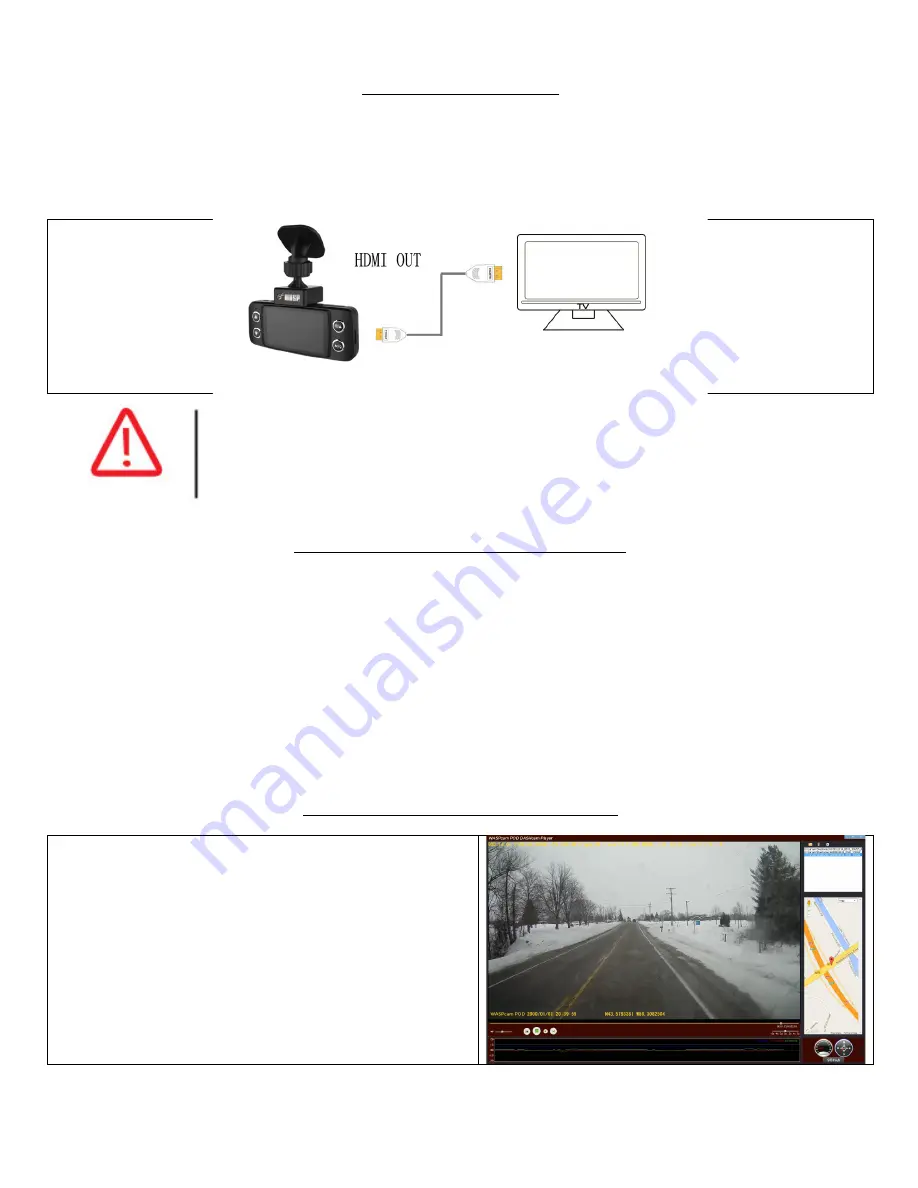
Video   Output   


Connect   your   included   HDMI   cable   to   the   HDMI   Out   port   on   the   POD   DVR   and   then   connect   
the   other   end   to   a   TV   that   supports   video   output.      Or   Plug   AV   cable   (optional)   or   HDMI   cable   
to   the   POD   DVR   and   connect   the   other   end   to   audio   /   video   equipment.   


Please   adjust   PAL/NTSC   in   TV   mode   according   to   the   local   format   of   video   
output.   The   AV   OUT   cable   is   optional.   


Software   Upgrade   Info   


Please   go   to   our   WASPcam   website   www.waspcam.com/POD   to   download   the   latest   firmware   
for   the   9401   POD   DVR:   

1.


Unzip   the   firmware   (*.bin)   to   the   root   menu   of   the   SD   Card   

2.


Boot   the   POD   DVR   after   inserting   the   SD   Card   (keep   the   POD   DVR   power   on)   

3.


The   display   will   light   up   automatically   about   20   seconds   after   upgrade   is   completed   

4.


Re-­‐format   the   SD   Card   after   upgrading   to   avoid   it   re-­‐running   the   upgrade   next   time   you   
use   the   POD   DVR   


POD   DVR   9401   Player   


Download   the   9401   POD   DVR   Player      

at   www.waspcam.com/POD


When   you   use   the   POD   DVR   player,   make   sure   
that   you   also   use   GPS   module   at   same   time   


When   the   GPS   module   receives   a   signal,   the   GPS   

tracking   will   work   properly   


Summary of Contents for 9401

Page 1: ......

Page 2: ...us 5 Button Functions 6 Video Display Screen 7 Menu Icons 8 9 Menu Functions 10 Motion Detection Mode 10 Plate Number Stamp 10 Parking Monitor 10 Driver Fatigue Warning 11 Speed Warning 11 Parking Gua...

Page 3: ...to malfunction and will void your warranty DO NOT connect or disconnect the power supply multiple times or it may also cause the product to malfunction DO NOT use the power supply in a humid environme...

Page 4: ...interface SOS emergency file lock 4 Memory Card Slot Insert SD card for video recording 13 HDMI Port Connects external video equipment 5 Down Button Select Down 14 Mode Button Function shortcut key 6...

Page 5: ...on cup bracket to the WASPcam DVR 2 Clean the mounting area well remove the 3M sticker backing and place the DVR in the desired location 3 Connect the OBD power supply 4 Turn OBD power switch on 5 Set...

Page 6: ...16 Date Stamp 3 Wide Dynamic Range 10 Parking Monitor 2FPS 17 Driver Fatigue Warning 4 Auto White Balance 11 Save Emergency File 18 Speed Warning 5 Sound Recording On 12 SD Card Normal Condition 19 Mo...

Page 7: ...er right corner of the screen indicating that video recording is in progress If the POD DVR is not on after you start the engine please check the power supply connection If the screen warning appears...

Page 8: ...s the Up Arrow Highlights which option you wish to modify While the camera is on standby in the menu screen Enter Button 18 on Page 2 DOWN Arrow Button 5 on Page 2 Operation Function Status Press the...

Page 9: ...cording automatically if there is a MicroSD card inserted when powered on otherwise it enter standby mode Standby Screen Recording Screen If the POD DVR shows memory card error when powered on format...

Page 10: ...d footage Voice Launches voice recording Date Watermark Input date for watermark on recorded footage G sensor Sets gravity sensor sensitivity Parking Monitor Launches Parking Monitor Function sets FPS...

Page 11: ...ay EV Adjust the brightness of the screen White Balance Adjust the ambient light Date Time Current date and time can be set here Button Sounds Turn button beeps ON OFF Language Change the display lang...

Page 12: ...r Menu mode select the Plate Number Stamp and use the UP DOWN arrow buttons to choose the letters and numbers of your vehicle s license plate Press the enter button to confirm each character Click Ok...

Page 13: ...oice will warn you when go over the speed limit you set Can be set at speeds of 40 60 80 100 120 KM H Parking Guard This function requires device to be connected to OBD car charger Enter Menu mode sel...

Page 14: ...detection fault error code number and it eliminates false alarms OBD Information Display 1 Engine Load 2 Coolant Temperature 3 Current Fault Code Number 4 Driving Speed 5 Current Mileage 6 Battery Vol...

Page 15: ...ackets A Voltage V B Engine Speed RPM C Driving Speed KM H D Throttle percentage E Engine Load F Coolant Temperature C G Fuel consumption L H H Average fuel consumption L 100KM I Mileage KM J Total mi...

Page 16: ...nostic verification OFF Supplies power once the car is started This is the normal OBD mode for video ON Continuous power supply mode means the OBD is on whether the car is running or not PLEASE NOTE W...

Page 17: ...no functions Note Each icon will show on the display after turning on screen saver If you turn on the parking monitoring or vibration recording selecting the backlight screen saver will reduce power c...

Page 18: ...waspcam com POD to download the latest firmware for the 9401 POD DVR 1 Unzip the firmware bin to the root menu of the SD Card 2 Boot the POD DVR after inserting the SD Card keep the POD DVR power on...

Page 19: ...ry 300mAh Size 113 L x32 W x45 5 H mm Weight 103g Operating Humidity 20 80 Storage Temperature 20 C 85 C LIABILITY WARNINGS 636 Distributing Inc is not responsible for any vehicle collisions damage or...

Page 20: ...18...

Reviews: