background image

8

TROUBLESHOOTING 

(CONTINUED)

PROBLEM

POSSIBLE CAUSES

Switch is not 

bright

– The power cord is not plugged in.
– The power switch is not on.
– The switch is damaged.
– Loose internal wire.

The heater is 

not working

– The power switch is not on.
– The switch is damaged. 
– Heater damage.
– Loose internal wire. 

WARRANTY – 2 YEARS PARTS AND 1 YEAR 

LABOR (U.S. AND CANADA ONLY)

Waring warrants every new Waring™ Commercial Coffee Warmer 

to be free from defects in materials for a two-year period, and 

workmanship for a period of one year from the date of purchase 

when used with foodstuffs, nonabrasive liquids (other than 

detergents) and nonabrasive semiliquids, providing it has not been 

subject to loads in excess of the indicated rating.
These warranty periods run from the date of installation. Waring 

warrants that the equipment manufactured by it will be commercially 

free of defects in material and workmanship existing at the time of 

manufacture and appearing within the applicable warranty period. 

This warranty does not apply to any equipment, component or part 

that was not existing at the time of purchase or that, in Waring’s 

judgment, has been affected by misuse, neglect, alteration, improper 

installation or operation, improper maintenance or repair, non-

periodic cleaning and descaling, equipment failures related to poor 

water quality, damage or casualty including, but not limited to, 

excessive lime and chlorine. In addition, the warranty does not apply 

to replacement of items subject to normal use, including but not 

limited to user replaceable parts such as seals and gaskets.
Under this warranty, Waring will repair or replace any part that, upon 

our examination, is defective in materials or workmanship, provided 

the product is delivered prepaid to the Waring Service Center at 314 

Ella T. Grasso Ave., Torrington, CT 06790, or any Factory Approved 

Service Center.

Summary of Contents for WCW10

Page 1: ...enjoyment of this product always read the instruction book carefully before using Para su seguridad y para disfrutar plenamente de este producto siempre lea cuidadosamente las instrucciones antes de usarlo Afin que cet appareil vous procure en toute sécurité beaucoup de satisfaction lire attentivement le mode d emploi avant de l utiliser ...

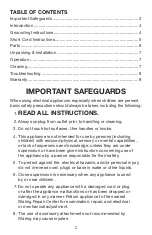
Page 2: ...reduced physical sensory or mental capabilities or lack of experience and knowledge unless they are under supervision or have been given instruction concerning use of the appliance by a person responsible for their safety 5 To protect against fire electrical hazards and or personal injury do not immerse cord plugs or base in water or other liquids 6 Close supervision is necessary when any applianc...

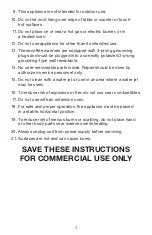
Page 3: ...r serviceable parts inside Repair should be done by authorized service personnel only 15 Do not clean with a water jet or use in an area where a water jet may be used 16 To reduce risk of explosion or fire do not use near combustibles 17 Do not use with an extension cord 18 For safe and proper operation the appliance must be placed in a stable horizontal position 19 To reduce risk of serious burns...

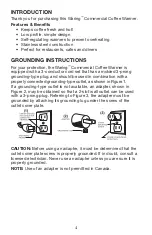
Page 4: ...ould be used in combination with a properly connected grounding type outlet as shown in Figure 1 If a grounding type outlet is not available an adapter shown in Figure 2 may be obtained so that a 2 slot wall outlet can be used with a 3 prong plug Referring to Figure 3 the adapter must be grounded by attaching its grounding lug under the screw of the outlet cover plate CAUTION Before using an adapt...

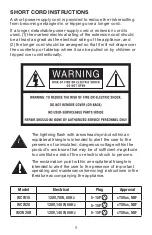
Page 5: ... children or tripped over unintentionally The lightning flash with arrowhead symbol within an equilateral triangle is intended to alert the user to the presence of uninsulated dangerous voltage within the product s enclosure that may be of sufficient magnitude to constitute a risk of fire or electric shock to persons The exclamation point within an equilateral triangle is intended to alert the use...

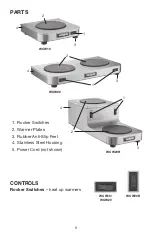
Page 6: ...2 1 2 3 1 2 WCW10 WCW10 WCW20 WCW20R WCW20 WCW20R 3 3 6 PARTS 1 Rocker Switches 2 Warmer Plates 3 Rubber Anti Slip Feet 4 Stainless Steel Housing 5 Power Cord not shown CONTROLS Rocker Switches heat up warmers ...

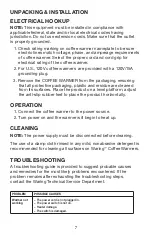
Page 7: ... residue are cleaned from its surfaces Place the product on a level platform adjust the anti slip rubber feet to place the product horizontally OPERATION 1 Connect the coffee warmer to the power source 2 Turn power on and the warmer will begin to heat up CLEANING NOTE The power supply must be disconnected before cleaning The use of a damp cloth rinsed in any mild nonabrasive detergent is recommend...

Page 8: ...t will be commercially free of defects in material and workmanship existing at the time of manufacture and appearing within the applicable warranty period This warranty does not apply to any equipment component or part that was not existing at the time of purchase or that in Waring s judgment has been affected by misuse neglect alteration improper installation or operation improper maintenance or ...

Page 9: ...mpieza 3 No toque las superficies calientes use los mangos asas y los botones perillas 4 Los niños o las personas que carezcan de la experiencia o de los conocimientos necesarios para manipular el aparato o aquellas cuyas capacidades físicas sensoriales o mentales estén limitadas no deben usar el aparato sin la supervisión o la dirección de una persona responsable por su seguridad 5 Para reducir e...

Page 10: ...rato no contiene ninguna pieza que pueda ser reparada cambiada por el usuario Las reparaciones deben ser efectuadas por técnicos autorizados solamente 15 No limpie el aparato a presión con un chorro de agua y no lo use en un lugar donde se use un rociador chorro de agua 16 Para reducir el riesgo de explosión o incendio no lo use cerca de combustibles 17 No use un cable alargador de extensión con e...

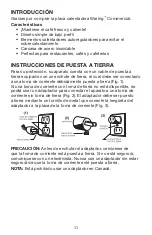
Page 11: ...do a una toma de corriente debidamente puesta a tierra Fig 1 Si una toma de corriente con toma de tierra no está disponible se podrá usar un adaptador para conectar el aparato a una toma de corriente sin toma de tierra Fig 2 El adaptador debe ser puesto a tierra mediante un tornillo de metal que conecte la lengüeta del adaptador a la placa de la toma de corriente Fig 3 PRECAUCIÓN Antes de enchufar...

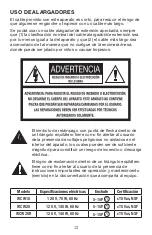
Page 12: ...elámpago con punta de flecha dentro de un triángulo equilátero tiene como fin alertar al usuario de la presencia de voltajes peligrosos no aislados en el interior del aparato los cuales pueden ser de suficiente magnitud para constituir un riesgo de incendio o descarga eléctrica El signo de exclamación dentro de un triángulo equilátero tiene como fin alertar al usuario de la presencia de instruccio...

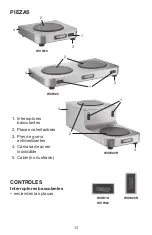
Page 13: ...culantes 2 Placas calentadoras 3 Pies de goma antideslizantes 4 Carcasa de acero inoxidable 5 Cable no ilustrado CONTROLES Interruptores basculantes encienden las placas 4 4 4 1 2 1 2 3 1 2 WCW10 WCW10 WCW20 WCW20R WCW20 WCW20R 3 3 ...

Page 14: ...ierra de 120 V 15 A 3 Retire la unidad de su embalaje cerciorándose de quitar todos los materiales de protección plásticos y residuos de su superficie Coloca la unidad en una superficie plana y ajuste los pies de caucho antideslizantes para nivelarla horizontalmente FUNCIONAMIENTO 1 Enchufe el cable en una toma de corriente 2 Presione el interruptor la s placa s empezará n a calentarse LIMPIEZA IM...

Page 15: ...máxima capacidad La garantía rige a partir de la fecha de instalación Waring garantiza que este equipo fabricado por nosotros estará comercialmente libre de defectos de material y mano de obra existentes en el momento de la fabricación y dentro del período de garantía aplicable Esta garantía no se aplica a ningún equipo componente o pieza que no existiera en el momento de la compra o que a juicio ...

Page 16: ...s surfaces chaudes utiliser les poignées ou les boutons 4 Cet appareil ne devrait pas être utilisé par des enfants ou des personnes atteintes de certains handicaps physiques mentaux ou sensoriels ou qui ne disposent pas des connaissances ou de l expérience nécessaires à moins qu une personne responsable de leur sécurité leur en ait expliqué le fonctionnement ou les encadre 5 Afin de réduire le ris...

Page 17: ...re correctement configurée 14 Cet appareil ne contient aucune pièce pouvant être réparée remplacée par l utilisateur Toute réparation doit être effectuée par un technicien autorisé 15 Ne pas laver l appareil au jet à pression et ne pas l utiliser dans un endroit où un jet pourrait être utilisé 16 Pour réduire les risques d explosion ou d incendie ne pas utiliser à proximité de combustibles 17 Ne p...

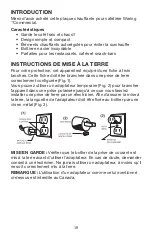
Page 18: ... correctement configurée Fig 1 Vous pouvez utiliser un adaptateur temporaire Fig 2 pour brancher l appareil dans une prise polarisée jusqu à ce que vous fassiez installer une prise de terre par un électricien Afin d assurer la mise à la terre la languette de l adaptateur doit être fixée au boîtier par une vis en métal Fig 3 MISE EN GARDE Vérifier que le boîtier de la prise de courant est mis à la ...

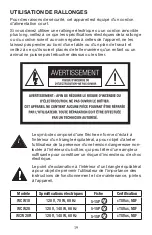
Page 19: ... dessus ou les tirer Le symbole composé d une flèche en forme d éclair à l intérieur d un triangle équilatéral a pour objet d alerter l utilisateur de la présence d une tension dangereuse non isolée à l intérieur du boîtier qui peut être d une ampleur suffisante pour constituer un risque d incendie ou de choc électrique Le point d exclamation à l intérieur d un triangle équilatéral a pour objet de...

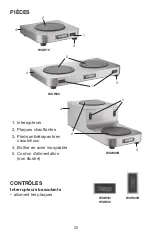
Page 20: ...es chauffantes 3 Pieds antidérapants en caoutchouc 4 Boîtier en acier inoxydable 5 Cordon d alimentation non illustré CONTRÔLES Interrupteurs basculants allument les plaques 4 4 4 1 2 1 2 3 1 2 WCW10 WCW10 WCW20 WCW20R WCW20 WCW20R 3 3 ...

Page 21: ...V 15 A 3 Retirer l appareil de son emballage en veillant à éliminer de sa surface tous les matériaux de protection plastiques et résidus Placer l appareil sur surface plate et régler les pieds en caoutchouc antidérapants pour le mettre à niveau horizontalement FONCTIONNEMENT 1 Brancher le cordon dans une prise de courant 2 Appuyer sur l interrupteur l appareil commencera à chauffer NETTOYAGE IMPOR...

Page 22: ...maximale La garantie est valable à partir de la date d installation Waring garantit que cet appareil fabriqué par nous sera commercialement exempt de tout défaut de matière et de fabrication existant au moment de la fabrication et apparaissant pendant la période de garantie applicable Cette garantie ne s applique pas à tout appareil composant ou pièce qui n existait pas au moment de l achat ou qui...

Page 23: ...23 ...
Page 24: ... 2020 Waring Commercial 314 Ella T Grasso Avenue Torrington CT 06790 www waringcommercialproducts com Printed in China Impreso en China Imprimé en Chine WCW10 WCW20 WCW20R IB 20WC072168 IB 16751 ...

Reviews: