10
890202_b•en•16.11.2011
We reserve the right to carry out improvements
Installation
For flush mounting, the WAREMA Comfort Timer requires rough-
ly the same area as a wall-mounted switch and a deep flush-fit-
ted wall box. The dimensions can be found in figure 6. The con-
trol may only be fitted in interior areas, in dry and easily accessi-
ble locations. Choose a mounting position so that...
• The WAREMA Comfort Timer can be operated ergonomically
at all times
• There are no strong heat sources (e.g. radiators, chimney
walls) in the vicinity.
• Avoid any position where direct sunlight will shine onto the
device as this can affect the legibility of the display.
• Work through the points given below in the order given, not
-
ing the following diagrams:
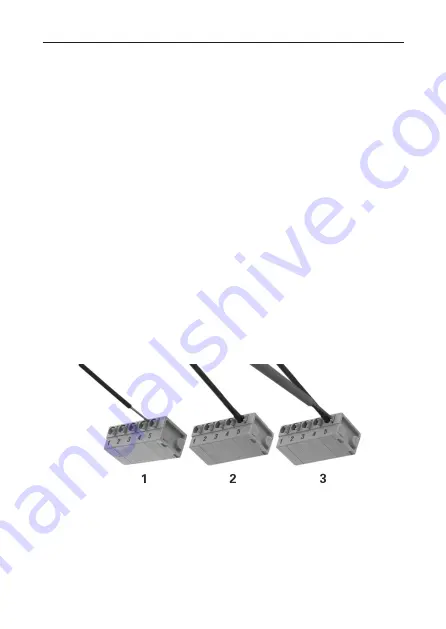
Handling the spring terminals:
Fig. 1 Connecting and disconnecting the line connections
After removing the insulation on the wires, these are pressed into
the terminal (1), until the insulation on the wires enters the termi-
nal and the line is securely held in the terminal (2). To disconnect
the line, the relevant unlock button needs to be pressed in using
a screwdriver as far as it will go, and the line then removed from
the terminal (3).


