background image

3.0  TECHNICAL INFORMATION

2

SEP.SEPCOM_Vertical.--.M.A4.0722.EN    Issue: A4

07.22

16

SEPCOM

®

 Vertical

3.10 Safety devices

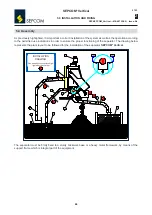
Inspection hatches:

The access to inspections hatches is not necessary during operation of the equipment; their use is meant for 

routine or extraordinary maintenance operations.

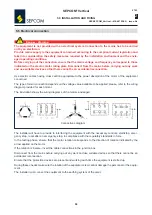
Danger - Warning

Before starting up the machine, it is compulsory closing the inspection hatches by fitting the screws 

provided in their original position to avoid they accidentally open.

Important

Use the special device when opening the inspection hatches. The equipment is provided with the due 

warning signs. 

Summary of Contents for SEPCOM Vertical

Page 1: ...S p A Via Cavour 338 41030 Ponte Motta Cavezzo MO ITALY Manual No SEP SEPCOM_Vertical M A4 0722 EN Issue A4 Latest Update July 2022 ORIGINAL INSTRUCTIONS IN ENGLISH EN ASSEMBLY AND MAIN INSTRUCTIONS F...

Page 2: ...EN ISO 9001 ensures that the entire production process starting from the processing of the order to the technical service after delivery is carried out in a controlled manner that guarantees the quali...

Page 3: ...0 TECHNICAL INFORMATION 11 3 1 General description of equipment 11 3 2 Main components 12 3 3 Operating principle 13 3 4 Permitted use 13 3 5 Improper use not permitted 13 3 6 Noise level 14 3 7 Envir...

Page 4: ...eplacement 38 8 2 Replacing the electric motor 38 8 3 Replacing the screw 40 8 4 Replacing the screw sections 44 8 5 Inspecting the screen 47 8 6 Replacing the mechanical seal of the lower bearings 51...

Page 5: ...er and installer to act on the equipment concerned for which specific technical skills in the sector concerned are necessary electrical mechanical etc The illustrations may differ from the actual stru...

Page 6: ...rtant to comply with and scrupulously follow the information highlighted by the symbols Danger Warning Indicates situations of serious danger which if ignored can be risky for the health and safety of...

Page 7: ...es that it is forbidden to lubricate or adjust moving parts Danger indicates danger of serious injury to limbs if the internal moving parts of the equipment are exposed Before opening inspection or ma...

Page 8: ...e equipment concerned is installed Routine maintenance includes all the actions necessary to keep the equipment in good working conditions to ensure greater operating durability and to keep the safety...

Page 9: ...t the Manufacturer for a new ID plate and replace it The ID plates shown identify the equipment concerned and its main components The plates show the reference necessary for operating safety 1 4 Manuf...

Page 10: ...e F Technical Data A B F C E D IP 55 Ins cl F Batch No Type Year Kg Hz V Rpm A kW cos WAM COD 063001359 REV 04 3 Via Cavour 338 WAM Ponte Motta S p a MO ITALY di Cavezzo 01 Made in China 01 For all te...

Page 11: ...bed in this Manual and in ac cordance with the national legislation in force Likewise the Manufacturer shall not accept any responsibility if the equipment concerned is used improperly by unauthorized...

Page 12: ...quipment during installation use and mainte nance Modifications to the equipment components should not be made for any reason whatsoever without the Manufacturer s permission Carry out all the handlin...

Page 13: ...ly During operations prevent access to the work area by unauthorized persons Remove all obstacles or sources of danger from the work area Climbing walking or seating on the machine placing and or impr...

Page 14: ...astic etc in the environment but carry out waste separation disposal depending on the chemical composition of the various products in compliance with the legislation in force On completion of maintena...

Page 15: ...module consists of a counter pressure diaphragm that compacts the solid material that gets discharged through the special chutes this equipment is provided with The vertical solids liquid screw press...

Page 16: ...re 3 Screen basket 4 Screws 5 Liquid phase discharging hopper 6 Compensator tank 7 Material inlet pipe 8 Overflow 9 Venting air pipe 10 Support feet 11 Motor and gear reducer 12 Nipples 13 Separated s...

Page 17: ...it is therefore very important to follow all the recommendations listed at page 27 Installation diagram at page 36 Scheduled maintenance table particularly as regards the maintenance operations freque...

Page 18: ...ise levels within the legally permitted limits 3 7 Environmental operating limits Unless otherwise specified the equipment concerned may be used only within the limits indicated Altitude less than 1 0...

Page 19: ...M Vertical Danger Warning Follow the signs on the plates Ensure the plates are legible otherwise clean them and replace the damaged ones applying them in their original position N B See the page 2 1 2...

Page 20: ...ion of the equipment their use is meant for routine or extraordinary maintenance operations Danger Warning Before starting up the machine it is compulsory closing the inspection hatches by fitting the...

Page 21: ...mponents the safety switch actuator fixed on the chute and the safety switch secured to the body of the separator Important The safety switches fitted to the separator SEPCOM Vertical are compliant wi...

Page 22: ...ty pin shown in the image below is supplied with the separator SEPCOM Vertical The safety pin block the chutes opened to prevent them from accidentally get closed which would cause the euipment tostar...

Page 23: ...A Fragile indicates that the package has to be handled and lifted carefully to avoid damage B Centre of gravity indicates the position of the gravity centre of the package C Harness indicates the cor...

Page 24: ...YLON SHRINK WRAP PACKAGING INCLUDING THE BOX BARRIER BAG PACKAGING INCLUDING CAGE NYLON SHRINK WRAP Refer to the technical manual for further information on weights and sizes Important The centre of g...

Page 25: ...nsation may not be accepted 4 3 Lifting and unloading methods Danger Warning Carry out the lifting and handling operations according to the information indicated on the equipment and in the Manufactur...

Page 26: ...anger Warning Harness the microfilter by means of the safety hooks DO NOT use clamps rings open hooks or sys tems that do not ensure the necessary safety level Important The lifting means have to matc...

Page 27: ...ting installation define a safety plan which complies with the laws in force regarding workplace safety The specialist technician authorized by the installer or owner must asses whether the area has b...

Page 28: ...M A4 0722 EN Issue A4 07 22 24 SEPCOM Vertical 3 Fix sturdily the compensator tank by means of the special brajet to the struc ture of the separator by means of bolts 4 Fix sturdily the compensator ta...

Page 29: ...to be position on b The separator is supplied with the compensator tank disassembled therefore it is required to follow the indications at point 5 2 and then install the separator according to point...

Page 30: ...ndications in order to ensure the proper functioning of the separator The drawing below represents the plant layout to be followed for the installation of the separator SEPCOM Vertical The separator m...

Page 31: ...opper G avoid pressing widening and choking it or narrowing of the section Position it with a slope of at least 5 The free end of the pipe has to be at least 200 mm H2 from the tank level A for the ma...

Page 32: ...re followed Electric motors features The connections needs to be made on the junction box of the motor Pos L L During the first start up phases of the separator make sure the direction of rotation is...

Page 33: ...XING 2 SEP SEPCOM_Vertical M A4 0722 EN Issue A4 07 22 29 SEPCOM Vertical In case of reverse rotation after having disconnected from the mains reverse the position of the power cables inside the termi...

Page 34: ...cerned The type of motor connection depends on the voltage value available to be applied please refer to the wiring diagram provided for each motor The illustration shows the wiring diagrams of the mo...

Page 35: ...proper Before starting to operate the equipment Ensure that the plant in which the microfilter is installed is compliant to the Directive 2006 42 EC and to the relevant directives the safety standard...

Page 36: ...t operation cycle the oil requires a longer rest period for the air bubbles to get eliminated Check the oil level in the gear reducer Oil quantity The motors and gear reducers are supplied with the fi...

Page 37: ...eakage from the separated solid inlet 7 Repeat the sequence until a stable solid plug is obtained in the compaction zone 8 Once the solid plug is obtained in the compaction zone the pump and separator...

Page 38: ...ermitted use indications are complied with Before reusing the separator after a long shut down proceed as described below 1 check the main screws and bolts 2 check the oil level 3 ensure the screws an...

Page 39: ...in the environment and in the surrounding area or use a moist cloth Do not use compressed air Wash the equipment the machine after vacuuming the dust with a low pressure water jet Danger Warning All c...

Page 40: ...are provided with level drainage and venting plugs Checking the lubricant oil level Follow the indications bellow 1 Check the correct level of oil in the gear box through the level indicator A The oil...

Page 41: ...bricant For the features of the oil see the Lubricants Table 5 Fill oil through the bore in the filler plug B The oil must reach the line in the middle of the level indicator A 6 Replace the sealing...

Page 42: ...assembly Danger Warning Set the separator in safety condition see Glossary and Terminology Harness the electric motor appropriately and use suitable lifting means 8 1 Safety recommendations for replac...

Page 43: ...e of lubri cants and sealants on the coupling surfaces G and H 4 Fit the motor on the gear reducer Important Do not force the coupling and do not use improper means as this will damage the coupling an...

Page 44: ...ARTS 2 SEP SEPCOM_Vertical M A4 0722 EN Issue A4 07 22 40 8 3 Replacing the screws 2 Unhook the quick release coupling of the guard 1 Open the chute from the outlet side according to the picture 3 Rem...

Page 45: ...t fixing bars and of the compaction module 5 Remove the fixing bars the screen and the compaction module 6 Unscrew the grub screws indicated by the red arrow to unlock the to unlock the rings which ho...

Page 46: ...from their seat and re move them out of the separator Check or replace the auger and follow the indications above in reversed order to fit back the augers Important For a correct repositioning of the...

Page 47: ...SEPCOM Vertical 8 0 REPLACEMENT OF PARTS 2 SEP SEPCOM_Vertical M A4 0722 EN Issue A4 07 22 43 Important Before closing back the chutes to release first the safety pin see image below...

Page 48: ...ve the fixing screw of the upper hub To replace the sections remove first the auger by following the instructions provided at Chapter 8 3 Replacing the screw Once the auger has been removed proceed wi...

Page 49: ...ng polymer section Remove the worn or damaged sections and repeat the steps priorly mentioned in reversed order Prior to replacing the sections clean them as well as the inside of the microfilter Prio...

Page 50: ...the Technical Catalogue for the proper sequence LEFT SIDE SX RIGHTSIDE DX Important Pay attention to the side left or right on which the modules of the screw have has to be installed The correct insta...

Page 51: ...EMENT OF PARTS 2 SEP SEPCOM_Vertical M A4 0722 EN Issue A4 07 22 47 8 5 Inspecting the screen 2 Unhook the quick release coupling of the guard 1 Open the chute according to the picture 3 Remove the gu...

Page 52: ...rtical 8 0 REPLACEMENT OF PARTS 2 SEP SEPCOM_Vertical M A4 0722 EN Issue A4 07 22 48 4 The screen can now be dismantled Important Before closing back the chutes to release first the safety pin see ima...

Page 53: ...F PARTS 2 SEP SEPCOM_Vertical M A4 0722 EN Issue A4 07 22 49 8 5 1 Cleaning or replacing the screen 2 Unhook the quick release coupling of the guard 1 Open the chute according to the picture 3 Remove...

Page 54: ...compaction module Wash the screen with pressurized hot water Important Repeat the same operations for the screen installed on the other side of the separator If required pick a new screen and fit it b...

Page 55: ...2 SEP SEPCOM_Vertical M A4 0722 EN Issue A4 07 22 51 8 6 Replacing the mechanical seal of the lower bearings 2 Unhook the quick release coupling of the guard 1 Open the chute according to the picture...

Page 56: ...t fixing bars and of the compaction module 5 Remove the fixing bars the screen and the compaction module 6 Unscrew the grub screws indicated by the red arrow to unlock the to unlock the rings which ho...

Page 57: ...07 22 53 8 Lift up the augers from their seat and re move them out of the separator 9 Untighten the fixing screws of the inspec tion hatch and remove it 10 Disconnect greasing pipe from the quick rele...

Page 58: ...ertical M A4 0722 EN Issue A4 07 22 54 12 Slip out the supports unit from the ma chine body 13 Unscrew the screws that secure the cover to the bearings and seals support 14 Remove the cover from the b...

Page 59: ...SEPCOM_Vertical M A4 0722 EN Issue A4 07 22 55 16 Remove the locking washer from the bearings and seals support 17 Pull the seals and bearings unit from the seals support by pushing the seals and bea...

Page 60: ...EPCOM Vertical 8 0 REPLACEMENT OF PARTS 2 SEP SEPCOM_Vertical M A4 0722 EN Issue A4 07 22 56 19 Remove the first inner and outer spacer 20 Remove the second bearing Important Replace the faulty bearin...

Page 61: ...EPCOM Vertical 8 0 REPLACEMENT OF PARTS 2 SEP SEPCOM_Vertical M A4 0722 EN Issue A4 07 22 57 21 Remove the second spacer 22 Slip out the mechanical seals one by one Important Replace the damaged seals...

Page 62: ...SEPCOM Vertical 8 0 REPLACEMENT OF PARTS 2 SEP SEPCOM_Vertical M A4 0722 EN Issue A4 07 22 58 23 Remove the grains that secure the protec tive bushing to the shaft 24 Remove the protective bushing...

Page 63: ...SEP SEPCOM_Vertical M A4 0722 EN Issue A4 07 22 59 25 Remove the sealing ring Important Replace the worn ring with the spare one 26 Fit the new sealing ring 27 Insert the protective bushing on the sh...

Page 64: ...OF PARTS 2 SEP SEPCOM_Vertical M A4 0722 EN Issue A4 07 22 60 Important Fit a new protective bushing with new nuts make sure the nuts do not protrude out of the bushing 28 Fit the mechanical seals one...

Page 65: ...SEPCOM Vertical 8 0 REPLACEMENT OF PARTS 2 SEP SEPCOM_Vertical M A4 0722 EN Issue A4 07 22 61 30 Fit the second bearing 31 Fit the first inner and outer spacer...

Page 66: ...2 SEP SEPCOM_Vertical M A4 0722 EN Issue A4 07 22 62 32 Fit the first bearing 33 Fit the seals and bearings unit on the seals support by pushing the seals and bearings unit upwards 34 Fit the locking...

Page 67: ...EMENT OF PARTS 2 SEP SEPCOM_Vertical M A4 0722 EN Issue A4 07 22 63 35 Tighten the locking screw 36 Fit the cover on the bearings and seals support 37 Tighten the screws that secure the cover to the b...

Page 68: ...g the disassembly steps in reversed order Important Grease the screw bearings manually by means of the special grease circuit until the voids are com pletely filled or until the grease comes out from...

Page 69: ...SEPCOM Vertical 8 0 REPLACEMENT OF PARTS 2 SEP SEPCOM_Vertical M A4 0722 EN Issue A4 07 22 65 Important Before closing back the chutes to release first the safety pin see image below...

Page 70: ...2 SEP SEPCOM_Vertical M A4 0722 EN Issue A4 07 22 66 8 7 Disassembling the gear reducer 2 Unhook the quick release coupling of the guard 1 Open the chute from the outlet side according to the picture...

Page 71: ...t fixing bars and of the compaction module 5 Remove the fixing bars the screen and the compaction module 6 Unscrew the grub screws indicated by the red arrow to unlock the to unlock the rings which ho...

Page 72: ...2 SEP SEPCOM_Vertical M A4 0722 EN Issue A4 07 22 68 8 Lift up the augers from their seat and re move them out of the separator 9 Open the chute at the outlet side 10 Remove the front guards on both...

Page 73: ...and remove completely the screw no 1 Slacken the screw no 2 Carry out the same steps for the guard on the opposite side 13 Grab the handle of the guard and push it upwards Carry out the same steps for...

Page 74: ...COM_Vertical M A4 0722 EN Issue A4 07 22 70 14 Lift the guard up according to the picture Carry out the same steps for the guard on the opposite side 15 Remove the side guards 16 Disconnect greasing p...

Page 75: ...2 SEP SEPCOM_Vertical M A4 0722 EN Issue A4 07 22 71 18 Hook the 4 eyebolts through a chain with lifting hook having the proper size capacity 180 kg 19 Lift the drive unit 20 Place the drive unit on a...

Page 76: ...07 22 72 21 Remove the fixing screws of the gear reducer 22 Remove the gear reducer Install back the screen by following the steps previously indicate and restore the operation of the equipment Impor...

Page 77: ...e matter of differential collection and disposal of wastes With reference to the WEEE Directives electrical and electronic components marked with a special symbol have to be disposed off in authorized...

Page 78: ...ower 4 An inverter that stops the starting torque 4 Refer to the inverter manufacturer Motor starts but stops immediately 1 Direction of rotation incorrect 1 Reverse polarity see Electrical connection...

Page 79: ...1 Information necessary a Description of the problem b Total working hours c Running frequency hours per day or month d Photo of the separator e Picture of the plant and of all connecting pipes up to...

Page 80: ...lace the mineral oil with synthetic oil having the same viscosity In this case change the oil the first time after the first 2000 hours of service change the oil subsequently after 10000 hours or ever...

Page 81: ...have the same characteristics Lubricant Brand Type Screw seals grease Castrol Longtime PD2 EP 2 SKF EP 2 Indications on the automatic lubricator settings Fill the cartridge Time to be set 60 ml 1 mon...

Reviews: