


41
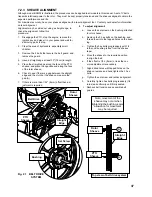
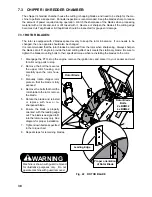
7.3.4 SHREDDER KNIVES:
The shredder rotor is designed with 3 sets of swinging knives (30 knives on the
BXM42)
27 knives on
the
BXM32)
. Each knife has a bevelled edge that cuts, chops and mulches the material as it moves
around the rotor compartment. In addition the chop block helps to break the material into smaller pieces
and turn it into mulch.
The sized opening in the divider at the top of the rotor keeps the material inside the rotor housing, until it
becomes a fine enough to move through the opening to the rotor paddles and expelled out the discharge
chute.
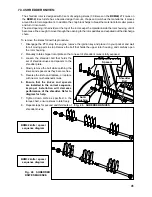
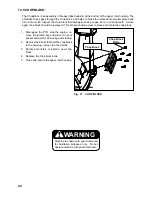
To remove the knives follow this procedure:
1. Disengage the PTO, stop the engine, remove the ignition key and place it in your pocket and wait
for all moving parts to stop Remove the bolt that holds the upper rotor housing, and carefully open
the rotor housing.
2. Manually rotate chipper rotor plate so that one set of shredder knives is fully exposed
3. Loosen the shredder bolt that holds the
set of shredder knives and spacers to the
shredder plate,
4. Slowly remove the bolt while catching the
knives and spacers as they become free.
5. Reverse the knife and replace, or replace
with new or re-sharpened knives.
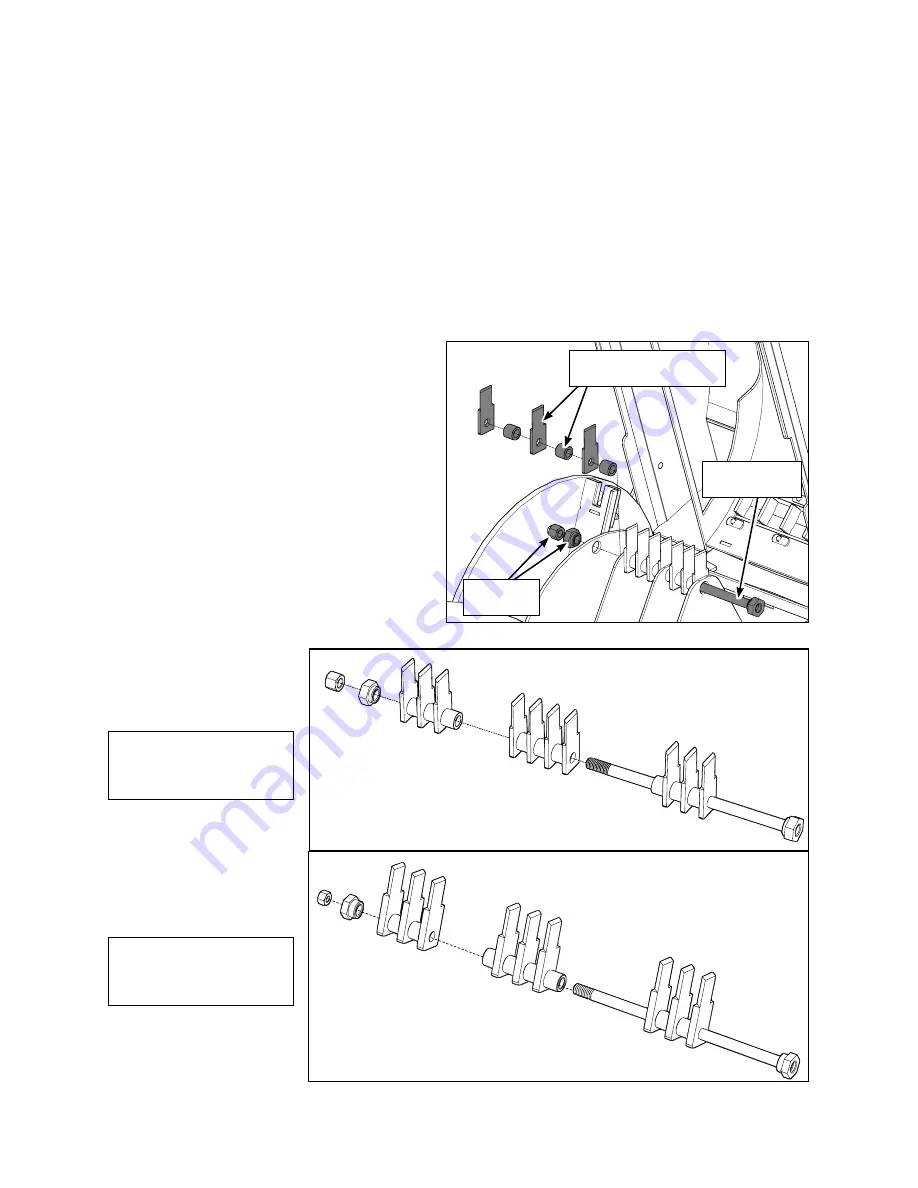
6. Ensure that the knives and spacers
are installed in the correct sequence,
improper installation will decrease
performance of the shredder. Refer to
diagram for help.
7.
Tighten down bolts as specified in the
torque chart, ensure knives rotate freely.
8. Repeat steps for second and third sets of
shredder knives.
Shredder Knives and
Spacers
Shredder
Bolt
BXM42 knife / spacer
sequence diagram
Fig. 25 SHREDDER KNIVES
Fig. 26 SHREDDER
KNIFE SEQUENCE
Nut &
Bushing
BXM32 knife / spacer
sequence diagram
Summary of Contents for BXM32
Page 48: ...PRINTED IN CANADA ...


