


23
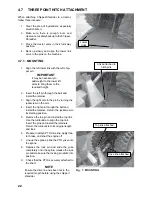
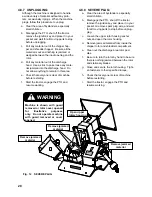
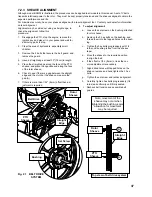
4.7.2 QUICK HITCH MOUNTING.
1. Align the claws on the Quick Hitch slightly
below the mounting pins on the Chipper-
Shredder.
2. Back up until the pins are above the claws.
3. Use the turnbuckle on the top link to adjust the
position of the top claw.
4. Raise the 3 point hitch until the pins seat in
the claws.
5. Be sure the retainers are released to hold the
pins in the claws.
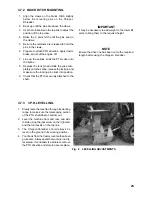
6. Prepare to attach PTO driveline: apply tractor
brake, and shut the engine off.
7. Line up the splines, slide the PTO yoke onto
the spline
8. Depress the lock pin and slide the yoke com-
pletely onto the spline, release the lock pin and
make sure the locking pin clicks into position.
9. Check that the PTO is securely attached to the
shaft.
IMPORTANT
It may be necessary to add weight to the lower lift
arms to bring them to the required height.
NOTE
Ensure the drive line has been cut to the required
length before using the chipper / shredder.
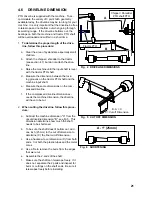
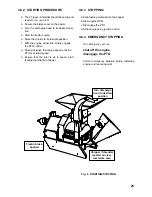
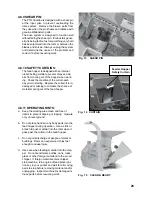
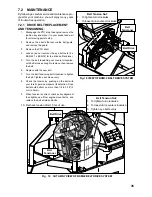
4.7.3 3 P.H. LEVELLING.
1. Slowly raise the machine through its working
range to make sure the telescoping portion
of the PTO shaft doesn't bottom out.
2. Level the machine front and rear, and side
to side using the jackscrew on the right arm
and the turnbuckle on the top link.
3. The Chipper-Shredder should always be
level on the ground in its working position.
4. To unhook from the tractor, reverse the above
procedure. Always park the machine in a dry,
level area. If vandalism is a problem, remove
the PTO driveline and store in a secure place.
Fig. 8 LEVELLING ADJUSTMENTS
Summary of Contents for BXM32
Page 48: ...PRINTED IN CANADA ...


