background image

GB

19

WallPerfect W 665

Assemble the parts again (see “Assembly”).

14) 

Assembly 

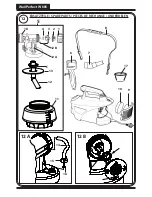
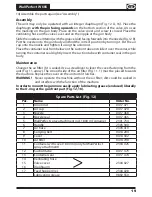
The unit may only be operated with an integer diaphragm (Fig. 12 A, 16). Place the 

diaphragm with the pin facing upwards on the bottom section of the valve. Also see 

the marking on the gun body. Place on the valve cover and screw it closed. Place the 

ventilating hose on the valve cover and on the nipple at the gun body.
Slide the nozzle seal (Item 4) with the groove (slot) facing forwards into the nozzle (Fig. 12 B). 

Put the nozzle onto the gun body and find the correct position by turning it. Put the air 

cap onto the nozzle and tighten it using the union nut.
Place the container seal from below on the suction tube and slide it over the collar, while 

turning the container seal slightly. Insert the suction tube with container seal in the gun 

body.

Maintenance 

Change the air filter if it is soiled. Use a screwdriver to lever the cover fastening from the 

unit (Fig. 11, arrow). The smooth side of the air filter (Fig. 11, 1) must be placed towards 

the machine. Replace the cover on the unit until it latches.
WARNING!   Never operate the machine without the air filter; dirt could be sucked in 

and interfere with the function of the machine.

In order to mount the gun more easily apply lubricating grease (enclosed) liberally 

to the O­ring at the gun front part (Fig. 12, 18).

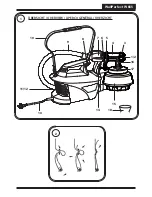
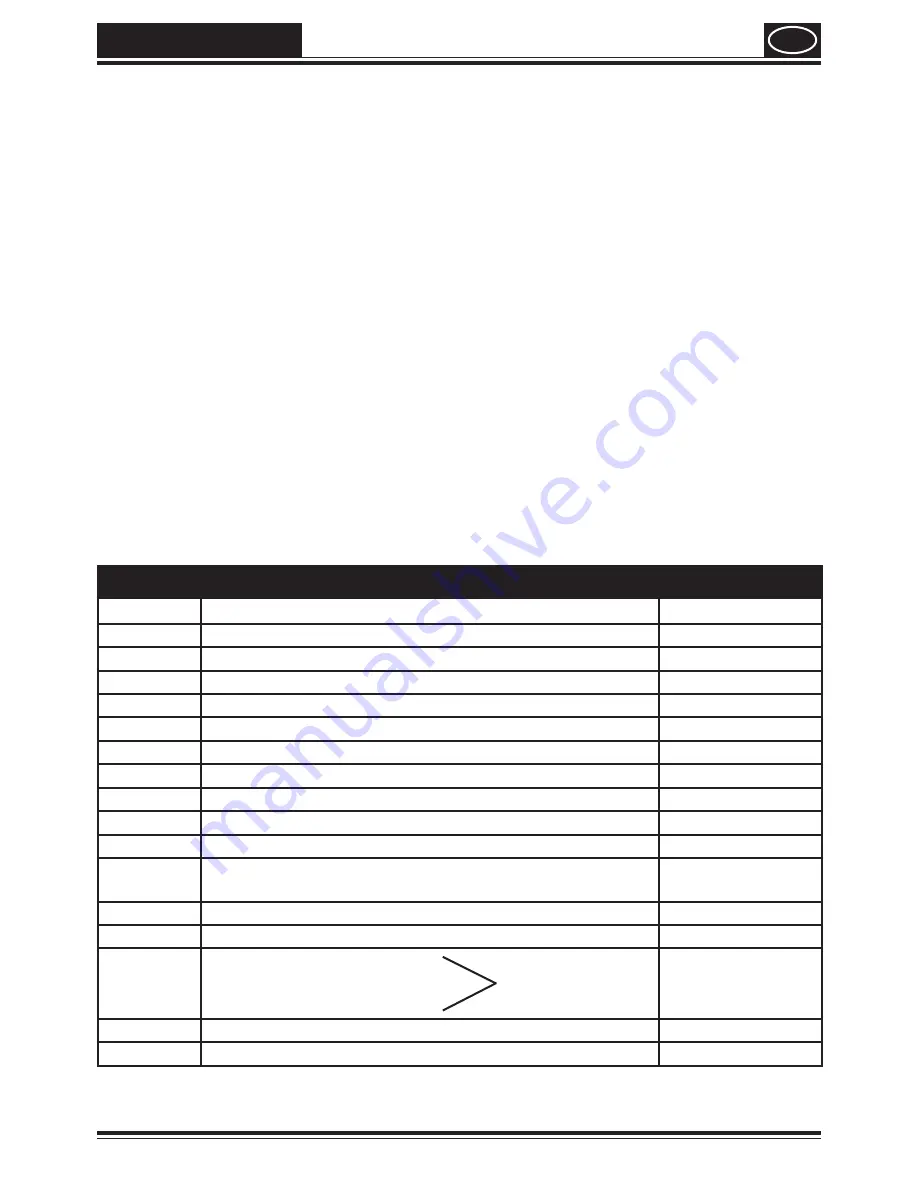
Spare Parts List  (Fig. 12)

Pos.

Name

Order No.


1

Union nut

0417 471


2

Air cap 

0417 470


3

Nozzle

0417 468


4

Nozzle seal

0417 465


5

WallPerfect spray attachment incl. 1800 ml. conainer

2301 734


6

Handle

2303 300


7

Air hose 

2303 410


8

Carrying belt

0414 204


9

Cover 

0414 302


10

Air filter

0414 700


11

Container with cover 1800 ml (only for WallPerfect 

spray attachment)

2304 025


12

Suction tube 

0417 473


13

Container seal 

0417 474


14

Ventilating hose                        


15

Valve cover

2304 027


16

Diaphragm


17

Feed hopper (3x)

2304 028


Lubricating grease

9892 550

Summary of Contents for WallPerfect W665

Page 1: ...WallPerfect W 665 D GB F NL 2Jahre Garantie 2years WARRANTY 2ansde GARANTIE 2 ans de GARANTIE...

Page 2: ...WallPerfect W 665 1 2 bersicht Overview aper u g n ral Overzicht 1 2 8 9 3 16 6 7 5 4 14 13 10 11 12 15 17 18...

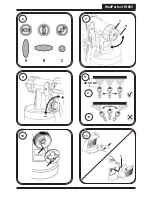
Page 3: ...WallPerfect W 665 4 a b Click 5 3 A B...

Page 4: ...1 WallPerfect W 665 a b 8 11 10 6 7 2 1 9 20 30 cm...

Page 5: ...WallPerfect W 665 12 2 3 4 13 14 12 7 6 9 8 10 7 5 12 A C 12 B 12 13 11 12 A 16 15 14 12 B 4 3 2 1 18 17 Ersatzteile Spare Parts pi ces de rechange onderdelen...

Page 6: ...children and other persons away when using the power tool c You can lose control of the tool if you are distracted 2 Electrical Safety The tool plug must fit into the socket The plug may not be modif...

Page 7: ...ear suitable clothing Do not wear wide clothing or jewelry Keep your hair f clothes and gloves away from moving parts Loose clothing jewelry or long hair can be caught in moving parts This appliance i...

Page 8: ...y glasses ear protection and gloves CAUTION Danger of injury Never point the spray stream towards human beings or animals The spray gun may only be used to spray materials with a flash point of 21 C 3...

Page 9: ...0 V Power consumption 350 W Atomizing output 105 W Max delivery rate 250 g min Double insulation Sound pressure level 80 dB A Oscillation level 2 5 m s Air hose length 3 5 m Weight 4 0 kg Description...

Page 10: ...d Stir the material thoroughly and dilute it in the container as per the recommended 1 dilution an agitator is recommended for stirring Thinning recommendation Sprayed material Interior wall paint dis...

Page 11: ...ING Danger of injury Never pull the trigger guard while adjusting the air cap Adjusting the Material Volume Fig 8 Set the material volume by turning the regulator on the trigger guard of the spray gun...

Page 12: ...click slightly downwards Turn the gun 2 front part and gun rear part against each other Screw of the container and empty it Pull out the suction tube with container seal 3 Precleanthecontainerandfeed...

Page 13: ...the air filter if it is soiled Use a screwdriver to lever the cover fastening from the unit Fig 11 arrow The smooth side of the air filter Fig 11 1 must be placed towards the machine Replace the cover...

Page 14: ...such as radiators cupboard corners recesses etc 0417 915 WallPerfect spray attachment incl 1800 ml container For processing interior wall paint We recommend against using the WallPerfect spray attach...

Page 15: ...e contaminated Viscosity of coating material too high Too little pressure build up in container Air filter heavily soiled Turn material volume adjusting screw to the left Clean Dilute further Tighten...

Page 16: ...e following code blue neutral brown live As the colours of the wires in the mains lead of this appliance may not correspond with the coloured markings identifiying the terminals in your plug proceed a...

Page 17: ...rantee expires if the tool is opened up by persons other than WAGNER service personnel Transport damage maintenance work and loss and damage due to faulty maintenance work are not covered by the guara...

Page 18: ...1000 3 3 2005 EN 60335 1 2006 EN 50366 2006 EN 50144 2 7 2000 P GB CE D claration de conformit Nous d clarons sous notre responsabilit que ce produit est en conformit avec les r glementations suivante...

Page 19: ...49 WallPerfect W 665...

Page 20: ...05 28 E J Wagner Spraytech Ib rica S A Ctra N 340 Km 1245 4 08750 Molins de Rei Barcelona 34 93 6 80 00 28 34 93 6 68 01 56 B Wagner Spraytech Belgie Veilinglaan 58 1861 Meise Wolvertem 32 2 2 69 46 7...

Reviews: