20
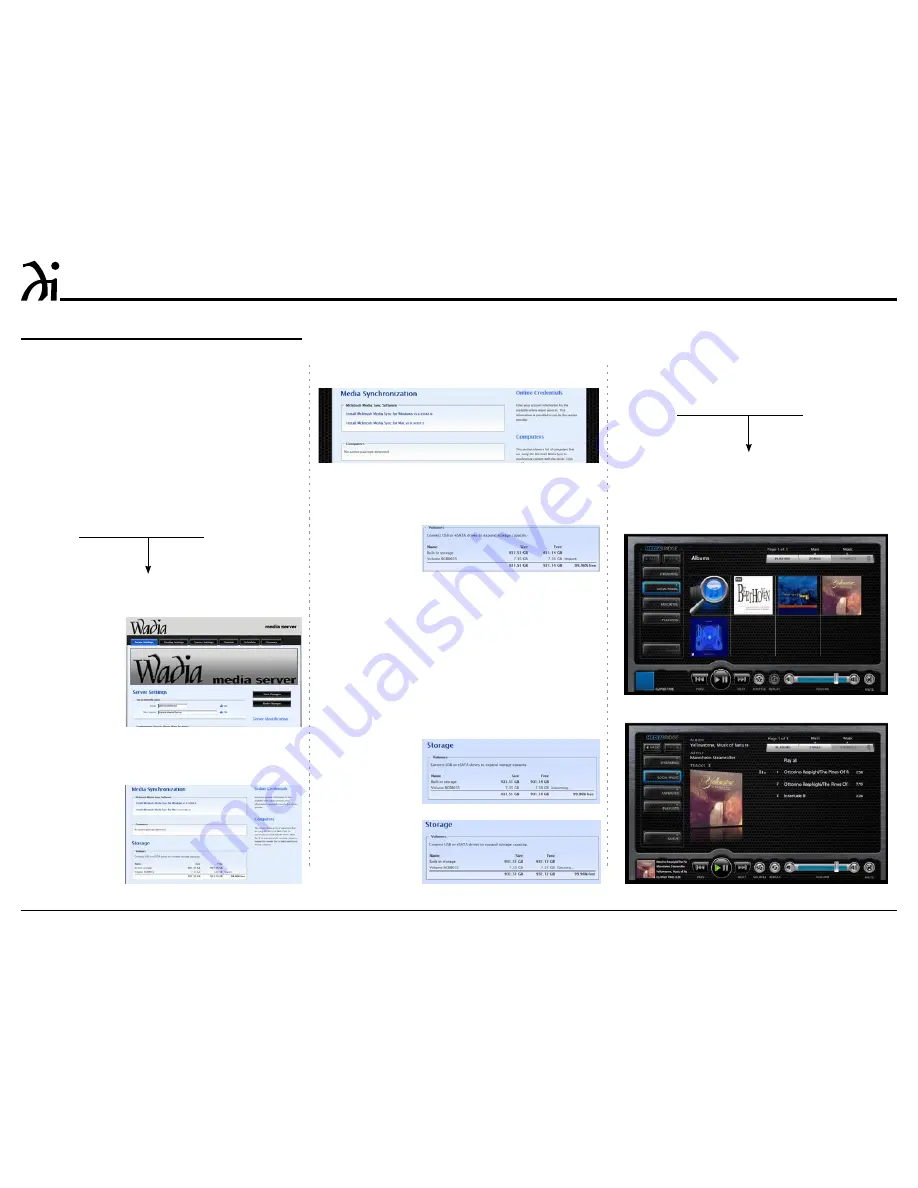
6. To listen to the music just imported (when the im-
porting process is complete) enter into the “URL-
Address line” below:
The IP Address Number
HTTP://__.__.___.___/MediaServer
7. Then select local music, click on albums, select-
ing the desired music, followed by selecting either
“Play all” or the desired track. Refer to figures 86
and 87.
Referring to figure 82, the “Volumes” window indi-
cates both the m330 internal storage drive (931.51GB)
and an external connected drive (7.35GB).
4. Click on the word “Import” and a window will ap-
pear with additional information about the import-
ing process. Refer to figure 83.
Note: The import process will copy all of the music
files it finds on the externally connected stor-
age drive. Depending on the amount of music
files on the drive, the copying process could
take some time.
5. Start the import process by clicking on the but-
ton “OK, Import the volume”. Refer to figures 84
and 85.
How to Import Music from External Drives
Before proceeding with the steps below, switch power
Off to the m330. Then connect the External Drive
(HDD or SDD) to an USB or eSata connector on the
Rear Panel of the m330. After the m330 has powered
up and completed initialization, note the IP Address in
the upper left corner.
1. Using a computer connected to the same network
as the m330, launch an Internet Web Browser
Application (such as Windows Internet Explorer).
Type in on the “URL-Address line” the following:
The IP Address Number
HTTP://__.__.___.___/config
2. Then press enter on the computer keyboard. Refer
to figure 80 (partial view).
3. Click on the “Content” Tab (located along the top),
then scroll down to “Storage”. Refer to figure 81.
Figure 80 (partial view)
Figure 81
Figure 84
Figure 85
Figure 86
Figure 87
Figure 82
Figure 83
How to Operate the m330, con’t
How to Operate the m330, con’t
Summary of Contents for m330 media server
Page 21: ...21 ...


