72
23. Tensioning bracket with milling machine table (optional)
23.4 Adjustment of the dovetail guide
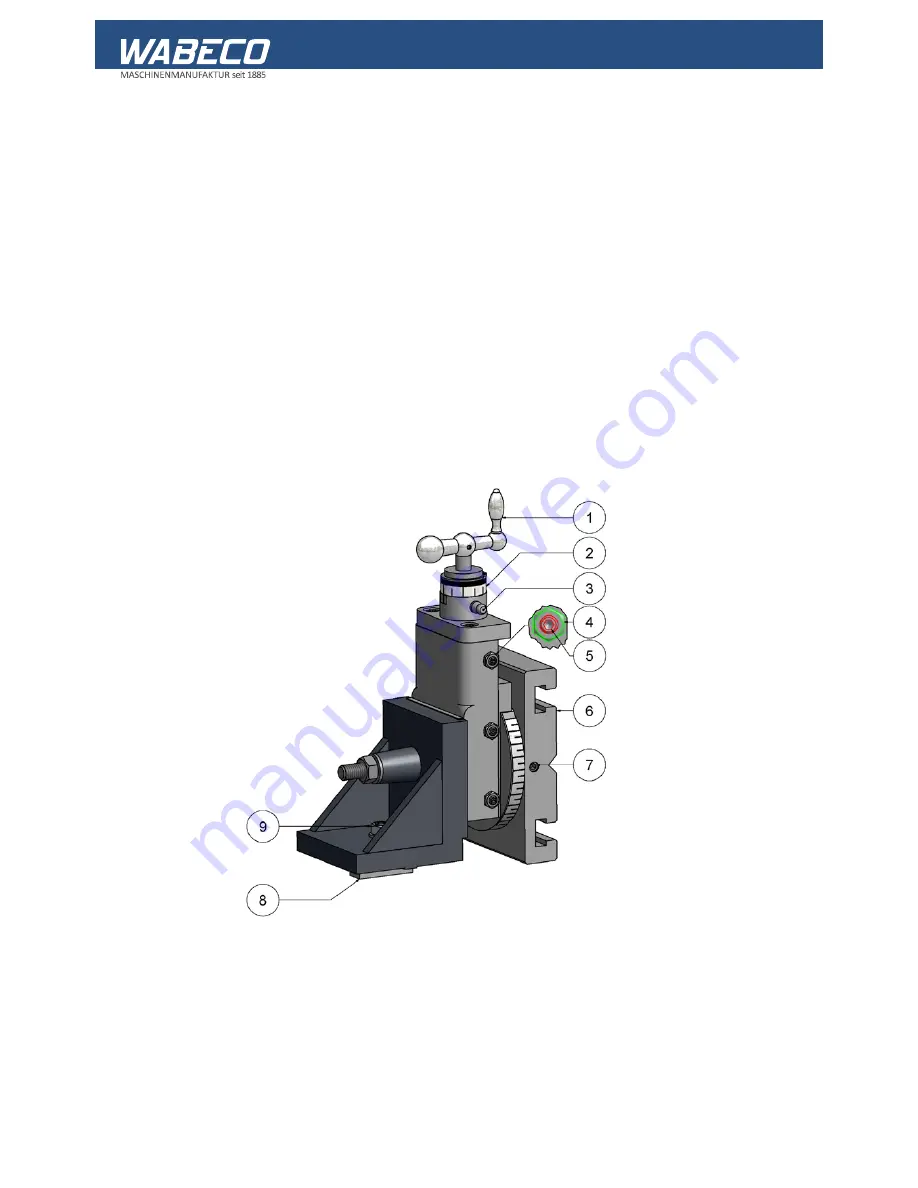
1. Undo the lock nuts (4)
2. Set the adjustment bar using the threaded pins (5) in such a way that the skid is free of play and
can be moved with little force. To do this, the skid should be moved during the setting process
and checked for play and appropriate ease of movement.
3. When the threaded pins (5) are set correctly, tighten the lock nuts (4) back up again
Only set the threaded pins (5) if they are in the range of the counter guide! To do this, the
skid may need to be moved into this area. Otherwise the dovetail guide may jam and this
may cause damages.
23.5 Alignment of the milling machine table
If the milling machine table has been moved unintentionally (angle of T-groove to x axis), this must
first be realigned. To do this, open both screws (7) align the table and then tighten both screws up
again (7). For the alignment work, always use a dial gauge if you have one.
23.6 Lubrication of the tensioning bracket with milling machine table
■
Use a class 2NLGI multi-purpose grease for lubrication
■
Use lubricating oil with a viscosity of 100mm²/s for lubrication
■
Prior to each use:
Lubricate the spindle bearing at the lubrication nipple (3) using a grease
press
Grease the feed spindle accessible from the front
Oil the dovetail guide with lubrication oil using an oil can
Summary of Contents for D4000
Page 42: ...42 18 Drawings and legends 18 5 Headstock Tumbler gear...
Page 44: ...44 18 Drawings and legends 18 6 Bed with lead screw...
Page 46: ...46 18 Drawings and legends 18 7 Change gear quadrant...
Page 48: ...48 18 Drawings and legends 18 8 Tool skid Transverse skid...
Page 50: ...50 18 Drawings and legends 18 9 Tool skid Lock plate...
Page 52: ...52 18 Drawings and legends 18 10 Tool skid Longitudinal skid...
Page 54: ...54 18 Drawings and legends 18 11 Tailstock...
Page 73: ...73 23 Tensioning bracket with milling machine table optional 23 7 Drawing and legend...


