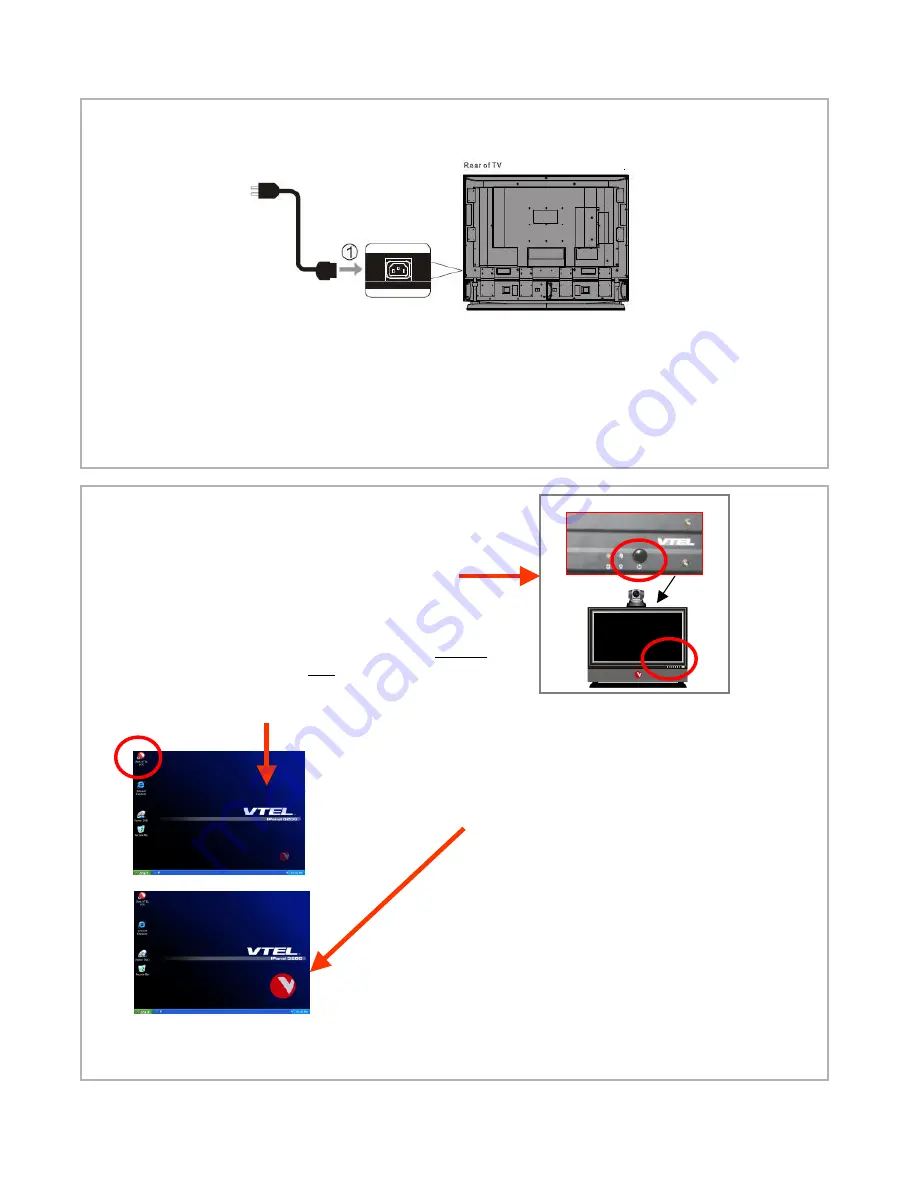
D. On the back of the panel ensure the power cable is connected
E. Configure your External IP network using the Network Configuration Guide in Section 6.
F. The hardware set up is complete. You should not have to do this again unless the system is
moved to a new location.
2. Power and network
(continued)
A. Power on the system using the power
button on the top of the computer and the
power button on the front of the monitor
B. The system will start up like any other Windows
XP computer going through familiar screens.
C. This computer screen should be on the left side of
the monitor. If it isn’t go now to 3A “Arranging Proper
Displays” . Your monitor needs to be configured for
NORMAL Videoconferencing mode.
3. Starting up the system
D. Double click on the red “V ball”
(“
Start VTEL VCS” shortcut
)
in the upper left corner. This launches the
videoconferencing software.
E. After a brief loading process, a large
VTEL “V ball” appears on the lower right
of the screen. This says that the video-
conferencing software is loaded.
Note: if you do not see the
usual Windows XP screen on
the left side during start up go
to section 3A to configure
monitor and then return to this
section.


