


10
aC
T
IV
IT
Ie
s
• To add a frame to the movie before starting to record, scroll the Up/Down Wheel to
choose a frame for the video. Then, press the Shutter/OK button
to start recording
a movie. The frame can’t be changed during the recording.
• To watch the movies you’ve recorded, press the Play button
to enter the Movie
Album, then scroll the Up/Down Wheel to choose the movie that you want to watch,
and press the Play button
to start the movie. While watching movies, you can
scroll the Zoom Wheel to adjust the volume.
• While in the Movie Album, press the Trash button to delete the movie that is
currently shown on the screen.
• To exit the Movie Album and return to Movie Mode, press the Shutter/OK button
once, or press the Movie Mode button.
Note:
Movies taken with the
Lightning McQueen™ Digital Camera
will be saved
in the VIDEO folder of the internal memory or on the SD card (not included) if one is
inserted into the camera. If you want to play the movies backed up earlier from the
Lightning McQueen™ Digital Camera
, please download the movies to the folder
in DOWNLOAD\VIDEO of the built-in memory or on an SD card (not included) if one is
inserted.
3. PhOTO eDITOR MODe
• In the Photo Editor Mode, scroll the Up/Down Wheel to choose a photo and press the
Shutter/OK button
to start editing the selected photo. Scroll the Up/Down Wheel
again to choose one border or stamp and then press the Shutter/OK button
. The
selected border or stamp will become part of the photo.
• Then, you can scroll the Up/Down Wheel to choose another photo to edit.
4. TOOLs & seTTINgs MODe
Scroll the Up/Down Wheel to select one of the following options to change in the
Lightning McQueen™ Digital Camera
settings.
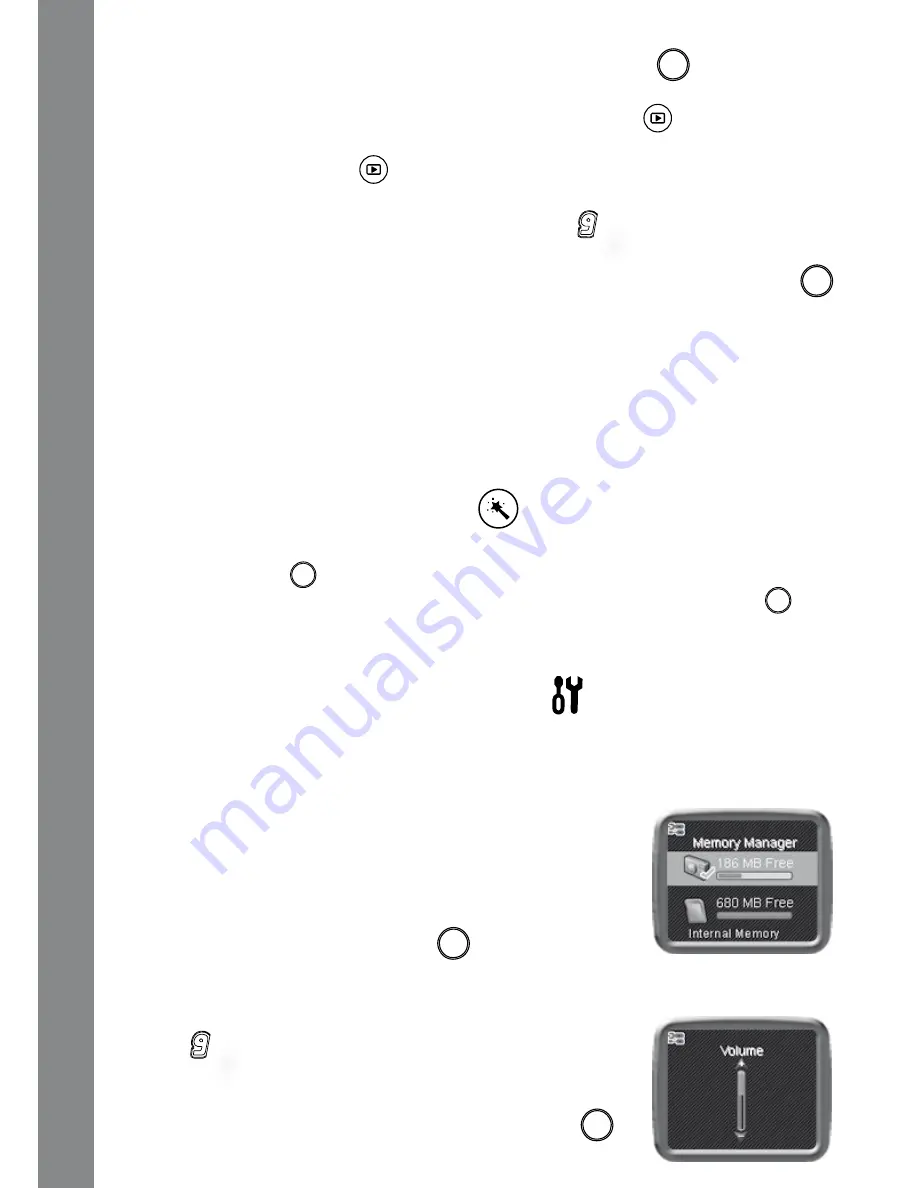
a. Memory Manager
You can see the memory status of the camera’s internal
memory and SD card (not included) if one is inserted into
the
Lightning McQueen™ Digital Camera
. Scroll the
Up/Down Wheel to select either the internal memory in
the
Lightning McQueen™ Digital Camera
or the SD
card. Press the Shutter/OK button
to set the selected
memory as default to save the photos and videos taken with
the
Lightning McQueen™ Digital Camera
. To format and
erase all the data in the selected memory, press the Trash
button .
b. Volume
Scroll one of the wheels up to increase the volume and down
to decrease the volume. Press the Shutter/OK button
to
confirm the volume setting.


