background image

11

11

Here your can choose different light colors and effects. You cannot enter 

the advanced light settings menu in FM Radio Mode.
There are more than 12 light effects for you to choose from. You can 

also choose a particular color that will stay on the screen and body. 

There are also different lighting patterns to choose from in different 

activities:     


Color Effect Selection 

  Use the   /   

Direction Buttons

 or wave your hand above the  

Kidi Magic Speaker Clock

TM

 to change the light effect.

  Press the 

Light Button

 again to save the current settings and go to 

that mode.

4. Projection Control

A projector is located on the top of the 

Kidi Magic Speaker Clock

TM

. It 

allows the current time to be projected onto the ceiling.

Press the 

Projection Button


 to turn the time displayed onto the 

ceiling on or off.
By default, the clock display is set to eight seconds. If the time projection 

auto turns off, press the 

Projection Button

 again to turn it back on. 

The optimal focus range of the time projection is between 20 inches and 

eight feet.
Rotate the 

Projector Focus Ring 

clockwise or counterclockwise to 

adjust the focus of the projection display. 
Rotate the 

Projection Angle Adjuster

 to adjust the projection angle.

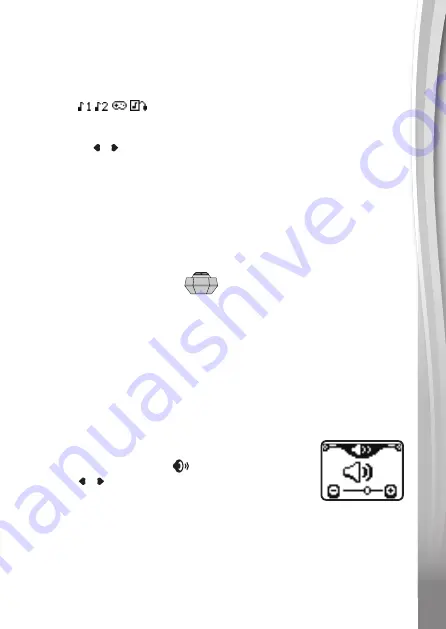
5. Volume Control 

Press the 

Volume Button


 to adjust the volume. 

Use the   /   

Direction Buttons

 to decrease or 

increase the volume.
Press the 

Volume Button

 again or any function  

button to save the current settings.

6. Long-Time Light on Feature

There is a long-time light on feature for the 

Kidi Magic Speaker Clock

TM

You can set the light to stay on for a long time in some modes when an 

adapter is being used. We recommend the use of an adapter whenever 

Summary of Contents for KidiMagic

Page 1: ...Parent s Guide 91 003111 011 US ...

Page 2: ...CAUTION ELECTRIC TOY Not recommended for children under 3 years of age As with all electric products precautions should be observed during handling and use to prevent electric shock ...

Page 3: ...WARNING All packing materials such as tape plastic sheets packaging locks removable tags cable ties and packaging screws are not part of this toy and should be discarded for your child s safety NOTE Please keep this parent s guide as it contains important information ATTENTION Pour la sécurité de votre enfant débarrassez vous de tous les produits d emballage tels que rubans adhésifs feuilles de pl...

Page 4: ...tus of each mode Music Mode Games FM Radio Audio In Alarm 1 Alarm 2 Magic Sensor Projection Angle Adjuster Magic Sensor OK Button Time Projection Button Alarm Settings Direction Button Volume Radio Projector Lens Projector Focus Ring Magic Sensor Direction Button Clock Light Music Games ...

Page 5: ... to choose a game Alarm Settings Press this button to change any settings or to set the alarm Light Press this button to change to a different light mode Hold this button to change the light color Volume Press this button to adjust the volume Direction Buttons Press these buttons to make a selection OK Button Press this button to confirm your selection When in Clock Mode press the OK button to hea...

Page 6: ...g light or direct sunlight it will interfere with the Magic Sensors To avoid poor operation please ensure there are no obstacles such as a shelf close to the top of the unit and that it s not too close to a wall If the sensor detects an obstacle that impedes the performance of the unit you will see a warning icon on the screen SPECIAL WARNING ICONS Low Battery This icon will appear when the batter...

Page 7: ...he unit GETTING STARTED BATTERY INSTALLATION Kidi Magic Speaker ClockTM uses 4 AA size batteries or a VTech 7 5V adapter Locate the base compartment cover at the bottom of the unit Remove the base compartment cover Locate the battery cover inside the base compartment Remove the battery cover and install 4 AA size batteries as illustrated Close the battery cover and the base compartment cover ...

Page 8: ...ries in fire Do not charge non rechargeable batteries Remove rechargeable batteries from the toy before charging if removable Rechargeable batteries are only to be charged under adult supervision POWER ADAPTER CONNECTION To connect the adapter to the unit follow the instructions below Make sure no batteries remain inside the unit Locate the 5 5mm DC jack on the side of the unit Connect the power a...

Page 9: ...onds Then plug the adapter back in and turn the unit ON If the problem persists the adapter you are using may be faulty TO BEGIN USING THE KIDI MAGIC SPEAKER CLOCK 1 Initial Set Up Press any button to turn the unit on When the unit is first turned on you will be asked to set the time and date 2 Time Set Up The default time is 08 00 in 24 hour mode Press the OK Button to highlight the next item hou...

Page 10: ... if there is no operation for a short period of time You can also press the Clock Button to go into standby mode if you are already in Clock Mode The current time will display even in standby mode Press any button to wake the unit up 2 Magic Sensor Control The Magic Sensors detect hand movement directly above them Wave your hand above the sensors to activate them You can select different light eff...

Page 11: ...Projection Button to turn the time displayed onto the ceiling on or off By default the clock display is set to eight seconds If the time projection auto turns off press the Projection Button again to turn it back on The optimal focus range of the time projection is between 20 inches and eight feet Rotate the Projector Focus Ring clockwise or counterclockwise to adjust the focus of the projection d...

Page 12: ...ss the OK Button to hear the time spoken aloud 2 Music There are six relaxing melodies paired with soothing light effects that create a peaceful atmosphere for you to relax or to sleep Wave your hand left and right above the Kidi Magic Speaker ClockTM to change the light effect Press the Direction Buttons to cycle through and select the melodies Press the OK Button to see different animations 3 FM...

Page 13: ... or hold the OK Button to ask a yes or no question Your question will be answered when you move your hand away or release the OK Button Friendship Meter Are you and your friend truly the best of friends Let the Kidi Magic Speaker ClockTM help you find out Choose a picture representing yourself and your friend by pressing the Direction Buttons or waving your hand then choose a card from a selected ...

Page 14: ...ion Memory Collect different herbs to make a magic potion One type of herb will be briefly displayed then lots of different herbs will appear Select the herb shown at the beginning of the game to finish the potion Press the OK Button or wave your hand above the Kidi Magic Speaker ClockTM to collect the herbs 5 External Music Connection Plug in an external music player not included to the Kidi Magi...

Page 15: ...e External devices will not be affected 6 Settings In this mode you can change the below settings Alarm clock Brightness Sparkling star projection Projection orientation Auto off timer Time Date 6 1 Alarm Clock There are two alarms for better time management alarm 1 and alarm 2 To Set the Alarm Choose the desired alarm by pressing the Direction Buttons and the OK Button When in the alarm time sett...

Page 16: ...re you can turn the projected sparkling star animation on or off Press the Direction Buttons to choose to turn it on or off then press the OK Button to save it The default setting is time display with the sparkling star animation on Note For the best reception in FM Radio Mode stars will not sparkle 6 4 Projection Orientation The time projection can be reversed for easy viewing Press the Direction...

Page 17: ...off option is only available when an adapter is in use Music Press the Direction Buttons to select the desired length of time 30 minutes 60 minutes 120 minutes or disable auto off The disable auto off option is only available when an adapter is in use 6 6 Time Set up The default time is 08 00 in 24 hour mode Press the OK Button to highlight the next item hours minutes AM PM only in 12 hour mode 12...

Page 18: ... date after installing new batteries or attaching a power supply Select the reset icon to be able to change the date format to MM DD YY CARE MAINTENANCE 1 Handle the device carefully 2 Keep the unit out of direct sunlight and away from any direct heat sources 3 Keep the device out of dusty or dirty areas 4 Keep the device out of moisture or extreme temperature 5 Do not disassemble the device If a ...

Page 19: ...net on the back of the unit Weak radio reception Place the unit nearer to a window that has an open and unobstructed view Magic Sensors Not Functioning Properly Weak batteries Replace with new batteries Strong light disturbance Keep unit away from strong light Interference by other objects e g wall ceiling book shelf cabinet etc Keep unit away from anything blocking the sensors located above or cl...

Page 20: ...dential installation This equipment generates uses and can radiate radio frequency energy and if not installed and used in accordance with the instructions may cause harmful interference to radio communications However there is no guarantee that interference will not occur in a particular installation If this equipment does cause harmful interference to radio or television reception which can be d...

Page 21: ...s com THIS DEVICE COMPLIES WITH PART 15 OF THE FCC RULES OPERATION IS SUBJECT TO THE FOLLOWING TWO CONDITIONS 1 THIS DEVICE MAY NOT CAUSE HARMFUL INTERFERENCE AND 2 THIS DEVICE MUST ACCEPT ANY INTERFERENCE RECEIVED INCLUDING INTERFERENCE THAT MAY CAUSE UNDESIRED OPERATION CAN ICES 3 B NMB 3 B Caution Changes or modifications not expressly approved by the party responsible for compliance could void...

Page 22: ...ly for conditions that may result in the risk of fire electric shock or injury to persons such as damage to the output cord blades housing or other parts and that in an event of such conditions the transformer should not be used until properly repaired ...

Page 23: ...r website for more information about our products downloads resources and more vtechkids com Read our complete warranty policy online at vtechkids com warranty TM 2018 VTech Holdings Limited All rights reserved Printed in China ...

Reviews: