background image

Step 4:  Prepare the connections of pipes

union nut

pipe joint

1. Remove the screw on the right handle of 

    outdoor unit and then remove the handle.

2. Remove the screw cap of valve and aim 

    the pipe joint at the bellmouth of pipe.

3. Pretightening the union nut with hand.

4. Tighten the union nut with torque wrench 

by referring to the sheet below.

handle

liquid valve

gas valve

  Hex nut diameter(in)  Tightening torque (N.m)

1/4

15~20

3/8

30~40

1/2

45~55

5/8

60~65

3/4

70~75

Step 5:  Connect indoor and outdoor pipe

1

Remove the wire clip; connect the power connection wire and signal control wire  

2. Fix the power connection wire and signal control wire with wire clip.  


NOTE: 

● Never cut the power connection wire to prolong or shorten the distance.

Installation of outdoor unit

N(1)

2

3

N

L

Indoor unit connection

Power 

brown

brown

yellow-

green

yellow-

green

blue

blue

black

33

Summary of Contents for VORT ARTIK

Page 1: ...Libretto istruzioni Instruction booklet VORT ARTIK MONO UE COD 5 471 084 855 15 11 2017...

Page 2: ...entro di raccolta differenziata per apparecchiature elettriche ed elettroniche oppure riconsegnato al rivenditore al momento dell acquisto di una nuova apparecchiatura equivalente L utente responsabil...

Page 3: ...di nudi non consentirne l uso a bambini o persone diversamente abili Non utilizzare l apparecchio in presenza di sostanze o vapori infiammabili come alcool insetticidi benzina ecc Se si decide di elim...

Page 4: ...i fonti di calore e svolgerlo sempre completamente per evitare pericolosi surriscaldamenti In caso di danneggiamento provvedere tempestivamente alla sua sostituzione che deve essere eseguita dall Assi...

Page 5: ...chio Il flusso d aria trattato deve essere pulito privo cio di grassi fuliggine agenti chimici corrosivi o miscele esplosive o infiammabili Se l apparecchio cade o riceve forti colpi farlo verificare...

Page 6: ...riore a Temperatura interna superiore C Intervalli di temperatura nei quali l unit pu non funzionare correttamente Nota 1 Il volume d aria misurato secondo la pressione statica esterna standard pertin...

Page 7: ...5 Nome delle parti NOTA Il prodotto effettivo potrebbe differire da quello illustrato fare sempre riferimento al prodotto effettivo Ingresso aria Pannello laterale Uscita aria...

Page 8: ...ni 3 Verificare che il tubo di scarico non sia danneggiato Controllo dopo l utilizzo stagionale 1 Scollegare l alimentazione Informazioni per il recupero 1 La maggior parte dei materiali di imballaggi...

Page 9: ...filtro sporco La temperatura impostata non nell intervallo corretto Regolare la temperatura nell intervallo corretto Le porte o le finestre sono aperte Chiudere le porte o le finestre Il condizionato...

Page 10: ...8 Temperatura gas di scarico d2 Esterno 9 Protezione antigelo d3 Esterno 10 Limite sovraccarico superato d4 Esterno 11 Limite temperatura IPM superato d5 Esterno 12 UE limite orrente di picco superat...

Page 11: ...o crossing L1 Interno 31 Errore motore ventola interna L2 Interno 32 Errore di comunicazione display interno tra unit interna ed esterna L3 Interno 33 Errore Anomalia livello di porta di selezione L4...

Page 12: ...sore temperatura ambiente esterna U2 Esterno 53 Errore del sensore di temperatura della bobina centrale esterna U3 Esterno 54 Errore sensore temperatura di scarico esterna U4 Esterno 55 Corto circuito...

Page 13: ...nell aria 2 Luoghi in cui sono presenti dispositivi ad alta frequenza come dispositivi di saldatura o medici 3 Luoghi vicino alla zona costiera 4 Luoghi con olio o fumi presenti nell aria 5 Luoghi co...

Page 14: ...le relativa al ca blaggio in vigore 10 L installazione deve essere effettuata in conformit con i requisiti NEC e CEC ed esclusi vamente da personale tecnico autorizzato Precauzioni di sicurezza 1 Il c...

Page 15: ...to di scarico Per unit con capacit di raffreddamento di 2300W 5000W sono necessarie 6 viti ad espansione per unit con capacit di raffredda mento di 6000W 8000W sono necessarie 8 viti adi espansione pe...

Page 16: ...che sia saldo Non tagliare il cavo di alimentazione per allungarlo o accorciarlo dado di raccordo giunto tubazione 1 Rimuovere la vite sul pannello laterale destro dell unit esterna e rimuovere il pan...

Page 17: ...e a 0 1MPa 4 Chiudere la pompa da vuoto e mantenere questo stato per 1 2 minuti per verificare se la pressione del piezometro si man tiene a 0 1MPa Se la pressione diminui sce potrebbe esserci una per...

Page 18: ...acqua L acqua viene scaricata correttamente Si pu formare condensa e gocciolamento d acqua La tensione di alimentazione conforme al valore indicato sulla targhetta Si pu incorrere in un malfunzioname...

Page 19: ...rica del refrigerante lunghezza tubazione supple mentare metri x quantit aggiuntiva di carica del refrigerante per metro In base alla lunghezza del tubo standard aggiungere refrigerante in conformit a...

Page 20: ...ntare il dado di raccordo Rimuovere il dado di raccordo tra tubo di collegamento interno e valvola esterna montare il dado di raccordo sul tubo tubo unito tubo E Allargare l attacco Allargare gli atta...

Page 21: ...ul life and liable to penalties applicable under current statutory regulations on waste disposal Appropriate sorted waste collection for subsequent recycling treatment and eco compatible disposal of d...

Page 22: ...ohol insecticides petrol etc If you decide to stop using the unit switch it off and disconnect it from the mains Do not store the unit within the reach of children or differently able persons Do not s...

Page 23: ...coil it completely to prevent dangerous overheating In the event of damage any component replacement work should be carried out at an authorised Vortice Service Centre Do not touch metal parts of the...

Page 24: ...t inlet or outlet grilles The flow of treated air must be clean that is free of grease soot chemical and corrosive agents and explosive or flammable mixtures Should the appliance be dropped or suffer...

Page 25: ...operation Indoor side temperature below 12 C Indoor side temperature below 16 C Indoor side temperature above 31 C Note 1 The air volume is measured at the relevant standard external static pressure 2...

Page 26: ...Parts Name Air inlet Handle Air outlet Actual product may be different from above graphics please refer to actual products NOTE 24...

Page 27: ...r drainage pipe is damaged Checking after use season 1 Disconnect power supply Notice for recovery 1 Most of packing materials are recyclable materials Please dispose them in appropriate recycling uni...

Page 28: ...need to adjust temperature Your required temperature exceeds the set temperature range Set temperature range 16 31 Cooling heating effect is not good Voltage is too low Wait until the voltage resumes...

Page 29: ...ng Indoor LL 6 Compressor RMS current limit exceeded d0 Outdoor 7 EU RMS current limit exceeded d1 Outdoor 8 Exhaust gas temperature limit Outdoor d2 9 Anti freeze limit exceeded d3 Outdoor 10 Overloa...

Page 30: ...oor 29 Jumper error L0 Indoor 30 Zero detection circuit error L1 Indoor 31 Indoor fan motor error L2 Indoor 32 Indoor display communication error between the indoor unit and outdoor unit L3 Indoor 33...

Page 31: ...mismatch PA Outdoor 48 PC Outdoor 49 Select the outdoor port level abnormal error Pd Outdoor 50 Indoor ambient Temp Sensor short open circuit U0 Indoor 51 Indoor pipe midway temp sensor error U1 Indo...

Page 32: ...or fumes in the air 5 The place with sulfureted gas 6 Other places with special characteristics 7 The laundries Outdoor unit affect neighborhood 2 The location should be well ventilated and dry in wh...

Page 33: ...t be performed in accordance with the requirement of NEC and CEC by authorized personnel only Grounding requirement with specialized grounding device by a professional Please make sure it is always gr...

Page 34: ...000W 6 expansion screws are needed for the unit with cooling capacity of 6000W 8000W 8 expansion screws are needed for the unit with cooling capacity of 10000W 16000W 10 expansion screws are needed St...

Page 35: ...sheet below handle liquid valve gas valve Hexnutdiameter in Tightening torque N m 1 4 15 20 3 8 30 40 1 2 45 55 5 8 60 65 3 4 70 75 Step 5 Connect indoor and outdoor pipe 1 Remove the wire clip connec...

Page 36: ...e of piezometer remains in 0 1MPa 4 Close the vacuum pump and maintain this status for 1 2min to check if the pressure of piezometer remains in 0 1MPa If the pressure decreases there may be leakage 1...

Page 37: ...curely It may cause electric leakage Does the power cord follow the specification It may cause malfunction or damaging the parts Is there any obstruction in the air inlet and outlet It may cause in su...

Page 38: ...length of liquid pipe m x additional refrigerant charging amount per meter Basing on the length of standard pipe add refrigerant according to the requirement as shown in the table The additional refri...

Page 39: ...nsulating pipe D Put on the union nut Remove the union nut on the indoor connection pipe and outdoor valve install the union nut on the pipe union pipe pipe E Expand the port Expand the port with expa...

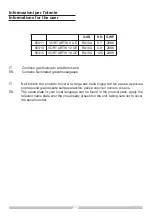
Page 40: ...uo paese applicala sopra quella gi presente sull apparecchio senza coprire il numero di serie EN The name plate in your local language can be found in the product pack apply the relevant name plate ov...

Page 41: ...ct opening gap must be no less than 3 mm ENGLISH Questo apparecchio pu essere utilizzato da bambini di et non inferiore a 8 anni e da persone con ridotte capacit fisiche sensoriali o mentali o prive d...

Page 42: ......

Page 43: ......

Page 44: ...u Province CAP 213000 CHINA vortice china com vortice vortice china com La Vortice Elettrosociali S p A si riserva il diritto di apportare tutte le varianti migliorative ai prodotti in corso di vendit...

Reviews: