


4/8/16DVR Quick Start Guide
VOOK
premium DVR
4
13
Connect to external sensor1-4
14
4 CH Audio input
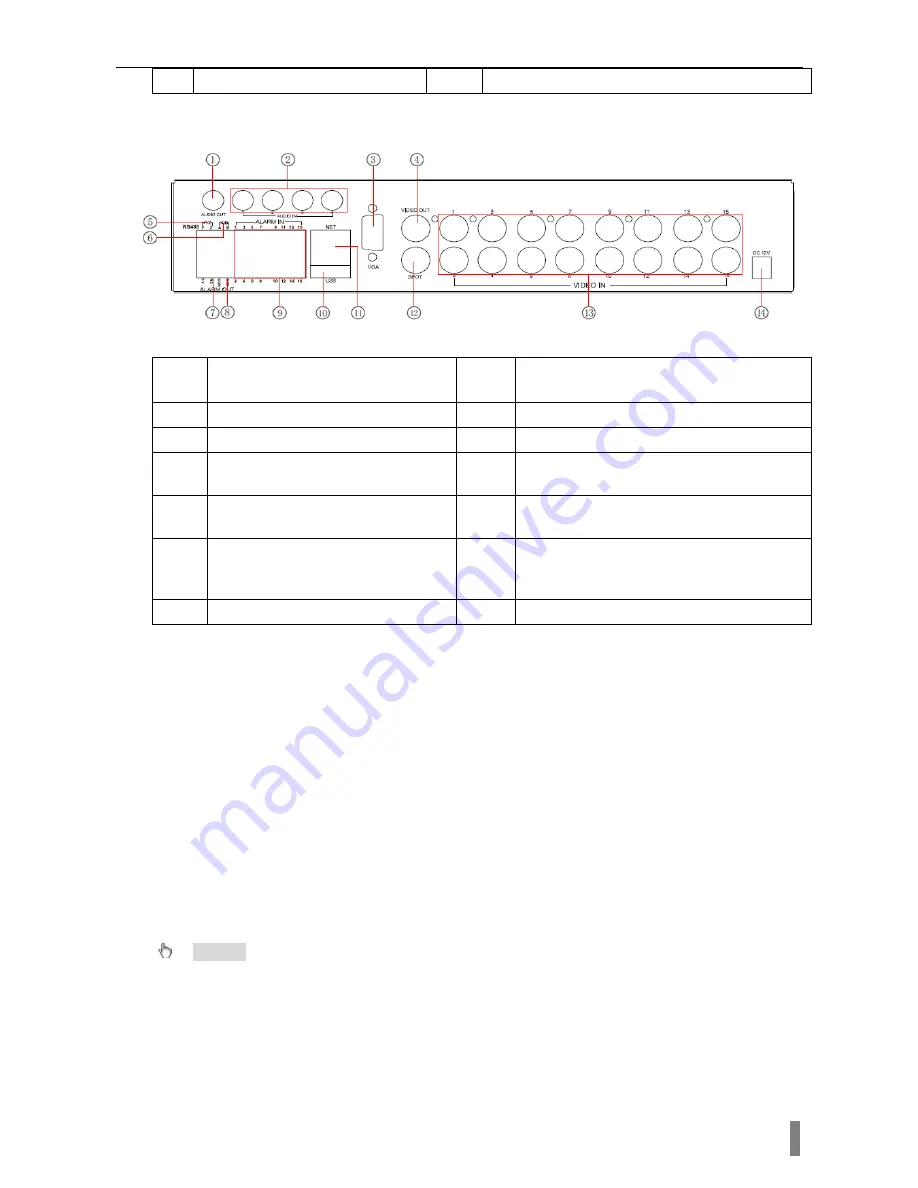
2.3 Rear view for 16-ch DVR
2.3 Rear view for 16-ch DVR
1
Audio out
:
Audio output, connect
to the sound box
2
4 CH Audio input
3
VGA output, connect to monitor
4
Connect to monitor
5
Connect to speed dome
6
Connect to keyboard
7
1-ch relay output. Connect to
external alarm
8
+5 V and Grounding
9
Connect to external sensor1-16
10
Connect USB mouse or connect
external USB devices
11
Network port
12
Connect to monitor as an AUX output
channel by channel. Only video display,
no menu show
13
Video input channels from 1-16
14
POWER INPUT
3. Power on
Step1: connect with the source power; switch on the power button near the
power port in the rear panel
Step2: the device will be loaded, and the power indicator will display blue
Step3: before start, a WIZZARD window will be pop-up and show some
information about time zone
,
time setup
,
network configuration, record
configuration and disk management. User can setup here and refer to the
concrete setup steps from the corresponding chapters. If users don’t want to
setup Wizard, please click Exit button to exit.
After the device power on, if there is no menu or only has live image display,
user can long press ESC button to switch.
Notice: this serial device can only display menu on VGA monitor or BNC monitor at one
time, if there is live image display without menu display, please check up whether other
device has menu display firstly, or long press ESC key to wait for login dialog box to appear.
Long press ESC key can switch the output between BNC and VGA.
4. Basic setup


