48
Remote-control output (on/off)
The DC output can be turned on and off via the a switching contact.
Proceed as follows for connection:
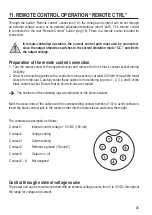
1. Connect the connecting cables of the remote sockets as illustrated.
2. Contact connections 4 and 5 with an isolated switching contact.
3. When the output is turned off, the status displays “C.V.” and “C.C.” (1) will flash. The display will
then show the current settings of the output voltage and the output current (1).
4. When the output is turned off, you can set the output values with the controls for voltage (3) and
current limiting (4).
No voltage must be applied to contacts 4 and 5.
5. Switch off the power unit and then connect the remote socket to the rear
remote connection. Screw on the external fastening ring.
6. Switch on the power unit.
7. Put the MODE switch (8) on the rear into the “Remote Ctrl” position.
The “REAR CONTROL” display is lit.
8. If the switching contact is open, the DC output is active; if it is closed,
the DC output is switched off. Check the switching function for correct
function.
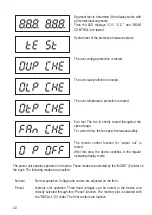
9. When the DC output is switched off, “O P OFF” is displayed.
10. If this remote control function is no longer required, put the MODE
switch (8) to the “Normal” position.


