background image

24

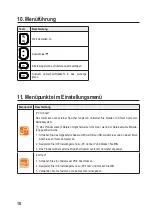
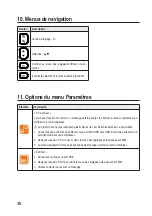
10. Navigating menus

Button

Description 

Adjust value: 

+/-

Selection: ▲/▼

Enter settings menu/confirm a selection

Cancel selection/return to previous screen.

11. Settings menu options

Item

Description

“PC Connect”

The unit can function as external storage. Manage files using your computer operating system. 


The product may no longer recognize files if the filename/extension has been changed.

1.  Connect one end of the included cable to the Mini USB to USB-A port and the other end to an 

available port on your computer.

2.  Navigate to “PC Connect” in the settings menu then press 

OK

.

3.  The product will appear as an external storage device on your computer.

“Edit Text”
1.  Connect a keyboard to the PS/2 port.
2.  Navigate to “Edit Text” in the settings menu then press 

OK

.

3.  Use the keyboard to type a message.

Summary of Contents for 2250943

Page 1: ...Instructions BS 2000HD Inspection Videoscope Control Unit Display Item No 2250943 Page 16 29 Mode d emploi Unit de commande cran du vid oscope d inspection BS 2000HD N de commande 2250943 Page 30 43 G...

Page 2: ...8 Schutzart 8 9 Erste Schritte 8 a Akku aufladen 8 b Speicher bereitstellen 9 c Datum und Uhrzeit einstellen 9 d Anschluss 9 10 Men f hrung 10 11 Men punkte im Einstellungsmen 10 12 Bedienungshinweis...

Page 3: ...se Bedienungsanleitung zum Nachlesen auf Bei technischen Fragen wenden Sie sich bitte an Deutschland www conrad de sterreich www conrad at Schweiz www conrad ch 2 Symbol Erkl rung Das Symbol mit dem B...

Page 4: ...en anwenden Aus Sicherheits und Zulassungsgr nden d rfen Sie das Produkt nicht umbauen und oder ver ndern Sollten Sie das Produkt f r andere als die zuvor beschriebenen Zwecke verwenden kann das Produ...

Page 5: ...geringer H he k nnen das Produkt besch digen Wenden Sie sich an einen Fachmann sollten Sie Zweifel in Bezug auf die Arbeitsweise die Sicherheit oder den Anschluss des Ger ts haben Lassen Sie Wartungs...

Page 6: ...Lassen Sie den Akku des Produkts w hrend des Ladevorgangs niemals unbeaufsichtigt Platzieren Sie das Produkt w hrend des Ladevorgangs auf einer hitzebest ndigen Oberfl che Eine gewisse Erw rmung beim...

Page 7: ...metaste 2 Bilddrehtaste 3 Fototaste 4 Bildschirm 5 Videoaufnahmetaste 6 Bilddrehtaste 7 Fototaste 8 LED Helligkeit erh hen verringern 9 Zoom 10 Navigation 11 OK Eingabetaste 12 ESC Zur ck Taste 13 Ein...

Page 8: ...ten Schutz gegen Staub und Spritzwas ser aus allen Richtungen Nicht in Fl ssigkeiten eintauchen Hinweis Damit die Schutzart wirksam ist muss die Abdeckung aus Gummi ordnungsgem abgedichtet sein Der St...

Page 9: ...stellen Gespeicherte Fotos und Videos enthalten Datum und Zeitinformationen 1 Halten Sie die Ein Aus Taste gedr ckt um das Ger t einzuschalten 2 Dr cken Sie OK um das Einstellungsmen aufzurufen 3 Dr c...

Page 10: ...t Dateien m glicherweise nicht mehr wenn der Dateiname die Erweite rung ge ndert wurde 1 Schlie en Sie das mitgelieferte Kabel am Mini USB zu USB A Anschluss und an einem freien Anschluss an Ihrem Com...

Page 11: ...lungsmen zu Auto Power Off und dr cken Sie OK Display Navigieren Sie im Einstellungsmen zu Display und dr cken Sie OK Stellen Sie die verschiedenen Display Einstellungen wie Helligkeit Kontrast und Sc...

Page 12: ...igen um ein Foto aufzunehmen um ein Video aufzunehmen d Dateibrowser Bild und Video wiedergeben Sie k nnen im Hauptmen auf den integrierten Dateibrowser zugreifen 1 Dr cken Sie um das Men PLAYBACK auf...

Page 13: ...sen sind Nach dem Anschluss an einem externen Monitor und das Kabel wurde abgezogen Im Modus Video Output Dr cken Sie 3 Mal ESC um den Modus Video Output zu verlassen Kein Zugriff auf microSD Karte m...

Page 14: ...en Sie die Karte Siehe b Speicher bereitstellen auf Seite 9 f r weitere Informa tionen Bild friert ein Prozessor aufgrund von anormalem Betrieb blockiert Dr cken Sie die R cksetztaste Siehe f R cksetz...

Page 15: ...riebsdauer max 6 Std USB USB2 0 Daten bertragung Digital Zoom max 3x Unterst tzte microSD Klasse 10 max 32 GB SD Kartenformat FAT32 Sprachen Deutsch Englisch Franz sisch Spanisch Schutzart IP54 Foto V...

Page 16: ...21 b Side 22 8 Ingress protection 22 9 Getting started 22 a Charging the battery 22 b Get storage ready 23 c Set date and time 23 d Connection 23 10 Navigating menus 24 11 Settings menu options 24 12...

Page 17: ...erating instructions for reference If there are any technical questions please contact www conrad com contact 2 Explanation of symbols The symbol with the lightning in the triangle is used if there is...

Page 18: ...safety and approval purposes you must not rebuild and or modify this product If you use the product for purposes other than those described above the product may be damaged In addition improper use c...

Page 19: ...e product carefully Jolts impacts or a fall even from a low height can damage the product Consult an expert when in doubt about the operation safety or connection of the appliance Maintenance modifica...

Page 20: ...able battery technology being used you do not need to discharge the rechargeable battery first Never charge the rechargeable battery of the product unattended When charging place the product on a sur...

Page 21: ...2 Screen rotate button 3 Photo snapshot button 4 Screen 5 Video record button 6 Screen rotate button 7 Photo snapshot button 8 LED brightness up down 9 Zoom 10 Navigation 11 OK enter button 12 ESC bac...

Page 22: ...nst dust and water splashing from all directions Do not submerge Note For the ingress protection rating to be effective the rubber compartment cover should be properly sealed The insertion cable conne...

Page 23: ...and time Saved photos and videos will contain date and time information 1 Press and hold the power button to switch the power ON 2 Press OK to enter the settings menu 3 Press to scroll to the Date Ti...

Page 24: ...em The product may no longer recognize files if the filename extension has been changed 1 Connect one end of the included cable to the Mini USB to USB A port and the other end to an available port on...

Page 25: ...gate to Auto Power Off in the settings menu then press OK Display Navigate to Display in the settings menu then press OK Adjust various display settings such as brightness contrast and sharpness Langu...

Page 26: ...browser playback image and video You can access the onboard file browser from the main screen 1 Press to enter the PLAYBACK menu A list of files will show 2 Press to select a file then press OK to vie...

Page 27: ...s microSD card In PC Connect mode and the USB cable was disconnected In PC Connect mode Exit PC Connect mode Cannot access card Card was inserted and removed multiple times or the card was removed too...

Page 28: ...s or recorded images Photos and video can only save 1x zoom Use third party software to enhance the image Cannot charge battery Defective battery Contact our technical support service or other technic...

Page 29: ...nguages German English French Spanish Ingress protection IP54 Photo video resolution 1280 x 720 pixels HD Display resolution 1024 x 600 Supported OS Windows 7 and above MacOS X 10 8 and above Linux 2...

Page 30: ...tions 36 9 D marrage 36 a Recharger la batterie 36 b Pr parez le stockage 37 c R glez la date et l heure 37 d Connexion 37 10 Menus de navigation 38 11 Options du menu Param tres 38 12 Fonctionnement...

Page 31: ...f rer ult rieurement Pour toute question technique veuillez vous adresser France email technique conrad france fr Suisse www conrad ch 2 Explication des symboles Le symbole avec l clair dans un trian...

Page 32: ...des raisons de s curit et d homologation toute restructuration et ou modification du produit est interdite Toute utilisation des fins autres que celles d crites ci dessus pourrait endommager le produi...

Page 33: ...une chute m me de faible hauteur peuvent endommager le produit Consultez un sp cialiste en cas de doute sur le fonctionnement la s curit ou le raccordement de l appareil L entretien les modifications...

Page 34: ...ateur n est pas n cessaire Ne rechargez jamais l accumulateur du produit sans surveillance Au cours du chargement placez le produit sur une surface qui ne soit pas sensible la chaleur Il est normal qu...

Page 35: ...e l cran 3 Bouton d instantan 4 cran 5 Bouton d enregistrement vid o 6 Bouton de rotation de l cran 7 Bouton d instantan 8 Augmentation r duction de la lu minosit des LED 9 Zoom 10 Navigation 11 Bouto...

Page 36: ...et la projection d eau provenant de toutes les directions Ne l immergez pas Remarque Pour que l indice de protection contre les intrusions soit efficace le couvercle du compartiment en caout chouc doi...

Page 37: ...des informations relatives la date et l heure 1 Appuyez sur le bouton de mise en marche et maintenez le enfonc pour allumer l appareil 2 Appuyez sur la touche OK pour acc der au menu des r glages 3 Ap...

Page 38: ...nateur Le produit peut ne plus reconna tre les fichiers si le nom de fichier extension a t modifi 1 Connectez une extr mit du c ble fourni au port Mini USB vers USB A et l autre extr mit un port dispo...

Page 39: ...enu des r glages puis appuyez sur OK Display Naviguez jusqu Display dans le menu des r glages puis appuyez sur OK R glez divers param tres d affichage tels que la luminosit le contraste et la nettet L...

Page 40: ...n direct appuyez sur pour prendre une photo pour enregistrer une vid o d Navigateur de fichiers lecture d images et de vid os Vous pouvez acc der au navigateur de fichiers embarqu partir de l cran pri...

Page 41: ...que tous les composants sont correcte ment connect s Apr s raccordement un moniteur externe le c ble a t d connect En mode Video Output Appuyez sur le bouton ESC pour quitter le mode Video Output Impo...

Page 42: ...atez la carte Voir b Pr parez le stockage la page37 pour plus d informations L image se fige Le processeur se bloque en raison d un fonctionnement anormal Appuyez sur le bouton de r initialisation Voi...

Page 43: ...x USB USB2 0 transmission de donn es Zoom num rique 3x max Carte MicroSD prise en charge Classe 10 32 Go max Format de la carte SD FAT32 Langues allemand anglais Fran ais espagnol Indice de protection...

Page 44: ...8 Beschermingsgraad 50 9 Aan de slag 50 a De batterij opladen 50 b Bereid geheugen voor 51 c De tijd en datum instellen 51 d Aansluiting 51 10 Navigeren door menu s 52 11 Instellingsmenu opties 52 12...

Page 45: ...voor toekomstige raadpleging Bij technische vragen kunt u zich wenden tot onze helpdesk Voor meer informative kunt u kijken op www conrad nl of www conrad be 2 Verklaring van de symbolen Het symbool...

Page 46: ...niet op mensen of dieren Om veiligheids en goedkeuringsredenen mag u niets aan dit product veranderen Als het product voor andere doel einden wordt gebruikt dan hierboven beschreven kan het worden bes...

Page 47: ...een val van geringe hoogte kunnen het pro duct beschadigen Raadpleeg een expert als u vragen hebt over gebruik veiligheid of aansluiting van het apparaat Onderhoud aanpassingen en reparaties mogen all...

Page 48: ...u de oplaadbare accu niet eerst te ontladen Laad de oplaadbare accu van het product nooit op zonder toezicht Tijdens het laden dient u het product op een voor hitte ongevoelig oppervlak te plaatsen He...

Page 49: ...deo opnametoets 2 Schermrotatietoets 3 Fototoets 4 Scherm 5 Video opnametoets 6 Schermrotatietoets 7 Fototoets 8 Led helderheid omhoog omlaag 9 Zoom 10 Navigatie 11 OK entertoets 12 ESC terugtoets 13...

Page 50: ...stof en waterstralen vanuit alle richtingen Niet onderdompelen Opmerking Om ervoor te zorgen dat de beschermingsklasse effectief blijft moet het rubberen compartimentdeksel goed gesloten zijn De conn...

Page 51: ...n datum instellen Opgeslagen foto s en video s zullen datum en tijdsinformatie bevatten 1 Houd de aan uittoets ingedrukt om AAN te schakelen 2 Druk op OK om het instellingsmenu te openen 3 Druk op om...

Page 52: ...en mogelijk niet meer herkennen als de bestandsnaam extensie is veranderd 1 Sluit het ene uiteinde van de meegeleverde kabel aan op de Mini USB naar USB A poort en steek het andere uiteinde in een bes...

Page 53: ...Auto Power Off in het instellingsmenu en druk vervolgens op OK Display Navigeer naar Display in het instellingsmenu en druk vervolgens op OK Pas hier verschillende beeldinstellingen aan zoals helderhe...

Page 54: ...om een video op te nemen d Bestandsbrowser foto s en video s afspelen Het hoofdscherm biedt toegang tot de ingebouwde bestandsbrowser 1 Druk op om het menu PLAYBACK te openen Er zal een lijst met bes...

Page 55: ...n aange sloten Na aansluiting op een externe monitor en de kabel was losge koppeld In Video Output mo dus Druk 3x op de toets ESC om de Video Out put modus te sluiten Geen toegang tot microSD kaart In...

Page 56: ...heugen voor op pagina 51 voor meer informatie Beeld loopt vast De processor is vastgelopen wegens abnormale werking Druk op de resettoets Zie f Reset knop op pagina 55 voor meer informatie Zoomaanpass...

Page 57: ...o 10 8 V 3450 mAh 37 26 Wh Gebruiksduur max 6 uur USB USB2 0 gegevensoverdracht Digitale zoom max 3x Ondersteunde MicroSD Klasse 10 max 32 GB SD kaartformaat FAT32 Talen Duits Engels Frans Spaans Besc...

Page 58: ...58...

Page 59: ...59...

Page 60: ...nting Copyright 2021 by Conrad Electronic SE Ce document est une publication de Conrad Electronic SE Klaus Conrad Strasse 1 D 92240 Hirschau Allemagne www conrad com Tous droits r serv s y compris la...

Reviews: