


Installing Your Network Card
Note
VigorNIC 132 series is being supported by the Windows 7
Generic Ethernet Driver. If you are required to install the
driver manually, please download it from
www.draytek.com
.
1.
Power off your computer
2.
Remove the cover of your computer.
3.
Choose a spare card slot and insert VigorNIC 132 network card
into the card slot.
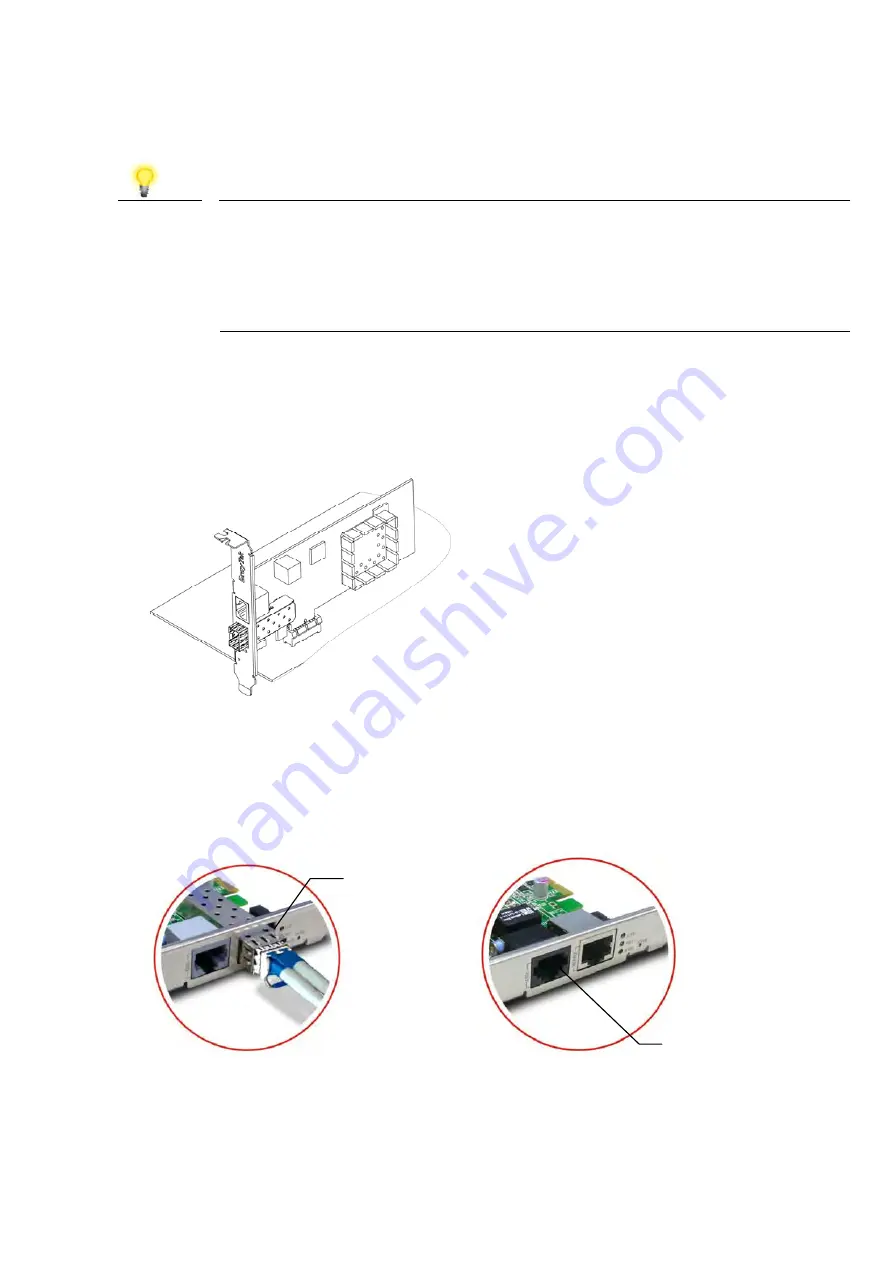
4.
Use RJ-11 cable(for AnnexA) or RJ-45 cable (for AnnexB) to
connect DSL interface to the external VDSL splitter to establish
DSL connection (VigorNIC 132). Or, insert the fiber cable into
WAN2 interface to establish fiber WAN connection(VigorNIC
132F).
5.
Install the cover of your computer and power on the computer.
6.
Check the ACT, WAN2/DSL LEDs of VigorNIC 132 to assure WAN
connections.
VigorNIC 132
VigorNIC 132F
VoIPon www.voipon.co.uk [email protected] Tel: (0)330 088 0195 Fax: +44 (0)1245 808299


