18
TAMPER WARNINGS
This wood heater has a manufacturer-set minimum low burn rate that must not be altered. It is against federal
regulations to alter this setting or otherwise operate this wood heater in a manner inconsistent with operating
instructions in this manual.
THE FIRST FIRES
The fresh paint on your stove needs to be cured to preserve its quality. Once the fuel charge is properly ignited,
only burn small
fi
res in your stove for the
fi
rst four hours of operation. Never open the air control more than
necessary to achieve a medium burn rate.
Make sure that there’s enough air circulation while curing the stove. The odors could be smelled during the 3
or 4
fi
rst
fi
res. Never start your stove outside. You will not be able to see if you are over heating.
IGNITION
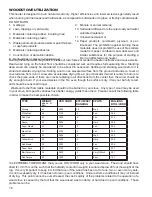
After making sure that the stove air intake controls are fully open (completely pull-out towards you), The top
down method of
fi
re building is recommended for this appliance. After making sure that the stove air intake
controls are fully open (completely pull-out towards you), Place the largest pieces of wood on the bottom, laid
in parallel and close together. Smaller pieces are placed in a second layer, crossways to the
fi
rst. A third layer
of still smaller pieces is laid crossways to the second, this time with some spaces between. Then a fourth
layer of loose, small kindling and twisted newspaper sheets tops off the pile.
Before igniting the paper and kindling wood, it is recommended that you warm up the chimney. This is done
in order to avoid back draft problems often due to negative pressure in the house. If such is the case, open a
window slightly near the stove and twist together a few sheets of newspaper into a torch. Light up this paper
torch and hold it as close as possible to the mouth of the pipe inside the combustion chamber to warm up
the chimney. Once the updraft movement is initiated, you are ready to ignite the stove by lighting the paper
and kindling wood inside the combustion chamber.When you have achieved a good bed of hot embers, we
recommend the following burn procedures:
Primary Air Settings
(Slide Damper is located in center of stove under hearth plate)
(Damper Adjustment: Pulling out on damper increases air)
Electric Blower Speed Setting
(Variable)
(Blower is on High when turned “ON”,
Rotate clock-
wise until stop for “LOW”.)
Burn Rate
Adjust Damper from fully closed
Burn Time
Blower Speed
Low
1/4” (6.3mm)
@ 30 minutes
Low
Medium - Low
3/8” (9.5mm)
@ 30 minutes
Low
Medium - High
1/2” (12.7mm)
@ 30 minutes
Low
High
approx. 3” (76mm)
all minutes
High
WARNINGS
• NEVER OVERFIRE YOUR STOVE. IF ANY PART OF THE STOVE STARTS TO GLOW RED, OVER
FIRING IS HAPPENING. READJUST THE AIR INTAKE CONTROL AT A LOWER SETTING.
• THE INSTALLATION OF A LOG CRADLE or GRATES IS NOT RECOMMENDED IN YOUR WOOD
STOVE. BUILD FIRE DIRECTLY ON FIREBRICK.
• NEVER PUT WOOD ABOVE THE FIREBRICK LINING OF THE FIREBOX.
• ATTEMPTS TO ACHIEVE HEAT OUTPUT RATES THAT EXCEED HEATER DESIGN SPECIFICATIONS
CAN RESULT IN PERMANENT DAMAGE TO THE HEATER.
• Be considerate of the environment and only burn dry wood
• Burn small, intense
fi
res instead of large, slow burning
fi
res when possible
• Learn your appliance’s operating characteristics to obtain optimum performance
• Burning unseasoned wet wood only hurts your stoves ef
fi
ciency and leads to accelerated creosote buildup
in your chimney
Summary of Contents for VG200
Page 23: ...23 Notes ...

