background image

Audio Connections

Installation

13

Now that your speakers are connected, it is time to connect your audio input devices. Looking at the rear panel 

of the DTX-9900K you will notice several jack groupings. Below we will cover which devices are suited for 

connection, and how the connections are made.

Analog Source Connections

The analog input channels are located between the digital channels and the speaker outputs. Each analog input 

channel has a L/R audio and a corresponding video jack. There are four analog input channels, one analog 

output channel and one loop channel (no video) available for connection. Connections are to be made via RCA-type 

patch cables, preferably shielded to minimize the possibility of cable noise.

Input Connections

To make an analog connection, connect the left and right AUDIO OUTPUT jacks of the external device, such as a 

CD+G or VCD player, to the left and right AUDIO INPUT jacks of the receiving channel on the DTX-9900K. If 

connecting video, connect the VIDEO OUTPUT jack of the external device to the yellow VIDEO INPUT jack on the 

same channel you connected the audio to.

Analog Source 

VCD

DVD

AUX

CD

OUT

AU

D

IO

R

AU

D

IO

L

VI

D

EO

Analog Input Channels

RCA Connectors

Input Connections 

VCD

DVD

AUX

CD

OUT

AU

D

IO

R

AU

D

IO

L

VI

D

EO

IN

PU

T

O

U

TP

U

T

External Device

(DVD Player for example)

Audio Out

Video Out

LO

O

P

IN

PU

T

O

U

TP

U

T

LO

O

P

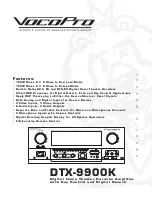
Summary of Contents for DTX-9900K

Page 1: ...udio Outputs Separate Bass and Treble Controls for Music and Microphones Channels 3 Microphone Inputs with Volume Controls Digital Scrolling Graphic Display for All System Operations Full Function Remote Control MIC MASTER VOLUME AUTO DISPLAY TEST TONE DTX 9900K MIC IN KARAOKE DIGITAL KEY CONTROL MASTER MENU DIGITAL HOME THEATER KARAOKE AMPLIFIER WITH KEY CONTROL AND DIGITAL REVERB POWER MIC 1 MIC...

Page 2: ...r other appliances including amplifiers that produce heat 10 Power Sources The appliance should be connected to a power supply only of the type described in the operating instructions or as marked on the appliance 11 Grounding or Polarization Precautions should be taken so that the grounding or polarization means of an appliance is not defeated 12 Power Cord Protection Power supply cords should be...

Page 3: ...ro 1728 Curtiss Court La Verne CA 91750 Toll Free 800 678 5348 TEL 909 593 8893 FAX 909 593 8890 VocoPro Company Email Directory Customer Service General Information info vocopro com Tech Support techsupport vocopro com Remember Our Website Be sure to visit the VocoPro website www vocopro com for the latest information on new products packages and promos And while you re there don t forget to chec...

Page 4: ...aration Degree of Stereo 70dB S N Ratio A Weight 90dB Input Sensitivity Impedance Microphone 0 5mV 100mV 2K Line In 0 707V 51K Audio 0 707V 1K Total Harmonic Distortion All Channels 1 1kHz 10W 8 Freq Response 20Hz 20kHz 0 5 Other Power AC 110 240V 50 60Hz Max Power Consumption 800W Dimensions 16 W x 6 7 H x 17 1 L Net Weight 23 1 Lbs Front Panel Rear Panel Remote Control 5 6 7 8 10 Speaker Install...

Page 5: ...ial and leave it there Pay attention to the different levels in various recordings Taking a minute to do this now will help to prevent hearing damage or loss in the future After all we want you listening for a lifetime Used wisely your new sound equipment will provide a lifetime of fun and enjoyment Since hearing damage from loud noise is often undetectable until it is too late this manufacturer a...

Page 6: ...bar and more 9 AUTO DETECT button When pressed this button automatically searches all input channels for an INPUT SIGNAL when one is found it automatically makes it the ACTIVE CHANNEL If more than one input channel has an active device connected the AUTO DETECT function will toggle between them each time it is pressed 10 MASTER MENU buttons These buttons navigate through the available MASTER MENU ...

Page 7: ...crease decrease the BASS level 20 INPUT button This button toggles through all the INPUT channels for available INPUT SOURCES 21 DISPLAY ON OFF button This button toggles the GRAPHIC DISPLAY ON OFF 22 CH MODE button This button is used to have the MICROPHONE OUTPUT concentrated to particular sections of the speaker matrix Microphone output can be concentrated to the FRONT L R or CENTER speaker des...

Page 8: ... COAXIAL These DIGITAL INPUTS are for connecting external audio video input devices via COAXIAL DIGITAL cables Connect RCA ended DIGITAL AUDIO CABLES from these jacks to the COAXIAL outputs on the external audio video device s 7 VCD DVD AUX CD AUDIO INPUT jacks RCA These ANALOG INPUTS are for connecting the L R AUDIO channels of INPUT SOURCES via RCA type patch cables Connect paired RCA ended patc...

Page 9: ...ack 9 KARAOKE ON OFF button Press this button to enable KARAOKE MODE features such as DIGITAL KEY CONTROL ECHO REPEAT DELAY CH MODE and MICROPHONES 10 DIGITAL KEY CONTROL buttons These buttons direct the DIGITAL KEY CONTROLLER to either raise lower or reset the musical key of source audio from connected input devices UP Raises the musical key a half step each time it is pressed RESET Resets the mu...

Page 10: ...adjust the levels within the MASTER MENU 23 DSP button This button toggles through the different DSP MODES available for music and vocal enhancement DSP modes include LIVE THEATRE STADIUM JAZZ CHURCH HALL USER MOVIE and MUSIC NOTE Echo adjustments can only be made when KARAOKE MODE is ENABLED NOTE Ch mode adjustments are only available when KARAOKE MODE is set to ON and the MAIN and CENTER speaker...

Page 11: ...me to replace the batteries Installing the batteries To install the batteries first remove the battery compartment lid from the back of the remote control Insert two AAA batteries ensuring that the polarities are aligned correctly NOTE When operating the remote control point the top of the remote control toward the front panel Keep the line of sight between the remote control and DTX 9900K Remote ...

Page 12: ...al distance You can try experimenting with slight angling of the main speakers towards the listening area placing them closer etc until you feel have reached the best sound One thing to avoid however when placing main speakers is placing them so that the tweeters are significantly higher or lower than ear height The surround or rear speakers actually work best when they are placed to the sides of ...

Page 13: ...olor coded red for positive and black for negative or ground The speakers should have some very similar identification on their inputs In order to maintain correct phasing between speakers it is very important that each speaker connection is made with the same polarity i e red to red black to black Lastly for the powered subwoofer connect its input to the DTX 9900K s subwoofer output using a shiel...

Page 14: ... video available for connection Connections are to be made via RCA type patch cables preferably shielded to minimize the possibility of cable noise Input Connections To make an analog connection connect the left and right AUDIO OUTPUT jacks of the external device such as a CD G or VCD player to the left and right AUDIO INPUT jacks of the receiving channel on the DTX 9900K If connecting video conne...

Page 15: ... To connect an external device to the LOOP channel first remove the metal LOOP BARS It is important to store the LOOP BARS in a safe place when they are not connected as they are necessary for audio output when no device is connected to the loop After removing the LOOP BARS connect an RCA type patch cable from the OUTPUT jacks of your external effects device to the LOOP IN jacks on the DTX 9900K C...

Page 16: ...een jacks of the same designation as they may differ from device to device Digital Source Connections The DTX 9900K has two Toslink Optical Digital inputs and two Coaxial Digital inputs These inputs are for connecting external devices with digital output To play and experience DTS DTS ES and Dolby Digital Dolby Digital EX soundtracks from a DVD player with the DTX 9900K s built in decoders the pla...

Page 17: ...tereo pre amp output carries the same audio signal that is fed to its internal amplifier for speaker output This output can feed an auxiliary audio device for system integration needs To make a pre amp connection using an RCA type patch cable connect the AUDIO INPUT jacks of your external device to the OUT jacks on the DTX 9900K Video Connections The DTX 9900K has four input channels and one outpu...

Page 18: ...ks till it fully inserted For microphones with 1 8 plugs a 1 8 to adapter can be obtained to make the connection AC Device Connections The DTX 9900K has two AC power outlets on the rear panel to provide power for connecting devices Please note that devices with power consumption ratings over 300W should not be connected as they exceed the allowable power feed Microphone Connection AC Power Outlets...

Page 19: ...have set all speaker levels to 0dB and repeat the TEST TONE If more variances are observed navigate to that speaker channels LEVEL setting and make the adjustments to get a uniform and even leveled sound Configuring Your Speakers In order for your DTX 9900K to properly adjust and distribute audio for output it needs to know some things about the speakers connected to it Below we will explain the k...

Page 20: ...ng environment is the smoother and warmer the audio is The reason being is that when soundwaves bounce off reflective surfaces they can cause phase shift stereo positioning and DSP application problems So ensure this setting is made for optimal sound quality Configuring Channel Delays In order for your surround experience to be fully synchronized with the video playback of movies the CHANNEL DELAY...

Page 21: ...tions of the audio The DYNAMIC RANGE can be set to either MINIM MINIMUM STAND STANDARD or MAXIM MAXIMUM The MINIMUM setting applies a compression level suitable for late night viewing greatly reducing peak levels without reducing speech and environmental audio The STANDARD setting applies a compression level recommended by most audio engineers for attaining an optimal sound while preventing any po...

Page 22: ...AL stereo image and select towards 3dB for an increased REAR stereo image Leave at 00dB for an even soundfield NOTE This setting only works in PRO LOGIC II audio mode PLII CT WIDTH level This setting allows variable adjustment of the CENTER audio image This is used to create an optimal F LEFT CENTER F RIGHT soundfield for increased stereo positioning The range of selection is from 00 to 07 To have...

Page 23: ...CT button repeatedly to toggle through all the DTX 9900K s INPUT CHANNELS When the channel your intended source device is connected to displays in the graphic display you are done Input Selection Selecting Input Channel MIC MASTER VOLUME AUTO DISPLAY TEST TONE DTX 9900K MIC IN KARAOKE DIGITAL KEY CONTROL MASTER MENU DIGITAL HOME THEATER KARAOKE AMPLIFIER WITH KEY CONTROL AND DIGITAL REVERB POWER M...

Page 24: ...tivate the DTS ES mode on the DTX 9900K will not work even if the player is connected via a digital connection Alternatively let s say you have DVD player connected with both an analog and digital connections and you have the output on the player set to analog if you play a DVD movie with a DTS encoded soundtrack when you try to select the DTS mode on the DTX 9900K the graphic display will scroll ...

Page 25: ...response This setting is ideal for increasing the presence of vocals or similar instrument voice within audio Lower Higher Mid range Boost Use this setting to increase medium low and medium high end response This setting is ideal for widening an audio signal for general frequency reinforcement Full frequency Cut Use this setting to reduce full frequency response This setting is ideal for controlli...

Page 26: ...h music playing press the DSP button on either the FRONT PANEL or REMOTE CONTROL Each time the DSP button is pressed the DTX 9900K cycles to a different DSP setting Finding the right DSP mode for the occasion may take a few complete cycles through the DSP modes so don t worry if that happens Since DSPs traditionally work with ANALOG signals employing AD analog to digital and DA digital to analog c...

Page 27: ...to 36 Mic Bass This setting controls the Mic channels BASS output level Use the MIC MASTER VOLUME knob to increase or decrease the MIC BASS level MIC BASS level settings can be adjusted from 10 to 10 Mic Treble This setting controls the Mic channels TREBLE output level Use the MIC MASTER VOLUME knob to increase or decrease the TREBLE level MIC TREBLE level settings can be adjusted from 10 to 10 Mi...

Page 28: ...ocals experience Standard two channel audio can be spread to surround and center speakers for various environmental and acoustical sound images that greatly enhance a singers voice When selecting a DSP mode for vocal enhancement remember that the front surround and center speakers should be connected for maximum enhancement To select a vocal DSP mode with a microphone connected and turned on press...

Page 29: ...y Speaker cables may be defective AC power supply is compromised Ensure AC outlet or power strip is not overloaded or malfunctioning Remote control is not working Replace batteries with fresh batteries Remote control batteries need replacement Remote control line of sight with remote sensor on front panel is compromised Remote control is being operated too far from the DTX 9900K Ensure no obstacle...

Page 30: ...o L R channels Ch Mode is set to Center speaker Digital key control sounds unnatural Reduce the Digital Key Control setting until the music sounds natural Chosen music cannot be Digitally Key Controlled to the chosen setting Digital Echo Repeat and Delay setting are set too high Microphone is too close to or pointed directly at speakers Reduce the Digital Echo Repeat and Delay settings or disable ...

Page 31: ...alog playback to have surround mode enabled No sound from particular Rear or Center speakers Disable or change the Pro Logic mode to a mode where the speaker are audible A Pro Logic surround mode that by design cuts sound to particular speakers is enabled Particular speakers are not connected properly Perform a Test Tone check If particular speakers are not present in Test Tone rotation check spea...

Reviews: