


VMware, Inc.
51
Chapter 10 vShield Edge Management
5
Click
Add
.
A new row appears in the table.
6
Double-click each cell in the row to enter or select the appropriate information.
You must type IP addresses in the
Source
and
Destination
fields.
7
(Optional) Click
Log
to send log events to a specified syslog server when the firewall rule is violated.
8
(Optional) Select the new row and click
Move Up
to move the rule up in priority.
9
Click
Commit
to save the rule.
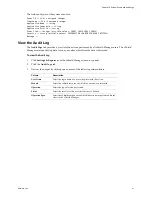
Validate Active Sessions Against Current vShield Edge Firewall Rules
By default, a vShield Edge matches firewall rules against each new session. After a session has been
established, any firewall rule changes do not affect active sessions.
The CLI command
validate sessions
enables you to validate active sessions against the current vShield
Edge firewall rule set to purge any sessions that are in violation of the current rule set. After a firewall rule set
update, you should validate active sessions to purge any existing sessions that are in violation of the updated
policy.
After a vShield Edge firewall update is complete, issue the
validate sessions
command from the CLI of a
vShield Edge instance to purge sessions that are in violation of current policy.
To validate active sessions against the current firewall rules
1
Update and commit the vShield Edge firewall rule set.
2
Open a console session on a vShield Edge instance to issue the
validate sessions
command.
vShieldEdge> validate sessions
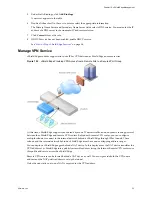
Manage NAT Rules
The vShield Edge provides network address translation (NAT) service to protect the IP addresses of internal,
private networks from the public network. You must configure NAT rules to provide access to services
running on privately addressed virtual machines.
The NAT service configuration is separated into SNAT and DNAT rules. An SNAT rule translates a private
internal IP address into a public IP address for outbound traffic. A DNAT rule maps a public IP address to a
private internal IP address.
To configure an SNAT rule for a vShield Edge
1
In to the vSphere Client, go to
Inventory > Networking
.
2
Select an Internal port group where a vShield Edge has been installed.
3
Click the
vShield Edge
tab.
4
Click the
NAT
link.
5
Under Direction OUT (SNAT), click
Add
.
A new row appears in the table.
6
Double-click each cell in the row to enter the appropriate information.
7
Click
Commit
to save the rule.
Summary of Contents for VSHIELD APP 1.0.0 UPDATE 1 - API
Page 9: ...VMware Inc 9 vShield Manager and vShield Zones...
Page 10: ...vShield Administration Guide 10 VMware Inc...
Page 14: ...vShield Administration Guide 14 VMware Inc...
Page 18: ...vShield Administration Guide 18 VMware Inc...
Page 24: ...vShield Administration Guide 24 VMware Inc...
Page 34: ...vShield Administration Guide 34 VMware Inc...
Page 42: ...vShield Administration Guide 42 VMware Inc...
Page 46: ...vShield Administration Guide 46 VMware Inc...
Page 47: ...VMware Inc 47 vShield Edge and Port Group Isolation...
Page 48: ...vShield Administration Guide 48 VMware Inc...
Page 57: ...VMware Inc 57 vShield App and vShield Endpoint...
Page 58: ...vShield Administration Guide 58 VMware Inc...
Page 62: ...vShield Administration Guide 62 VMware Inc...
Page 68: ...vShield Administration Guide 68 VMware Inc...
Page 78: ...vShield Administration Guide 78 VMware Inc...
Page 85: ...VMware Inc 85 Appendixes...
Page 86: ...vShield Administration Guide 86 VMware Inc...


