VIVOTEK
User's Manual - 43
Media > Image
This section explains how to configure the image settings of the Network Camera. It is
composed of the following four columns: General settings, Picture settings, Exposure, and
Privacy mask.
General settings
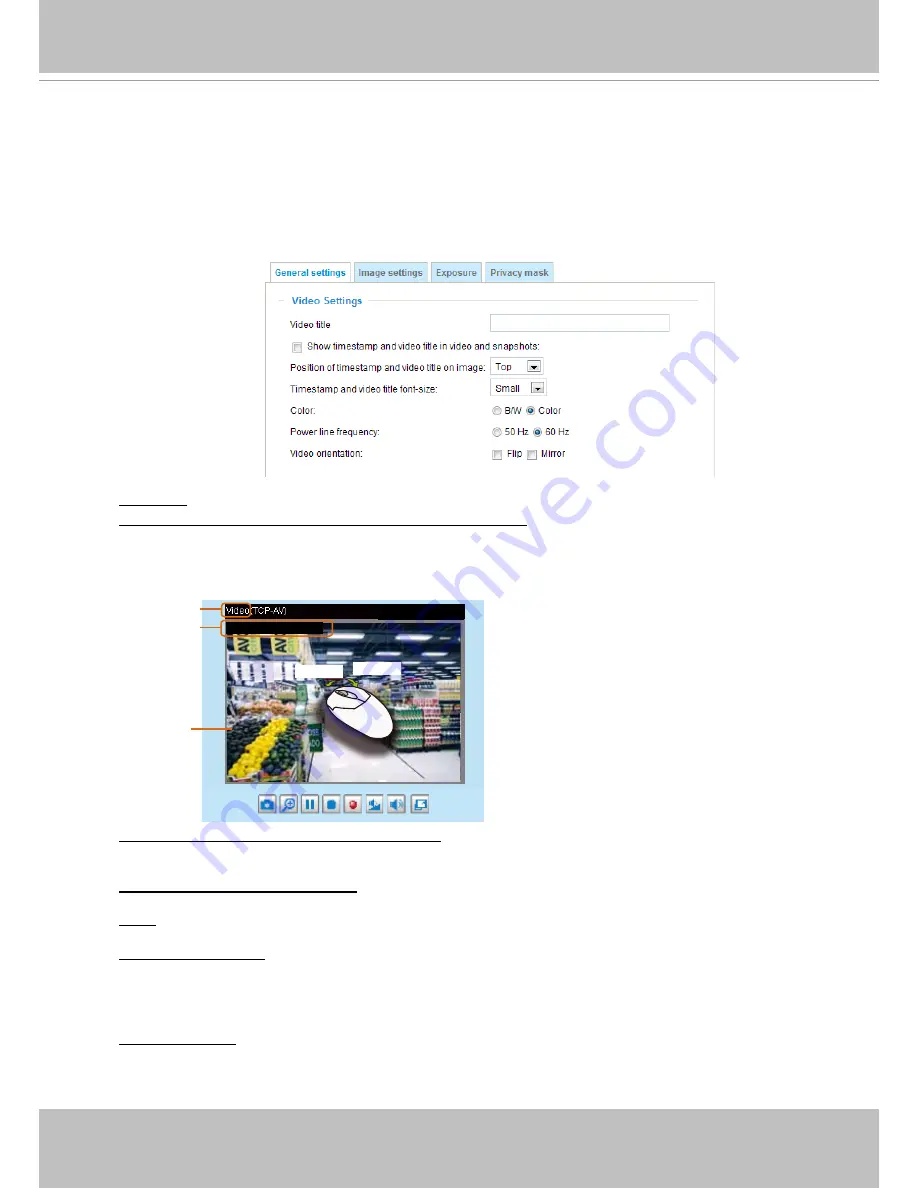
Video title
Show_timestamp_and video_title_in_video_and_snapshots
: Enter a name that will be displayed on
the title bar of the live video as the picture shown below. A zoom indicator will be displayed on the
Home page when you zoom in/out on the live viewing window as shown below. You may zoom in/
out on the image by scrolling the mouse wheel inside the live viewing window, and the maximum
zoom in will be up to 4 times.
Position of timestamp and video title on image
: Select to display time stamp and video title on the
top or at the bottom of the video stream.
Timestamp and video title font size
: Select the font size for the time stamp and title.
Color
: Select to display color or black/white video streams.
Power line frequency
: Set the power line frequency consistent with local utility settings to eliminate
image flickering associated with fluorescent lights. Note that after the power line frequency is
changed, you must disconnect and reconnect the power cord of the Network Camera in order for
the new setting to take effect.
Video orientation
: Flip - vertically reflect the display of the live video; Mirror - horizontally reflect the
display of the live video. Select both options if the Network Camera is installed upside-down (e.g.,
on the ceiling) to correct the image orientation. Please note that if you have preset locations, those
locations will be cleared after flip/mirror setting.
Video Title
Title and Time
Video 17:08:56 2014/7/09
2014/7/09 17:08:56
X2.1
Zoom Factor
Zoom In
Zoom Out


