


VIVOTEK
User's Manual - 67
Color: Select to display color or black/white video streams.
Power line frequency: Set the power line frequency consistent with local utility settings to eliminate
image flickering associated with fluorescent lights. Note that after the power line frequency is
changed, you must disconnect and reconnect the power cord of the Network Camera in order for
the new setting to take effect.
Video orientation
: Flip - vertically reflect the display of the live video; Mirror - horizontally reflect the
display of the live video. Select both options if the Network Camera is installed upside-down (e.g.,
on the ceiling) to correct the image orientation. Please note that if you have preset locations, those
locations will be cleared after flip/mirror setting.
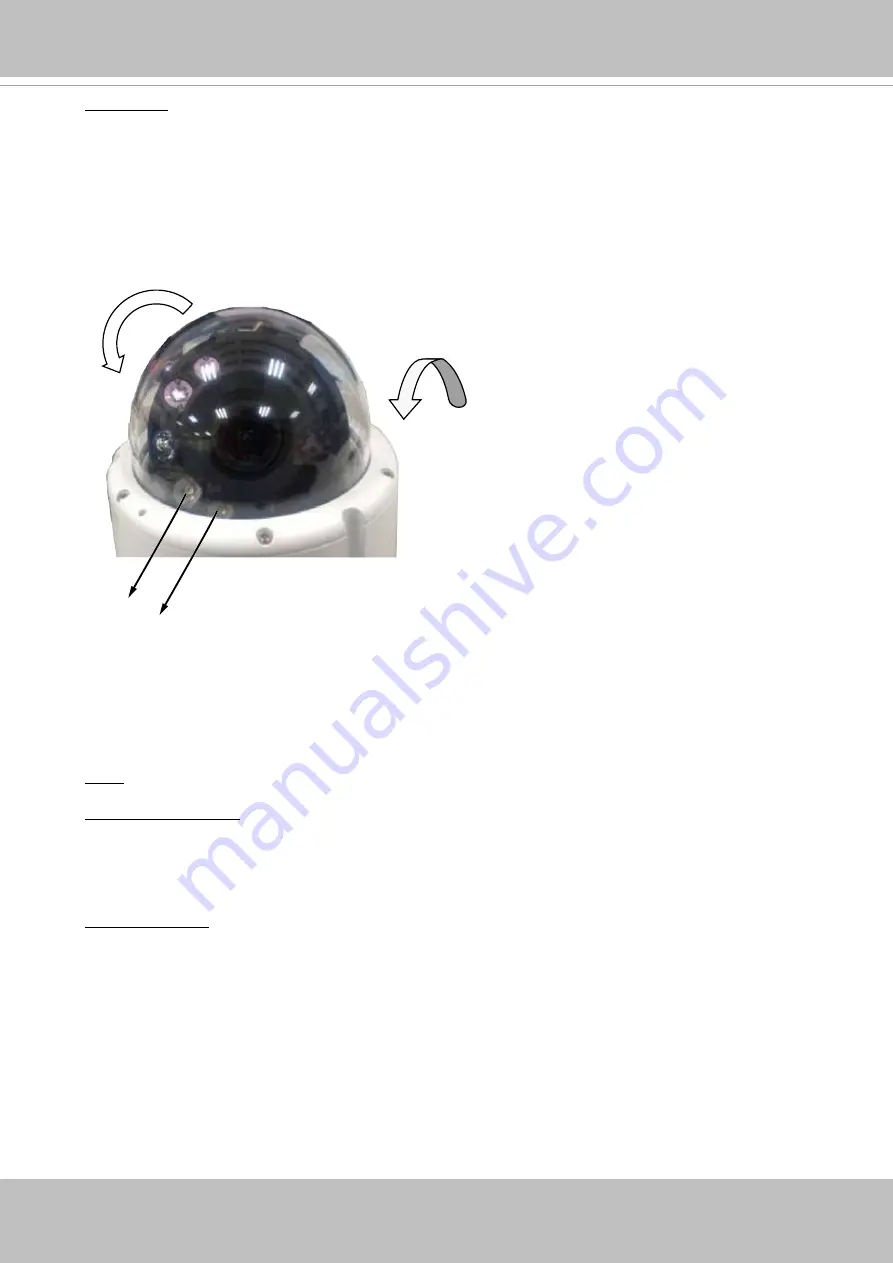
Tilt 60°
Rotate 90°
These 2 IRs turned off
Mount type: There are 3 Mount types - Ceiling, Wall, and Floor. Selecting the correct mount type
enables the camera image to display the correct video orientation.
Note that the camera supports automated IR control with the onboard G-sensor. The G-sensor
automatically detects the orientation of the lens module, and enable/ disable some of the IR lights.
As illustrated below, if you need to rotate the lens module, say, to 90 degrees, some IRs may be
blocked out by the dome cover. The automated mechanisms turn off two of the IR LEDs.
Note that the automated IR control supports the Ceiling and the Floor mount types. If you install the
camera on a wall-mount orientation, please select the Wall-mount type. Otherwise, the automated
IR control may consider the current orientation is incorrect, and automatically turn off the IR LEDs.
Summary of Contents for FD9165-HT
Page 97: ...VIVOTEK User s Manual 97...


