Vivitar ViviCam S829 User Manual Download Page 45


44 

VIDEO CAPTURE MODE QUICK FUNCTION BUTTONS 

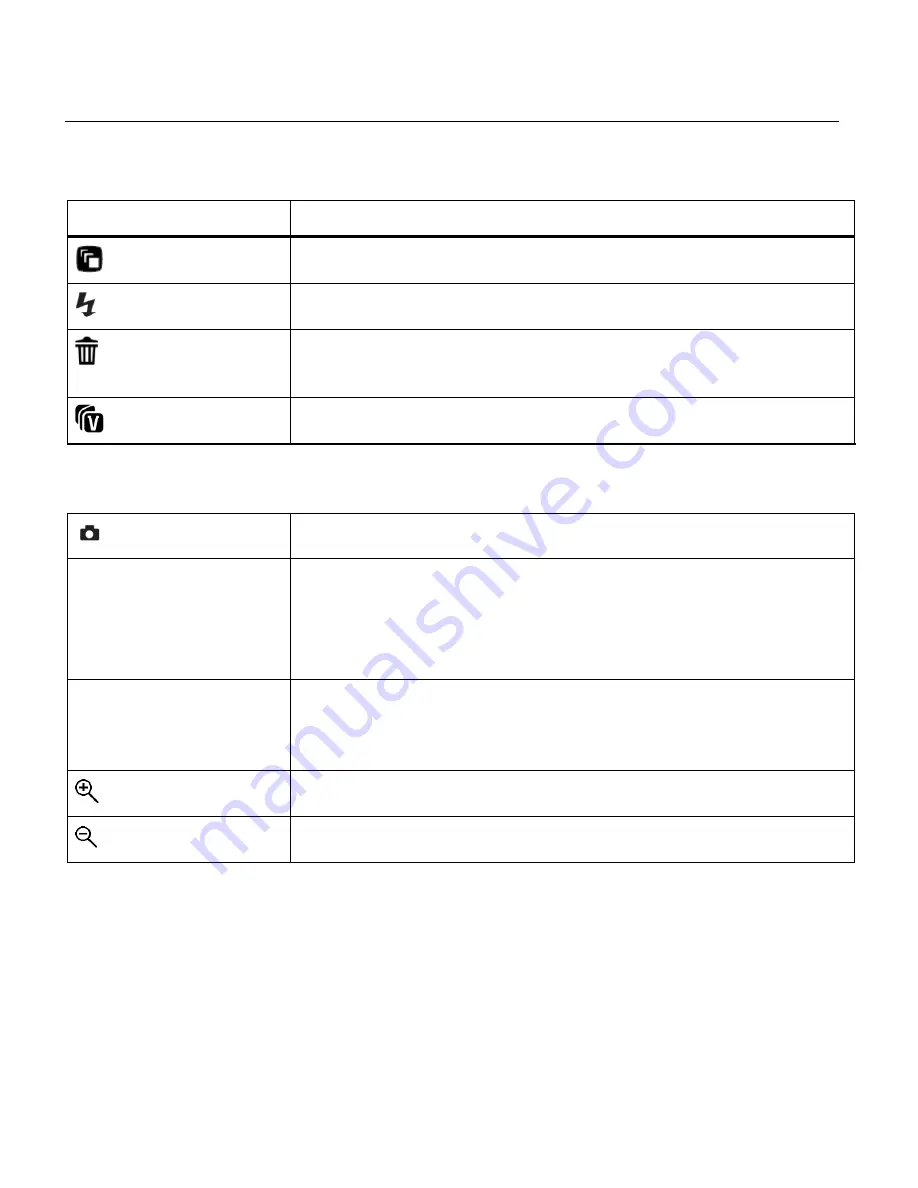
Your digital camera has a four-directional pad that functions as Quick Function buttons.   


Quick Function Button 

Function 


LEFT


SCENE SELECTION 

– Opens the ‘Scene’ menu. 


UP


LIGHT EXPOSURE 

– Opens the ‘Light Exposure’ menu. 


RIGHT


DELETE 

– Opens the ‘Delete This Video’ option and allows you to 

view and delete the last video taken. 


DOWN


VIVILINK 

– Opens the ‘ViviLink for Videos’ menu. 


Other 


  Shutter 

START/STOP 

– Starts and stops the video capture. 

SET 

  MENU - Opens the menu options for Video Capture Mode. 

  SAVE SELECTION - Saves your selected menu option. 

To navigate through the Menus, use the 

UP/DOWN/LEFT/RIGHT


direction control buttons. 

MODE 

  MODE SELECTION - Toggles between the Photo Capture Mode, 

Video Capture Mode and Playback Mode. 

  Exits the menu screen. 


Zooms In 


Zooms Out 


Summary of Contents for ViviCam S829

Page 1: ...Camera User Manual 2009 2015 Sakar International Inc All rights reserved Windows and the Windows logo are registered trademarks of Microsoft Corporation All other trademarks are the property of their...

Page 2: ...the Menus 14 Camera Features ViviLink Flash Macro Display 15 Photo Capture Mode 19 Photo Playback Mode 35 Video Capture Mode 43 Video Playback Mode 57 Installing the Software 63 Connecting the Camera...

Page 3: ...mera is a plug and play device You can download the pictures and videos captured by your camera without the software by directly accessing the camera s memory card from your computer It is recommended...

Page 4: ...ge Flash Indicator 15 USB Slot 5 Zoom Out Button 16 Tripod Mount 6 Zoom In Button 17 Optical Lens 7 Up Flash Slide Show Button 18 Battery Micro SD Memory Card Slot 8 Right Delete Button 19 Wrist Strap...

Page 5: ...ed USB cable to the camera and the other end to the computer s USB port or to the AC Charger which is then connected to a standard wall socket 4 Allow the battery to charge for at least 3 hours before...

Page 6: ...able to your camera Then follow one of the steps below A Charge the battery using the USB connection cable included and your computer Connect one end of the USB cable into the USB port on your camera...

Page 7: ...power Medium battery power Low battery power MICRO SD CARD Make sure a Micro SD card has been properly inserted into your camera Micro SD card not included To properly insert the Memory Card Push the...

Page 8: ...e UP and DOWN direction control buttons 2 Then press the SET button to confirm the selection 3 Once a language has been selected you will be asked if you would like to continue with the initial camera...

Page 9: ...and videos taken with your camera The ViviLink technology allows you to quickly and easily upload your camera s photos and videos to the social networks of your choice with the accompanying software a...

Page 10: ...DE button once to open the Video Capture mode To take a video aim your camera as desired and press the Shutter button to start the record A red record indicator will appear on the LCD screen while rec...

Page 11: ...om Exposure 3 0EV 3 0EV White Balance Auto Daylight Cloudy Fluorescent Incandescent ISO Auto 100 200 400 Scene Auto Scenery Portrait Night Scenery Night Portrait High Sensitivity Beach Flash No Flash...

Page 12: ...available hard disk space 16 bit Color monitor 1024 X 768 recommended screen resolution CD ROM Drive QuickTime 6 or higher MICROSOFT Internet Explorer 7 or higher Windows Media Player 10 or higher Dir...

Page 13: ...d the LED busy light turns on briefly The LCD screen turns on with your camera in Photo Capture Mode to start POWERING THE CAMERA OFF While the camera is on you can press the Power button again at any...

Page 14: ...ON the Photo Capture Mode will be active The icons that appear on the LCD screen are the best default settings so that you can begin to capture and enjoy clear quality photos and videos To change the...

Page 15: ...d by the camera a selection icon appears to the right of the selected menu option Changes made to these options remain until you decide to change them again at a later time Some menu options are singl...

Page 16: ...pen the ViviLink options Select a ViviLink option and press SET to save your selection and return to Photo Video Capture Mode Your selected ViviLink destination appears as an icon on the LCD screen an...

Page 17: ...activate Flash Note A Turn On Flash message appears when the camera detects a need for flash When this message appears it is recommended to press the Flash Up button and select one of the flash optio...

Page 18: ...ons and then press SET to confirm The flower icon appears on the LCD and indicates that the Macro mode is ON When enabled the MACRO mode allows your camera to focus on an object that is close to the c...

Page 19: ...of your camera Flash DISPLAY HIDE SHOW THE LCD ICONS The display of the icons on the LCD screen can be hidden or visible as desired 1 Hold the MODE button for 2 seconds to hide the display of the ico...

Page 20: ...FF or close up photo capture using MACRO ON 2 Zoom Options Press the T Zoom In button to zoom into the scene you would like to capture Press the W Zoom Out button to zoom out of the scene you would li...

Page 21: ...ion RIGHT DELETE Opens the Delete This Photo option and allows you to view and delete the last photo taken DOWN VIVILINK Opens the ViviLink for Photos menu Other Shutter Captures the photo SET MENU Op...

Page 22: ...nus that appear in your camera s Photo Capture Mode The selection icon appears by the default settings Once you change a setting the setting is saved by your camera until you manually change the setti...

Page 23: ...the highlighted menu option A selected option icon appears on the selected item 5 To continue within the menus and select a different menu option Press the LEFT or RIGHT button to select the next menu...

Page 24: ...pecific option 4 Press the SET button to confirm and select the highlighted menu option A selected option icon appears on the selected item 5 To continue within the menus and select a different menu o...

Page 25: ...ing the image 1 Press the SET button to open the menus for the current mode 2 Press the LEFT or RIGHT button to scroll and select the Anti Shake menu 3 Press the UP or DOWN button to highlight a speci...

Page 26: ...thin the menus and select a different menu option Press the LEFT or RIGHT button to select the next menu item 6 To exit the menu view Press the MODE button to exit the menu and return to your previous...

Page 27: ...e highlighted menu option A selected option icon appears on the selected item 5 To continue within the menus and select a different menu option Press the LEFT or RIGHT button to select the next menu i...

Page 28: ...button to highlight a specific option 4 Press the SET button to confirm and select the highlighted menu option A selected option icon appears on the selected item 5 To continue within the menus and s...

Page 29: ...nvironment When the ISO level is increased the image sensor in your camera will be more sensitive to light and allow you to capture images in lower light situations The higher sensitivity to light how...

Page 30: ...en the menus for the current mode 2 Press the LEFT or RIGHT button to scroll and select the Metering menu 3 Press the UP or DOWN button to highlight a specific option 4 Press the SET button to confirm...

Page 31: ...p will not appear on photos taken To Enable Disable the Timestamp 1 Press the SET button to open the menus for the current mode 2 Press the LEFT or RIGHT button to scroll and select the Date Time menu...

Page 32: ...ss the SET button to open the menus for the current mode 2 Press the LEFT or RIGHT button to scroll and select the Silent Mode menu 3 Press the UP or DOWN button to highlight a specific option 4 Press...

Page 33: ...y of the electrical current in fluorescent lighting sources in your locale If your camera is set to a frequency that does not match your country s electric current you may see waves on the images take...

Page 34: ...d menu 3 Press the UP or DOWN button to highlight a specific option CANCEL To exit without formatting the SD Memory Card select Cancel and press the SET button FORMAT To proceed with the format select...

Page 35: ...then automatically exit the menu and return to the previous mode with the digital camera settings set to the Factory Default Settings Note After RESETTING to the default settings it is recommended to...

Page 36: ...uld like to view Press the LEFT button to display the previous image Press the RIGHT button to display the next image Each captured image video and photo is displayed on the LCD screen Photos appear w...

Page 37: ...4 Once the selected photo is full size you can Zoom In and Zoom Out of the photo PHOTO PLAYBACK MODE QUICK FUNCTION BUTTONS Your digital camera has a four directional pad that functions as Quick Func...

Page 38: ...nu screen T ZOOM Zooms In to selected photo W ZOOM Zooms Out of selected photo THUMBNAIL Opens Thumbnail View To navigate in the Thumbnail View press the UP DOWN LEFT RIGHT direction buttons To select...

Page 39: ...he current image select No and press the SET button The photo will not be deleted and you will exit the menu and return to the Playback mode To delete all the images videos and photos you have saved o...

Page 40: ...nu view Press the MODE button to exit the menu and return to your previous mode Note An icon appears on the image with the selected ViviLink destination site when you return to the Playback display Re...

Page 41: ...ze Use the directional buttons to move the Crop box up down right or left 7 When you are ready to crop press the Shutter button 8 When you see the cropped picture appear press the Shutter button again...

Page 42: ...exit the menu and return to your previous mode Note Any image that is locked displays a lock symbol on the LCD screen when viewing that image in the Playback Mode Photos that are not locked do not di...

Page 43: ...for the current mode 2 Press the LEFT or RIGHT button to scroll and select the Slide Show menu 3 Press the UP or DOWN button to highlight a specific option 4 Press the SET button to confirm and selec...

Page 44: ...oom into the scene you would like to capture Press the W Zoom Out button to zoom out of the scene you would like to capture As you press the Zoom buttons a bar indicator moves up and down the rectangu...

Page 45: ...ption and allows you to view and delete the last video taken DOWN VIVILINK Opens the ViviLink for Videos menu Other Shutter START STOP Starts and stops the video capture SET MENU Opens the menu option...

Page 46: ...nus that appear in your camera s Video Capture Mode The selection icon appears by the default settings Once you change a setting the setting is saved by your camera until you manually change the setti...

Page 47: ...o select the next menu item 6 To exit the menu view Press the MODE button to exit the menu and return to your previous mode An icon reflecting your selection is displayed on the LCD screen IMAGE RESOL...

Page 48: ...the SET button to confirm and select the highlighted menu option A selected option icon appears on the selected item 5 To continue within the menus and select a different menu option Press the LEFT or...

Page 49: ...ss the MODE button to exit the menu and return to your previous mode An icon reflecting your selection is displayed on the LCD screen WHITE BALANCE MENU The White Balance feature allows your camera to...

Page 50: ...a different menu option Press the LEFT or RIGHT button to select the next menu item 6 To exit the menu view Press the MODE button to exit the menu and return to your previous mode IMAGE SHARPNESS MEN...

Page 51: ...or RIGHT button to scroll and select the Light Exposure menu 3 Press the UP or DOWN button to highlight a specific option 4 Press the SET button to confirm and select the highlighted menu option A sel...

Page 52: ...ge Depending on your selection the camera will be more sensitive to focusing on particular areas in the display and adjust the image color and lighting accordingly Center Averages the light metered fr...

Page 53: ...option 4 Press the SET button to confirm and select the highlighted menu option A selected option icon appears on the selected item 5 To continue within the menus and select a different menu option Pr...

Page 54: ...d select the Date Time menu 3 Press the UP or DOWN button to highlight the Date Setup menu option then press the SET button to select the option 4 The Date Setup submenu will open 5 Scroll through the...

Page 55: ...y of the electrical current in fluorescent lighting sources in your locale If your camera is set to a frequency that does not match your country s electric current you may see waves on the images take...

Page 56: ...d menu 3 Press the UP or DOWN button to highlight a specific option CANCEL To exit without formatting the SD Memory Card select Cancel and press the SET button FORMAT To proceed with the format select...

Page 57: ...then automatically exit the menu and return to the previous mode with the digital camera settings set to the Factory Default Settings Note After RESETTING to the default settings it is recommended to...

Page 58: ...l you find the video you would like to view Press the LEFT button to display the previous image Press the RIGHT button to display the next image Each captured image video and photo is displayed on the...

Page 59: ...view 3 Press the SET button to enlarge the selected image full size 4 Once the selected video is full size you can play and view the video Note The camera does not have a speaker In order to view you...

Page 60: ...nail View press the UP DOWN LEFT RIGHT direction buttons To select an image in the Thumbnail View press the SET button VIDEO PLAYBACK MODE MENUS The following are the menus that appear in your camera...

Page 61: ...Remember All images will be deleted except images that are Protected Locked To delete a locked image first unlock the image then select delete If you do not want to delete all of your videos and phot...

Page 62: ...h your camera can be protected or locked to prevent any deletion or alteration being made to the files 1 View the video you would like to protect lock 2 Press the SET button to open the menus for the...

Page 63: ...ppear in Playback Mode without the lock icon 5 Press the MODE button at any time to exit the menu and return to your previous mode Note Any image that is locked displays a lock symbol on the LCD scree...

Page 64: ...Experience Image Manager Installer window appears If the window does not appear open the application s CD DVD drive and click on Setup exe to launch the installer MACINTOSH Click the icon that appears...

Page 65: ...he Vivitar Experience Image Manager installer create the folder to where the program will be installed and then click Install 10 Please wait while the application continues the installation process on...

Page 66: ...it will be selected automatically 5 Select a location on the computer where to place the new photo and video files 6 Add the new photo and video files to albums if desired 7 Select to remove the medi...

Page 67: ...ation s Home screen Transferring Images from the Camera to the Computer Manually TRANSFERRING PHOTOS AND VIDEOS WINDOWS OS 1 Use the supplied USB cable to connect your camera to your computer 2 MSDC a...

Page 68: ...ckaging for compatibility with the iPad APPLE IPAD CAMERA CONNECTION For models that are compatible with the iPad photos and videos can be imported from your digital camera to your iPad by following e...

Page 69: ...resulting from defects in material or workmanship and damages or malfunctions from other than normal use including but limited to repair by unauthorized parties tampering modification or accident Wha...

Page 70: ...sample photos and then try downloading them again With test photos if the camera s power is off before you upload them to the computer the photos are not stored in the camera s memory These photos sho...

Reviews: