


Copyright © 2004, Vivato, Inc.
Vivato Wi-Fi AP/Bridge User Guide
37
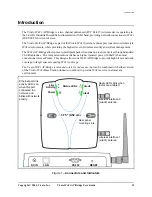
Configuration Connections
Initial Configuration Using the Built-In Web Pages
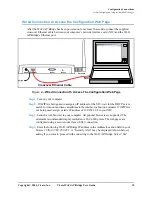
Enabling Your Computer’s Network Adapter to Access the Wi-Fi
AP/Bridge
The default IP address of the Wi-Fi AP/Bridge is 169.254.20.1, with a netmask of 255.255.0.0. Your
computer’s network interface must be assigned an IP address within the range of 169.254.0.1 to
169.254.255.254 (such as 169.254.20.2) to initially access the configuration web pages or to access
the command line interface using a secure shell.
You can set your interface’s IP address manually by accessing the TCP/IP settings for the interface,
disabling DHCP operation, and specifying an IP address in this range. You can also use automatic
private IP addressing (APIPA) to set the network interface’s IP address within the necessary range.
APIPA assigns an IP address to a network interface if dynamic host configuration protocol (DHCP)
is enabled for the interface but a DHCP server is not found within about one minute after the
computer is powered on. Microsoft® Windows® 2000, XP, and 98SE support this feature.
For more information on APIPA, go to the following link:
http://msdn.microsoft.com/library/default.asp?url=/library/en-us/dniph/html/pnpip.asp
After you have accessed the configuration pages or command line interface, you can change the IP
address of the Wi-Fi AP/Bridge to operate in your network.
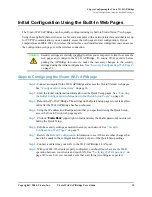
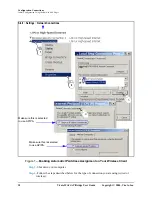
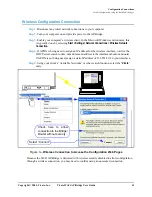
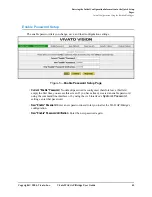
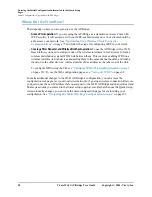
Using APIPA to Assign a Usable IP Address For Your Client
To get APIPA to assign an IP address to your interface that is accessible by the Wi-Fi AP/Bridge,
use the following steps and refer to
Figure 1—Enabling Automatic IP Address Assignment
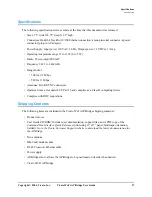
Step 1.
Verify that DHCP is enabled for the interface (see below). In Windows, go to
Start
>
Settings
>
Network
Connections
, and right-click on the interface connection to configure.
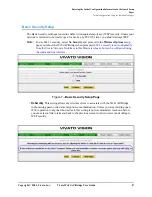
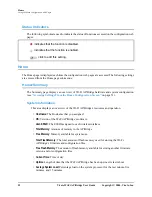
Step 2.
Left-click on
Properties
.
Step 3.
Select
Internet Protocol (TCP/IP)
and left-click on
Properties
. Make sure
Obtain IP Address
Automatically
is checked.
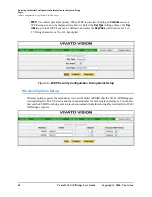
Step 4.
Select the
Alternate Configuration
tab, and verify that
Automatic private IP address
is
checked.
Important
To ensure a quick connection to the Wi-Fi AP/Bridge for the initial configuration, disconnect
your computer from any networks. This prevents a DHCP server on your network from
interfering with the process of assigning the appropriate IP address to the network interface
being used for the configuration connection.


