VT-NV Series – On Cue IP
66
7.1.1 CONNECT TO WEB SERVER
Enter the IP address of NVR into the ULR bar referring to the below picture.
LOCAL NETWORK ACCESS:
To find the IP address of the DVR, go to the ‘INFO’
section under the SYSTEM/MANAGEMENT of the DVR’s menu. If you are on the
same network as the DVR, you can use the DVR’s IP address to access it.
REMOTE NETWORK ACCESS
: NOTE) to access the DVR from a remote
network, you need to use the WAN IP address of the network the DVR is
connected to. (Sometimes this address is referred to as the LIVE, PUBLIC, or
OUTSIDE IP). In order to view your DVR remotely you MUST port forward BOTH
the DVR PORT and the WEB SERVER PORT. To find the DVR and Web Server
ports, go to the
NETWORK SETUP
page.
If you need assistance with port forwarding, please visit our website and review our
tutorial videos:
http://vitekcctv.com/videotutorials.asp
. If you need further assistance,
please reference your router’s manual or contact your Network Administrator/IT
Professional. If your router supports the ‘uPNP’ feature, there is no need to
manually configure ‘Port Forwarding’ because the DVR supports the ‘Auto Port
Forwarding’ function using the ‘uPNP’ protocol.
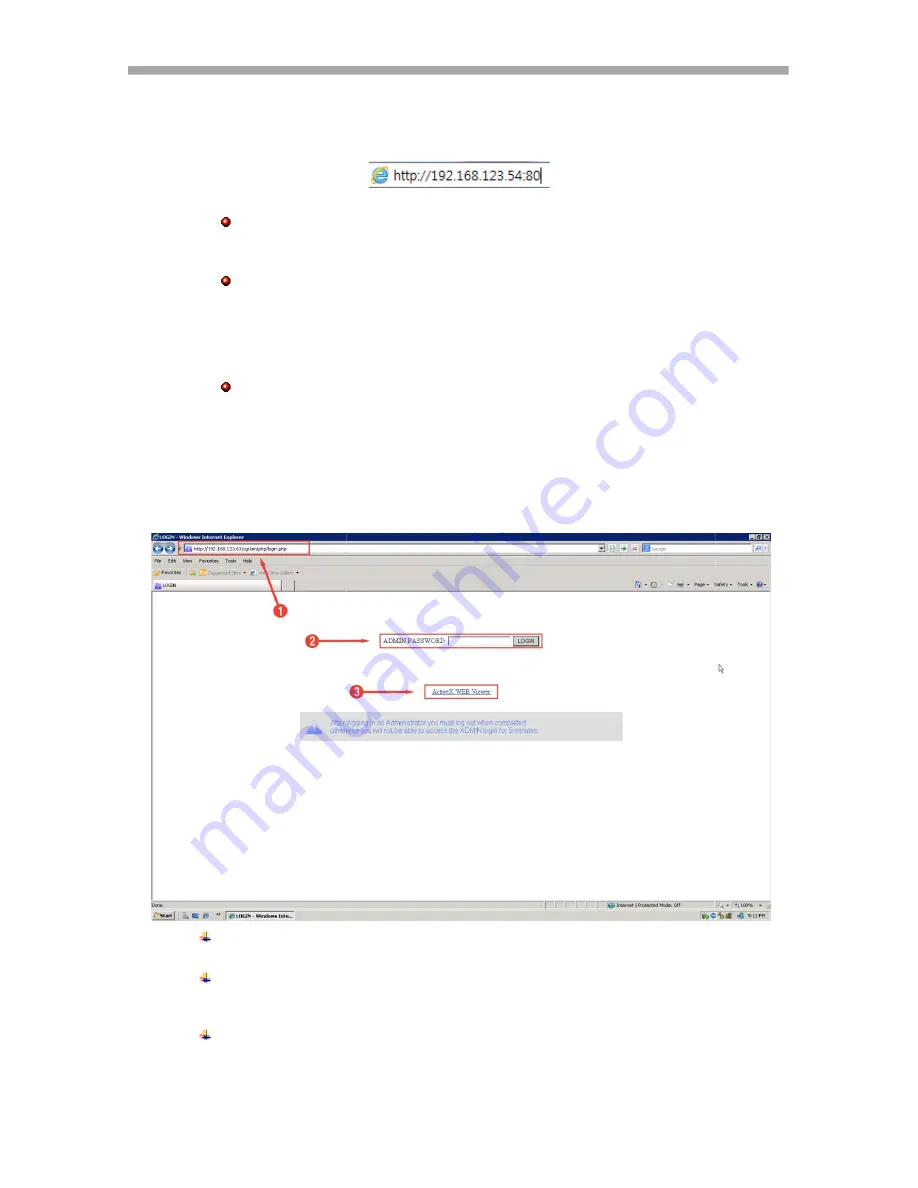
[The initial screen of Web Server]
1: Enter the IP address of your NVR. If you don’t use the default port number of HTTP,
80, you may add the port number following the IP address. Ex. http://192.168.123.63:80
2: Input the administrator’s password in ‘ADMIN PASSWORD’. Only administrator can
log in to the NVR configuration. Clicking the ‘LOGIN’ button will guide you to the NVR
configuration pages.
3: ActiveX based Web Viewer: Clicking the link will execute the ‘Web Viewer’ or initiate
the installation of ActiveX plug-in.
Summary of Contents for VT-NV1600P
Page 31: ...VT NV Series On Cue IP 30 ...
Page 55: ...VT NV Series On Cue IP 54 Power OFF Right to Power Off ...
Page 61: ...VT NV Series On Cue IP 60 ...
Page 95: ......
Page 96: ......
Page 97: ......


