


NOTES:
1. The indications of "MP3" and "CD" are mutually exclusive, that is, when the player is
playing MP3 disc, the indication will be "MP3" instead of "CD", and when the player is play"
ing CD disc, the indication will be "CD" instead of "MP3".
2. The indications of "AM", "FM" and "FM ST" are mutually exclusive, that is, when the
Radio Band Button is pressed to choose AM bandwave, the indication will be "AM"; when
the Radio Band Button is pressed to choose FM bandwave, the indication will be "FM", and
when a stereo radio station is being tuned to, the indication will be "FM ST".
3. The indications of "KHz" and "MHz" are mutually exclusive, that is, when AM bandwave
is chosen, the indication will be "KHz" to match "AM"; when FM bandwave is chosen, the
indication will be "MHz" to match "FM" or "FM ST".
4. The indications of "REPT 1", "REPT DIR" and "REPT ALL" are exclusive, that is, when
MP3 is being played, they are to indicate the three different REPEAT modes; and when CD
is being played, the indications of "REPT 1" and "REPT ALL" are to indicate the two differ"
ent REPEAT modes.
5. The indications of "PROG", "SHUFF" and "INTRO" are exclusive, they are to indicate the
three different Play modes " Programmed play, Random play and Introscan play respec"
tively.
POWER SOURCES (1)
AC OPERATION
Plug one end of the AC adaptor into the DC input jack (25), then plug the other end into AC
wall outlet.
PRECAUTIONS ON USING THE AC ADAPTOR
•
Do not touch the AC adaptor with wet hands. Doing so is dangerous, as this could result
in an electrical shock.
•
If the AC adaptor is connected when the batteries are installed, the power supply auto"
matically switches to the AC power source and the batteries are disconnected.
ALKALINE BATTERY INSTALLATION
Insert two AA batteries into the battery compartment on the CD insertion area of the unit.
Be sure to observe the proper polarity (the "+" and """ signs) as indicated inside the bat"
tery compartment.
NOTE ON ALKALINE BATTERIES
•
When replacing the alkaline batteries, use two new batteries of the same type. Do not
mix a used battery with a new one or mix different types of batteries.
•
When inserting the batteries, mistakenly inserting even one with improper polarity will
cause leakage.
•
Never charge, heat, disassemble, or throw batteries into a fire.
REMEMBER
•
If the symbol " " flashes in the display, your batteries are weak, replace them or use
the AC Adaptor.
•
If the Display is blank " no numbers show when Play/Pause button (17) is pressed, the
ENGLISH
5
ЗАПРОГРАММИРОВАННОЕ ВОСПРОИЗВЕДЕНИЕ (список может включать до 64 дорожек)
Примечание: Выполнение данной функции возможно только при выключенном режиме
воспроизведения "СТОП".
1. Нажмите кнопку режима программирования/эквалайзера PROG/EQ.
2. Выберите желаемый каталог, используя кнопки ПЕРЕХОДА/ПОИСКА (SKIP/SEARCH ) (4 или 3).
3. Повторно нажмите на кнопку программирования режима/эквалайзера (PROG/EQ) (12).
4. Используйте кнопки ПЕРЕХОДА/ПОИСКА (SKIP/SEARCH) (4 или 3) для выбора желаемых
дорожек, а также кнопку программирования режима/эквалайзера (PROG/EQ) (12) для
подтверждения выбора.
5. Осуществите программирование дополнительных дорожек, повторяя вышеуказанные шаги.
6. Чтобы включить режим воспроизведения запрограммированных дорожек, нажмите на кнопку
ВОСПРОИЗВЕДЕНИЕ/ПАУЗА (PLAY/PAUSE) (17).
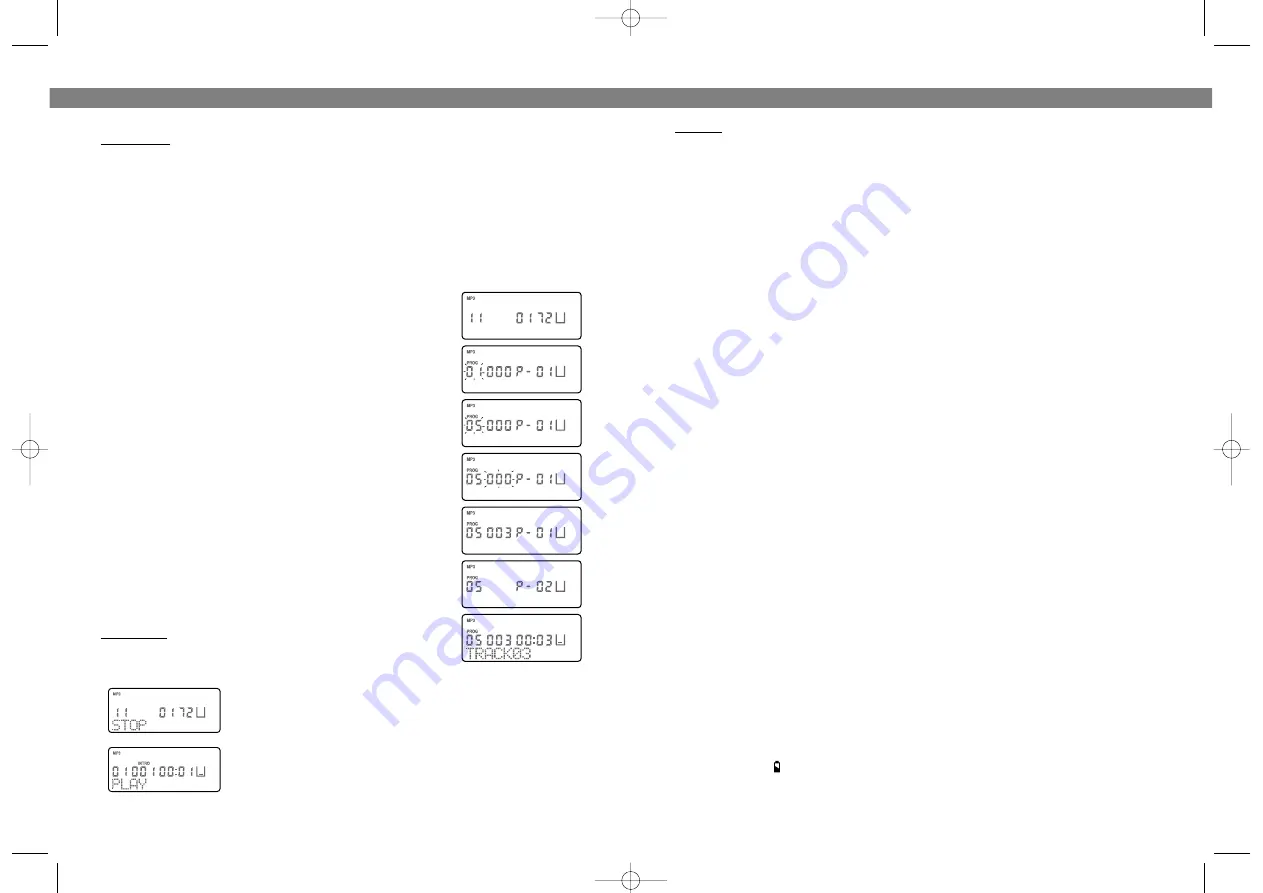
В качестве примера рассмотрим выбор и воспроизведение
дорожки 5 каталога 9:
1. Если функция воспроизведения выключена, на дисплее
выведено: "
1
11
1
M
MP
P3
3
0
01
1 7
72
2
".
2. Нажмите на кнопку программирования режима/эквалайзера
(PROG/EQ) (12), на дисплее будут выведены следующие
символы: "
0
01
1
" и "
P
P
0
01
1
".
3. Выберите каталог 5, используя кнопки ПЕРЕХОДА/ПОИСКА
(SKIP/SEARCH) (4 или 3). На дисплей будет выведен символ "
0
05
5
".
4. Нажмите на кнопку программирования режима/эквалайзера
(PROG/EQ) (12), на дисплее будет выведен номер дорожки и
мигающий символ "
0
00
00
0
".
5. Выберите дорожку 3, используя кнопки ПЕРЕХОДА/ПОИСКА
(SKIP/SEARCH) (4 или 3). На дисплее будет выведен символ
"
0
00
03
3
".
6.
Повторно
нажмите
на
кнопку
программирования
режима/эквалайзера PROG/EQ (12), на дисплее появится символ
"
P
P
0
02
2
",
предназначенный
для
следующей
дорожки,
программируемой по Вашему выбору.
7. Осуществляйте программирование дорожек, повторяя шаги с
3 по 6, вплоть до окончания программы.
8.
Чтобы
включить
режим
воспроизведения
запрограммированных
дорожек,
после
окончания
программирования
нажмите
на
кнопку
ВОСПРОИЗВЕДЕНИЕ/ПАУЗА (PLAY/PAUSE) (17).
Примечание: Для отмены программы, нажмите на кнопку СТОП
(STOP) и удерживайте ее в нажатом положении до тех пор, пока
надпись "PROG" не исчезнет с экрана проигрывателя.
РЕЖИМ ОЗНАКОМЛЕНИЯ
При прослушивании компакт"диска, или в режиме "СТОП",
четыре раза нажмите на кнопку выбора режима MODE (13) " на
дисплее появится надпись "INTRO" (ОЗНАКОМЛЕНИЕ).
Чтобы включить режим ознакомления, нажмите кнопку
ВОСПРОИЗВЕДЕНИЕ/ПАУЗА (PLAY/PAUSE) (17).
РУССКИЙ
28
3775.qxd 05.05.04 8:57 Page 8


