HD IP Camera
August 2020
Visual Engineering
Video solutions. Integrated
visualengineering.co.uk
Page 23
STA Mode Menu
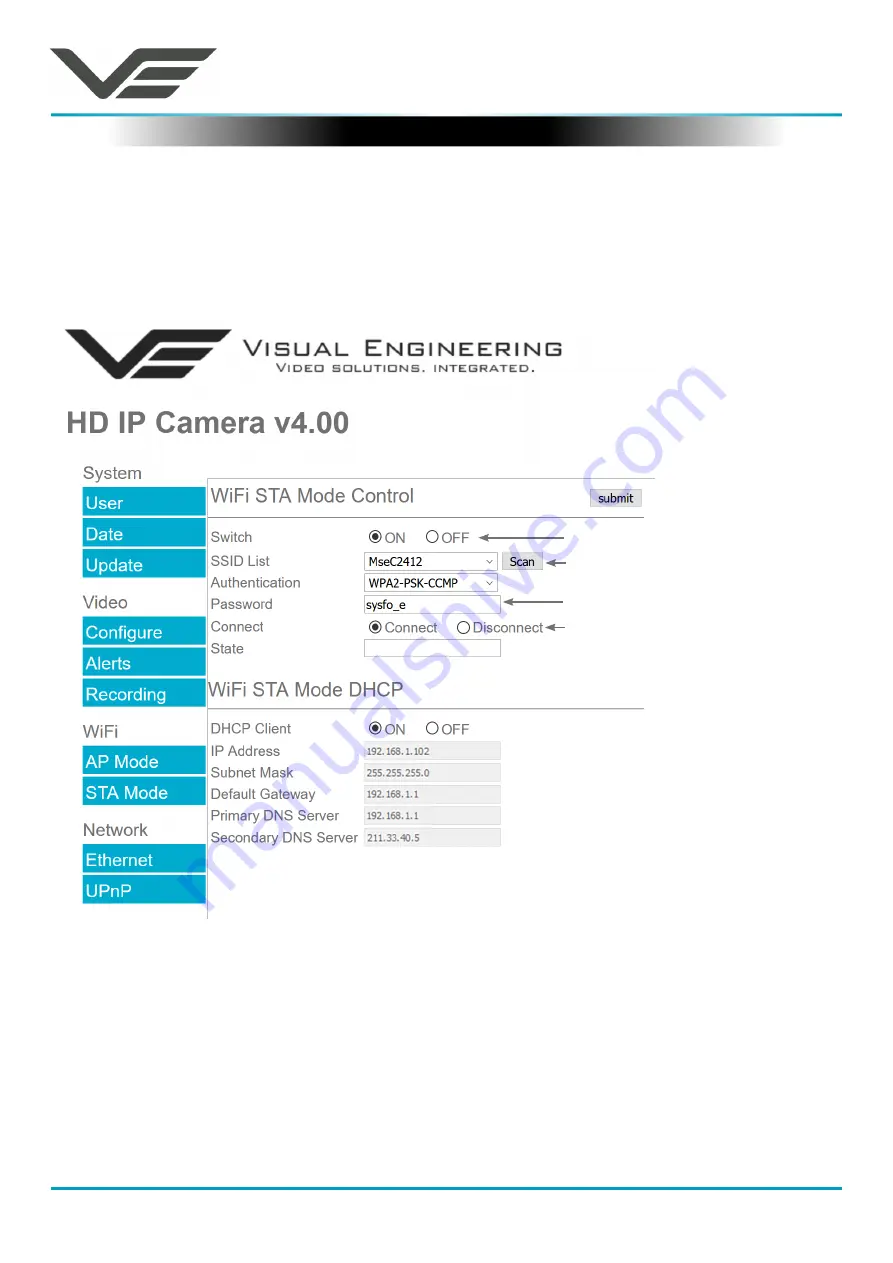
The STA Mode WiFi sub-menu allows the user to configure the WiFi adaptor in station mode. This
can be achieved by following the four steps as described on the right of the STA Mode web page
shown below. Following any changes made the user must press the
submit
button. The camera will
then save any changed parameters. Wait until the camera finishes re-configuring before trying to
move away from the current web page or powering off the camera.
Once the camera is connected in STA Mode the web page control and video stream will be
forwarded to the IP Address as shown in the DHCP Client section. For the example shown above
this would be 192.168.1.102
In most cases it is possible to view the video feed and control the camera on this STA Mode IP
Address and also on the camera’s IP Address as defined in the Ethernet Menu. In certain network
configurations it has been observed that the camera may not respond to its Ethernet IP Address
once STA Mode is connected. If this is found to be the case use the STA Mode IP Address
(192.168.1.102 in this case) to gain back control of the camera and view the video feed.
If the STA Mode is disconnected on a web page using the STA Mode IP Address it will be observed
that there is no web page confirmation of task and further control will be lost on that particular IP
Address.
1. Set the switch to ON
2. Click Scan & select the network
from the populated drop down list
3. Enter login details
If required, a static IP address
may be used by setting “Use
DHCP Client” to OFF.
4. Select Connect


