VistaQuest VQ3010 Quick Start Manual Download Page 6

- 5 -


Taking images 

a. Press the 

Power

 button on the camera for   

about 3 seconds to turn on the camera. 

b. Slide the function switch to          (capture status). 
c. Use TFT or viewfinder to compose the image 
    and hold the camera steady. 
d. Press 

Shutter

 button to take images. 


Reviewing images


a. Turn the 

power

 on. 

b. Slide the function switch to 

 (playback status).   

c. The captured images display on the TFT as thumbnails mode. 

Press the

 OK 

button to display the selected image in   

full screen size. 

d. Press the 

 (Flash)

 and 


(MODE)

 buttons to stroll   

through the files. 

e. Press the 


and


 buttons to zoom in or zoom out the files. Press the OK button 

twice to cancel the zoom. 

f. Slide the function switch to    (capture status). 


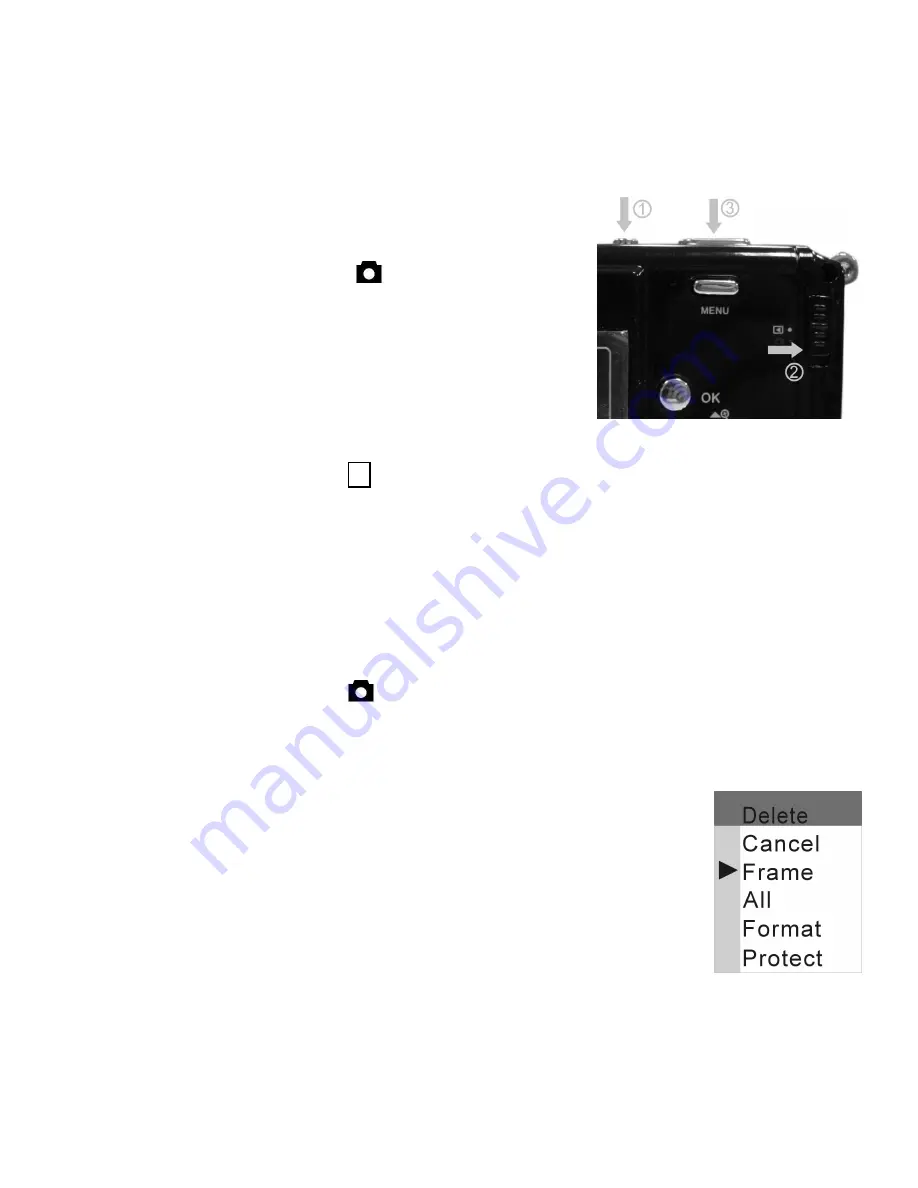
Erasing files from memory 

a. Turn the power on and slide the function switch to playback status. 
b. Press the 

 (Flash)

 and 


(MODE)

 buttons to select the file   

you want to delete. 

c. Press


the

 Menu

 button and you will see the toolbar as right. 

d. Press the 


and


buttons to select [Frame] and then press 

Ok 


button to confirm. 

e. Slide the function switch to (capture status).


Summary of Contents for VQ3010

Page 1: ...Quick Start Guide DIGITAL CAMERA VQ3010...

Page 2: ...ens Do not cover the lens while shooting 7 Focus Switch 8 Microphone 9 USB Port For connecting to a computer 10 Power Recharge Shooting lamp 11 Menu Button Menu option pops up after pressing the Menu...

Page 3: ...Up Button For zooming in and function as Up button Down Button For zooming out and function as Down button Left Flash Button For switching flash and function as left as button Mode Button For switchin...

Page 4: ...es 5 To show number of images you can capture 2 Focus Macro Mode Normal Mode 5 Resolution 2048x1536 default 3 Flash Mode 1600x1200 Flash Off 1280x1024 Force Flash 640x480 Auto Flash 6 Picture Quality...

Page 5: ...umber of present captured pictures 4 To show the number of present captured pictures 5 To show total number of captured pictures Power Saving The camera will automatically power off approximately 60 1...

Page 6: ...on to display the selected image in full screen size d Press the Flash and MODE buttons to stroll through the files e Press the and buttons to zoom in or zoom out the files Press the OK button twice t...

Page 7: ...follow these instructions to insert batteries into the camera a Slide open the battery cover b Insert two AAA size alkaline batteries with the positive and negative poles matching the directions indi...

Page 8: ...If the Memory Full warning message appears on the LCD monitor it means the SD card or internal memory is full Please remove the memory and insert a new one or move store all picture video in memory to...

Page 9: ...confirm the setting and return to shooting status Capture Cancel Exit the present menu Single Take one picture Self Timer Take the picture with self timer Video 320x240 Take the video about 0 07M pixe...

Page 10: ...luorescent lighting Sharpness Normal Sharp Soft Resolution Cancel Exit the present menu 2048x1536 Take pictures about 3 2M pixels 1600x1200 pixels Take pictures about 2 0M pixels 1280x1024 pixels Take...

Page 11: ...yes no and then press the OK button to confirm Date stamp on Print the date and time on the picture Date stamp off Do not print the date and time on the picture Language The camera offers two language...

Page 12: ...SD card is available otherwise erase pictures and videos on the internal memory Format Format memory If SD card is available format SD card otherwise format internal memory Protect image To lock image...

Page 13: ...uest Corporation is proud that you have chosen its product and hopes you will enjoy sharing a clearer vision of your memories and special moments captured with your new camera with friends and family...

Reviews: