


5
6
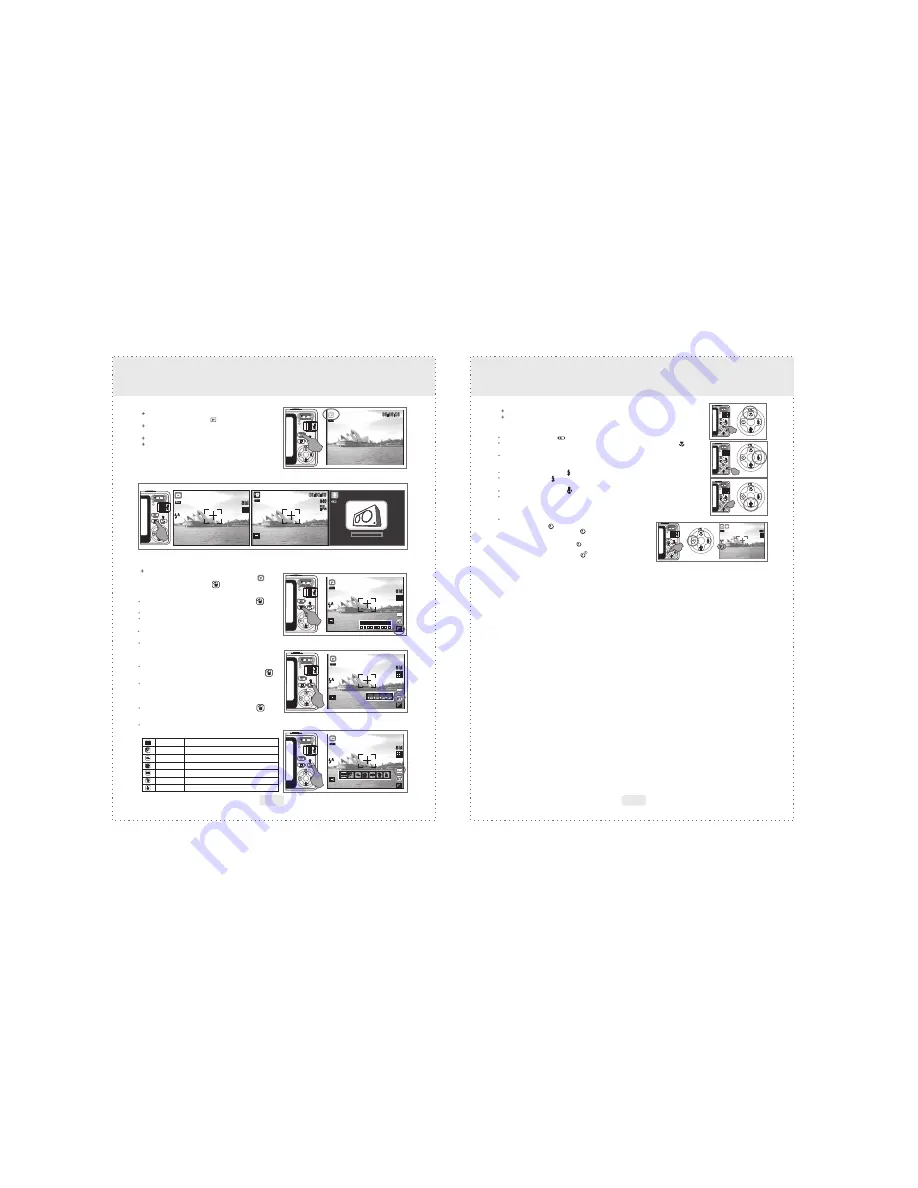
Select the Playback Mode by pressing the
Playback Mode Button ( ).
Playback Mode will show still images, movie clips
and voice clips.
Select an image by pressing Left or Right Button.
Press and hold the Left or Right Button to fast
forward the images
.4 Playback
.5 Mode
3
3
Buttons & Function
00:00:00
MENU
Press Menu/OK Button to go to the menu selection.
When the menu is displayed on the LCD monitor. The Menu/OK "Button is
used for shifting the cursor to the sub menu or for confirming data.
.7 Menu/OK
3
Buttons & Function
MENU
MENU
MENU
MENU
2S
MENU
Press the up Button ( ) to move up the submenu cursor.
When the menu is not displayed on the LCD monitor, the Up Button( )
operates as macro function .
The up Button also operates as Play & Pause function for play the voice &
movie clip file in Playback Mode.
Press the Right Button ( ) to move the cursor to the right tab.
The Right Button ( ) also operates as Flash function.
Press the Voice Button ( ) to move the cursor to the down tab.
There are two ways you can add your voice over to a stored still image.
1. Shooting Mode
2. Playback Mode
Press the Left Button to move the cursor to the left tab.
The Left Button ( ) also operates as Self-Timer function.
Image will be taken
after 10 seconds once the shutter is released.
The image will be
taken after 2 seconds once the shutter is released.
The first image will
be taken after an 10 seconds. The second image will
be taken after seconds continuously right after the first
shooting. The image will be taken twice once the shutter is released.
With the 10 sec. Self-timer
With the 2 sec. Self-timer
With the Double Self-timer
(
):
(
):
(
):
MENU
09:25:14
START:SHUTTER
MENU
30
FPS
8:08 AM
2009/01/05
00:00:00
640
MENU
MENU
8M
4
Still Image
Movie Clip
Voice Recording
8:08 AM
2009/01/05
8M
4
AUTO 100
200
400
MENU
In Shooting Mode and press Delete Button ( ) to
adjust the exposure.
Press Left/Right Button to set the Exposure Value.
The EV compensation value can be set in the range
from -2.0EV to +2.0EV (at 0.5EV increment).
After the preferred value is chosen press Menu/OK
Button to confirm the setting.
The higher the EV value, the brighter the image
will be.
To adjust the ISO value, you will need to
set at Program Mode and press Delete Button ( ).
Press Right/Left Button to set the ISO Value and
select the Menu/OK Button to confirm.
In Shooting Mode and press Delete Button ( ) to
adjust the White Balance feature.
Press Right/Left Button to set the WB Value and
select the Menu/OK Button to confirm.
Auto
Adjusting the white balance automatically
Daylight Under the strong light environment
Sunset Under the sunset light environment
Fluorescent Under the fluorescent light environment
Tungsten Under the tungsten light environment
Cloudy Under the cloudy light environment
Custom Under uncertain light environment
3.6 Delete & +/- (Exposure)
To adjust the white balance, ISO & EV you will need
to set the working mode at Program Mode( ) and
press the Delete Button ( ).
3.6.1 EV
3.6.2 ISO
3.6.3 WB ( White Balance)
MENU
MENU
-2
-1
0
+1
+2
8M
4
8M
4
8M
4
3.7.1 Up/Play & Pause/Macro
3.7.2 Right/Flash
5.7.3 Down/Voice Memo
3.7.4 Left/Self-Timer


