


SPEECH AND SOUND CONTROL
14
D-302542
3. Speech And Sound Control
Speech & Sound Cont. Pushbuttons
The sound and speech-related functions offered by
the PowerMax Pro are controlled using the built-in
keypad, as detailed in the following list.
Key Function
Increasing the loudness of spoken
messages
Decreasing the loudness of spoken
messages
Enabling / disabling the loudspeaker
Recording a spoken message for other
users of the alarm system
Listening to a recorded message left by
another user of the alarm system
Enabling / disabling the chime function in
chime zones
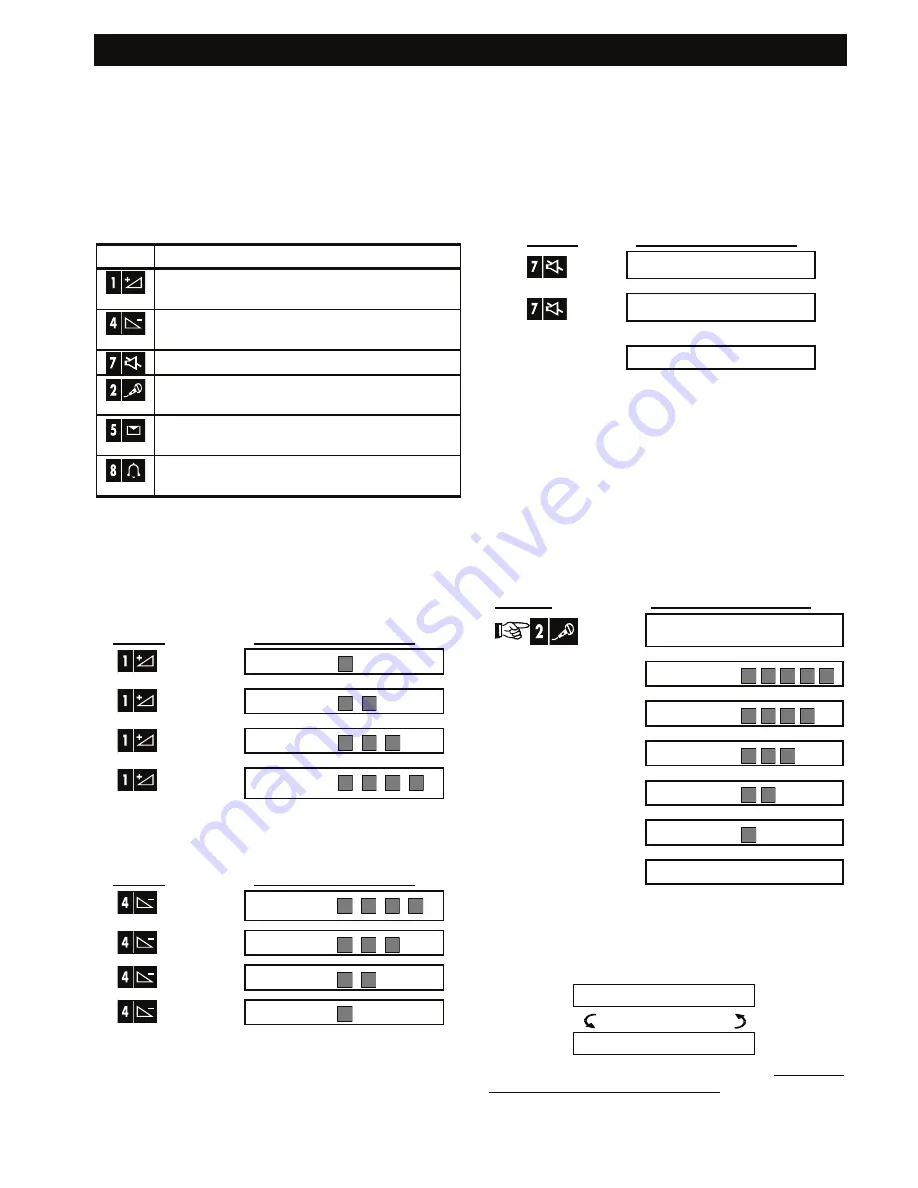
Adjusting the Speech Volume
The following diagram shows how to increase the
loudness by clicking the <
1
> key (assuming that the
volume was at minimum to begin with).
PRESS RESULTANT
DISPLAY
(max)
The following diagram shows how to decrease the
loudness with the
<4>
key (assuming that the volume
was at maximum to begin with).
PRESS RESULTANT
DISPLAY
(max)
VOLUME–
VOLUME–
VOLUME–
VOLUME–
Voice ON/OFF
You can switch spoken announcements on and off
by alternate clicking of the <
7
> key, as shown below.
PRESS RESULTANT
DISPLAY
VOICE ON
VOICE OFF
↓
READY HH:MM
Note:
The system will maintain the “Voice OFF” state
until subsequent selection of “Voice ON’.
Message Exchange
For message exchange you can record a verbal
message for other users of the alarm system. Face
the panel, press <
2
> and keep it pressed. When the
display reads
TALK NOW
, start talking
.
The 5 dark
boxes will slowly disappear one by one, from right to
left, as shown in the diagram below.
ACTION RESULTANT
DISPLAY
(constant)
RECORD A MESSAGE
Talk
↓
TALK NOW
Talk
↓
TALK NOW
Talk
↓
TALK NOW
Talk
↓
TALK NOW
Talk
↓
TALK NOW
Stop talking
RECORDING ENDED
Once the last of the boxes disappears,
RECORDING
ENDED
will be displayed.
When you release the button, the display will revert
to the normal status-displaying mode, but will also
indicate that a message is waiting. For example:
READY HH:MM
(alternating)
READY MSG
To check your own message, listen to it within one
minute from the end of recording (see Chapter 3 -
Message Playback). This way the
MSG
indication
will not be erased.


